Windows Update error 0x80240069 occurs when the update is deployed using enterprise tools such as Windows Server Update Services (WSUS) or System Center Configuration Manager (SCCM). In this article, we’ll explain what the Windows Update error 0x80240069 means and walk you through the steps you can take to fix it.

Fix Windows Update error 0x80240069
Windows Update error 0x80240069 has been occurring recently when installing KB5063878 using enterprise tools like WSUS or SCCM, but it works fine when using Windows Update or the Microsoft Update Catalog. This makes it clear that the issue is tied specifically to how the update is deployed in managed environments.
During installation, the Windows Update service (wuauserv) crashes, which leads to error messages in the Event Viewer. These include notices that the service stopped unexpectedly and logs showing problems with missing registry entries related to event tracing. Microsoft has acknowledged that the update contains a broken component in its servicing stack, which interferes with WSUS synchronization and causes these failures.
If you encounter the Windows Update error 0x80240069, follow the solutions mentioned below.
- Re-sync WSUS
- Make registry changes
- Install updates manually
- Reset Windows Update Components
Let us talk about them in detail.
1] Re-sync WSUS
First of all, let us use Microsoft’s solution. They have patched the backend Windows Update service to resolve the 0x80240069 error. To resolve it, we need to just remove and re-sync WSUS.
If you deployed the temporary workaround (KIR Group Policy), remove it before applying the fix. Basically, you need to delete the policy that you have created (if created) in GPEDIT. It would usually be Computer Configuration > Administrative Templates > Windows 11 24H2 and Windows Server 2025 KB5063878 250814_00551 Known Issue Rollback.
Once done, follow the steps mentioned below.
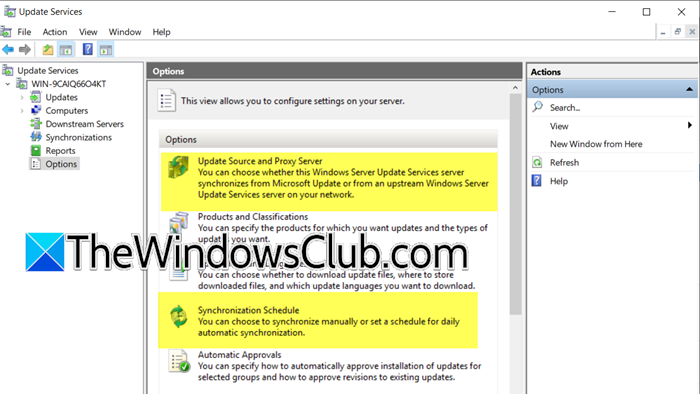
- Open the WSUS Console.
- Expand your server and click on Options.
- Click on Synchronization Schedule and select Synchronize manually or set a schedule that suits your environment. Click Ok.
- Now, go to Update Source and Proxy Server.
- Select Synchronize from Microsoft Update or Synchronize from an upstream server if you’re using an upstream WSUS server.
- Finally, save and exit the configuration.
Hopefully, this will do the job for you.
2] Make registry changes
In this solution, we are going to make some registry changes to force Windows to use a stable version of the update servicing stack and bypass the crashing component in KB5063878. However, before making any changes, create a registry backup.
Now, open the Registry Editor and go to the following location.
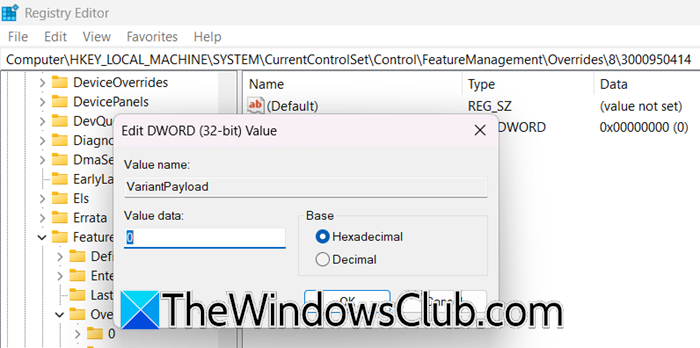
Computer\HKEY_LOCAL_MACHINE\SYSTEM\CurrentControlSet\Control\FeatureManagement\Overrides
Look for a folder under Overrides called 8. If ‘8’ is not there, right-click on Overrides, select New > Key, and name it 8. Under 8, you need to create or go to the 3000950414 folder.
Now, you need to create the following values and assign them to the mentioned values – right-click on the 3000950414, select New > DWORD (32-bit) Value, and give it the name.
- EnabledState -> 1
- EnabledStateOptions -> 0
- Variant -> 0
- VariantPayload -> 0
Finally, reboot your computer and check if the issue is resolved.
Alternatively, you can run the following PowerShell script (with admin privileges).
New-Item -Path "HKLM:\SYSTEM\CurrentControlSet\Control\FeatureManagement\Overrides\8" -Name "3000950414" -Force
Set-ItemProperty -Path "HKLM:\SYSTEM\CurrentControlSet\Control\FeatureManagement\Overrides\8\3000950414" -Name "EnabledState" -Value 1
Set-ItemProperty -Path "HKLM:\SYSTEM\CurrentControlSet\Control\FeatureManagement\Overrides\8\3000950414" -Name "EnabledStateOptions" -Value 0
Set-ItemProperty -Path "HKLM:\SYSTEM\CurrentControlSet\Control\FeatureManagement\Overrides\8\3000950414" -Name "Variant" -Value 0
Set-ItemProperty -Path "HKLM:\SYSTEM\CurrentControlSet\Control\FeatureManagement\Overrides\8\3000950414" -Name "VariantPayload" -Value 0
Hopefully, this will do the job for you.
3] Install updates manually
This method bypasses the faulty WSUS/SCCM delivery mechanism that caused error code 0x80240069. The actual update files are not corrupted; only their distribution was problematic. By downloading the update directly from Microsoft’s Update Catalog, you receive the genuine package from Microsoft’s servers, avoiding the WSUS synchronization issues that led to the installation failure.
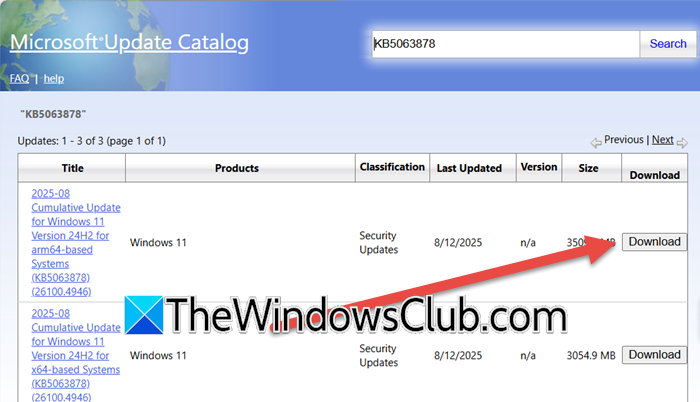
You need to go to catalog.update.microsoft.com and search for “KB5063878”. Look for the update that matches your exact Windows version, for Windows 11 24H2: “2025-08 Cumulative Update for Windows 11 Version 24H2 for x64-based Systems”, for Windows Server 2025: Corresponding server version. You need to click on the associated Download button.
Once downloaded, navigate to the .msu file, double-click on it, and follow the on-screen instructions to complete the installation.
4] Reset Windows Update Components
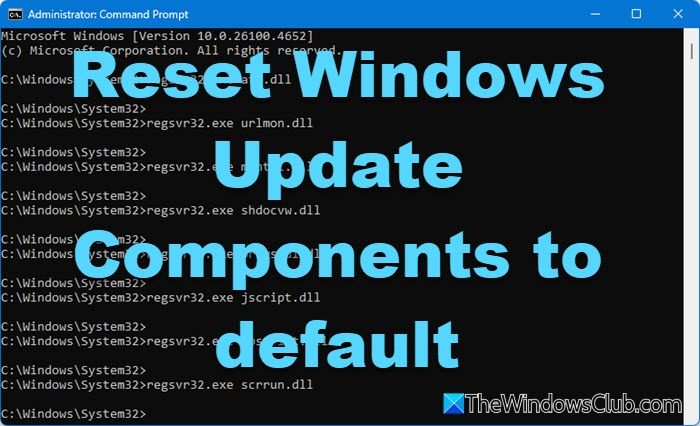
If nothing works, our last resort would be to reset the Windows Update Components, as that would give Windows a fresh slate to install the latest updates. Now, check if the issue is resolved.
Hopefully, with the help of these solutions, you will be able to resolve the issue.
Read: List of Windows Upgrade error codes and solutions
How to fix error 0x80070643 in Windows Update?
To resolve Windows Update error 0x80070643, first ensure your recovery partition has at least 250 MB of free space, as insufficient space is a common cause. Manually update Windows Defender and verify the .NET Framework is enabled and updated, as these are frequent culprits. Reset the Windows Update components by stopping related services, renaming the SoftwareDistribution and catroot2 folders, and restarting the services. If the error persists, run the Windows Update Troubleshooter or manually download and install the update from the Microsoft Update Catalog. We recommend that you check our post to know what to do to resolve the 0x80070643 Windows Update error.
Read: Windows Update Not enough disk space [Fix]
What is error 0x80246019 on Windows Update?
Error 0x80246019 is a Windows Update failure typically caused by corrupted system files, insufficient storage space, or interference from third-party antivirus software. This error disrupts the download or installation of updates, potentially compromising system security and stability. Resolution involves running the Windows Update Troubleshooter, temporarily disabling security software, and ensuring adequate disk space.
Also Read: Error 0x80240034, Windows Update failed to install.