The Update Compliance app is provided by Microsoft Azure Marketplace to process diagnostic data from the connect devices. However, you have the option to disable or enable Update Compliance Processing on your Windows computers. In this post, we will learn how to do the same.

Update Compliance is a powerful set of tools that enable organizations to monitor and track all important aspects of Microsoft’s new servicing strategy: Windows as a Service. Update Compliance uses the Windows telemetry that is part of all Windows devices. It collects system data including update installation progress, Windows Update for Business (WUfB) configuration data, Windows Defender Antivirus data and other update-specific information, and then sends this data privately to a secure cloud to be stored for analysis and usage within the solution.
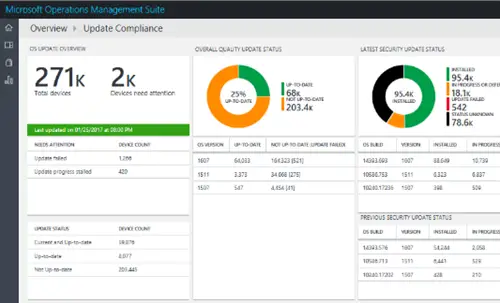
Organizations use Update Compliance in Windows 11/10 devices to collect data such as update installation progress data, Windows Defender Antivirus data, WUfB (Windows Update for Business) configuration data, monitor devices to make sure they include the latest quality updates, etc. The collected data is then stored in a secure cloud privately for analysis and usage. By default, Update Compliance remains disabled for a device. However, you can enable it using some simple steps in this post.
Before you proceed:
- Get the Update Compliance from the Azure Marketplace
- You have to enable and configure data telemetry on Windows 11/10 if not already
- Make sure cloud-delivered protection for Microsoft Defender Antivirus is turned on.
These two things are required to use and share data by Update Compliance.
Allow Update Compliance Processing in Windows 11/10
You should first create a system restore point to recover from any unwelcome changes. After that, use any of these two ways to disable or enable Update Compliance processing:
- Using Group Policy Editor or GPEDIT
- Using Registry Editor or GPEDIT.
Let us discuss them in detail.
1] Using Group Policy Editor
The Group Policy Editor allows you to configure system settings for all the devices connected to your domain network. Let us see how to configure compliance processing using it.
- Open Group Policy
- Access Data Collection and Preview Builds folder
- Enable Allow Update Compliance Processing.
You need to open Group Policy and then select the Data Collection and Preview Builds folder. The path is:
Computer Configuration > Administrative Templates > Windows Components > Data Collection and Preview Builds

From the list of settings, double-click on the Allow Update Compliance Processing setting.
In the next step, click on the Enabled option, and save the new setting. Restart the PC to apply the changes. Now you can configure Update Compliance in Azure and use the available options.

You can also disable update compliance processing in Windows 11/10 by following the above steps and using the Not Configured option in the last step.
2] Using Registry Editor
If you don’t have Group Policy Editor, try the Registry Editor instead.
- Open Registry Editor
- Access DataCollection key
- Create AllowUpdateComplianceProcessing DWORD value
- Set value data for DWORD value and save changes.
In the first step, open Registry Editor by typing regedit in the Windows search box and then press the Enter key.
After opening REGEDIT window, look for the DataCollection key. The path is:
HKEY_LOCAL_MACHINE\SOFTWARE\Policies\Microsoft\Windows\DataCollection

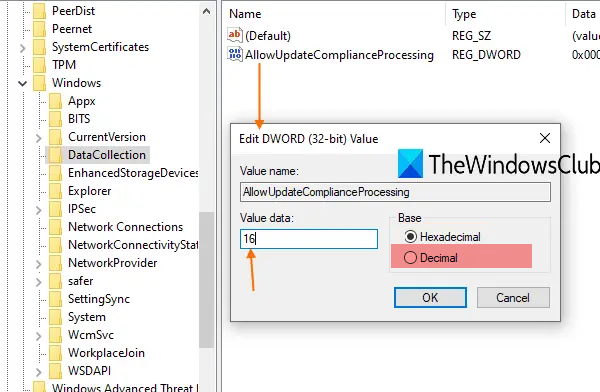
Create a DWORD (32-bit) value in the DataCollection key and then rename it as AllowUpdateComplianceProcessing, just as it is visible in the screenshot.
Double-click on that DWORD value and you will see a small box. There, enter 16 in the Value data box and press the OK button. Before doing that, make sure that the Base field is set to Decimal.
Restart the PC and it will apply the changes successfully.
To undo or disable Update Compliance, simply delete the AllowUpdateComplianceProcessing value, and restart the PC.
I hope these simple methods will help you deny or allow Update Compliance processing in Windows 11/10 with ease.
Read: Free tools to Block Automatic Windows Updates
How to enable Windows Update in Windows 11?
In Windows 11, updates are automatically enabled. To check for updates, you can open Settings, go to Windows Updates, and install the available updates. If there is an update available, it will be downloaded and installed.
Leave a Reply