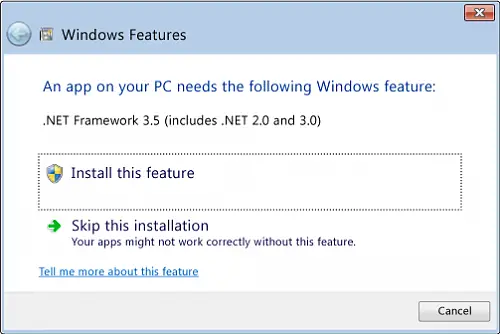
Every Windows version has a .NET Framework version installed and enabled by default. In Windows 11/10, .NET Framework 3.5 is disabled by default. But many programs still require .NET 3.5 to run. If you try to require some software or app that requires .NET Framework 3.5, you might face the following message:
An app on your PC needs the following Windows features. .NET Framework 3.5 (Includes .NET 2.0 and 3.0)
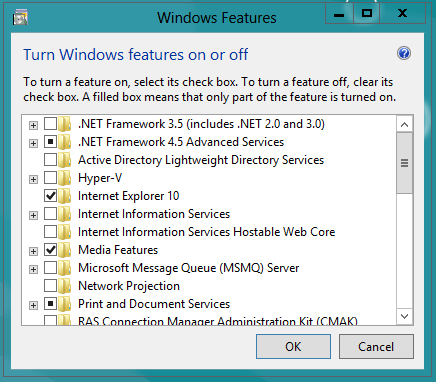
.NET Framework 3.5 missing? Enable it
Now to enable it, you have to move to Windows Feature. This can be accessed via Control Panel > Programs and Features.
If you don’t have a strong internet connection on your system, the download of required files may take a bit of time, and thus the overall process becomes lengthy.
You can also use Windows Settings.
Open Windows Settings > Apps > Optional Features and click Add a feature.
Search for .NET Framework 3.5 and install it.
Windows Update will fetch the required files.
If you want to use Command Prompt or PowerShell, run this command:
DISM /Online /Enable-Feature /FeatureName:NetFx3 /All /LimitAccess /Source:D:\sources\sxs
Here, replace D:\sources\sxs with the path to your Windows 11 installation media if you’re offline. If you’re online, you can omit /Source.
If you try to download the full setup of .NET, it is 291 MB in size, and you will obviously need a fast connection to do it quickly.
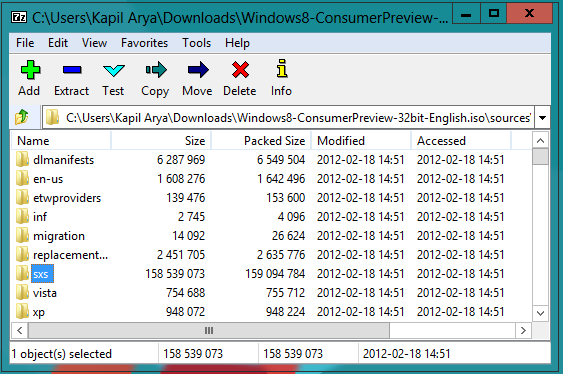
Install .NET Framework 3.5.1 on Windows 11 using ISO
1. Open the .iso file of Windows OS with a compression/decompression software like 7-Zip. Open the Sources folder and find sxs folder. Now copy this folder to the following location:
C:\Temp
2. Next, run the Command Prompt as administrator, and type the following command:
dism.exe /online /enable-feature /featurename:NetFX3 /All /Source:c:\temp\sxs /LimitAccess
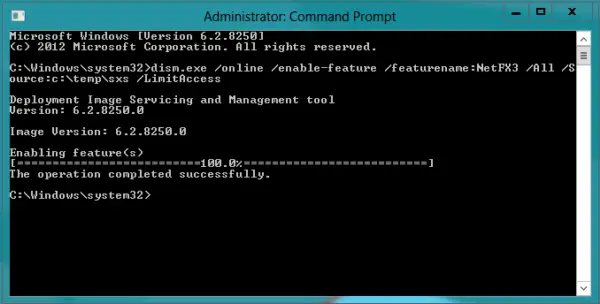
That’s it!
Now reboot and check the Windows Feature window again. You’ll see the first option is automatically checked.
You will now also be able to run software or app which requires .NET (like AutoCAD. etc.), without any problems.