If you fail to enable nested virtualization or the Enable Nested VT-x/AMD-V option is grayed out in VirtualBox, here is how you fix the problem in Windows 11/10 PC. Here we have discussed how you can bypass the error and turn on nested virtualization, as well as how you can make this option available in the GUI.
What is Nested VT-x/AMD-V in VirtualBox?
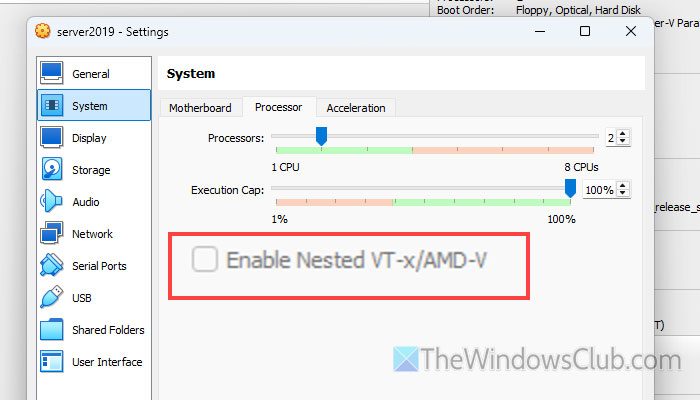
Nested VT-x/AMD-V is an option that allows users to enable or disable nested virtualization. If you have a virtual OS and you want to install VirtualBox, Hyper-V or any other virtual machine software in the virtual OS or environment, you need to enable Nested VT-x/AMD-V option or nested virtualization. In other words, it is a medium that connects your virtual machine software with your virtual machine.
Enable Nested VT-x/AMD-V grayed out in VirtualBox
If Enable Nested VT-x/AMD-V grayed out in VirtualBox, follow these solutions:
- Check if your PC supports VT-x
- Disable Hyper-V in host OS
- Increase CPU core and try again
- Enable virtualization in BIOS
- Enable nested virtualization using CMD/Terminal
To learn more about these solutions, continue reading.
1] Check if your PC supports VT-x

It is the very first thing you should ensure. If your PC’s hardware doesn’t support VT-x, there is nothing you can do except upgrade your hardware. Instead of wasting time on other workarounds, we would suggest you confirm the availability hardware virtualization facility first.
As the Microsoft Hardware-Assisted Virtualization Detection Tool is no longer available, you can try SecurAble. Securable is a freeware that lets you check various things such as maximum bit length, hardware D.E.P., hardware virtualization, etc.
To get started, download SecuAble from the official website and double-click on it to open the window. Click on the Yes button on the UAC prompt to find a window like the image above.
If it says that your PC supports hardware virtualization, you can go ahead and follow other solutions. However, if it says “No,” there is nothing you can do.
Note: You can also do this using Task Manager. For that, you need to switch to the Performance tab and find the status of Virtualization.
2] Disable Hyper-V in host OS
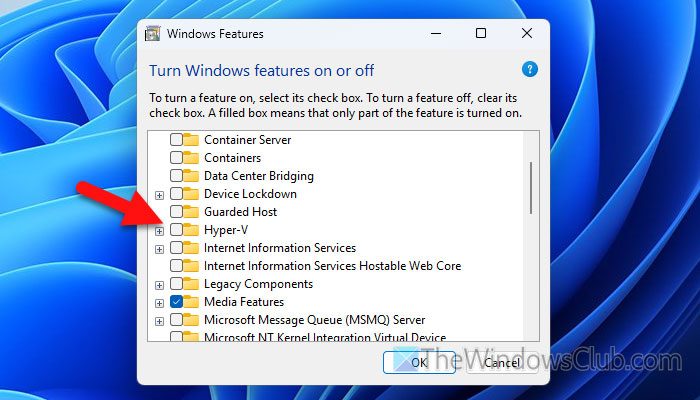
Although Hyper-V should not be the cause of this problem, at times, you might not be able to enable nested virtualization if Hyper-V is turned ON. That is why you can disable Hyper-V in the host OS and check if the option is available or not.
To disable Hyper-V, search for Turn Windows features on or off in the Taskbar search box and click on the individual search result. Then, remove the tick from the Hyper-V checkbox and click the OK button.
It takes a few moments and a restart to get the job done.
3] Increase CPU core and try again
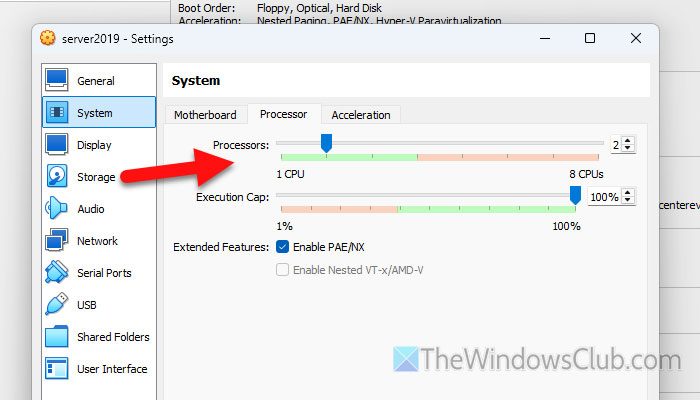
If your virtual machine doesn’t have enough hardware, you might not be able to enable nested virtualization. Therefore, follow these steps to increase the CPU core:
- Open VirtualBox and select the virtual machine.
- Click on the Settings option.
- Go to System > Processor.
- Use the Processors bar to increase the number of cores.
- Click the OK button.
Then, restart VirtualBox and try again.
Read: How to enable all CPU Cores on Windows 11
4] Enable virtualization in BIOS

Every computer has an option in BIOS or UEFI to enable or disable hardware virtualization. If it is turned off recently by you or anybody else, you might not be able to enable or disable nested virtualization in VirtualBox or any other virtual machine software.
To enable virtualization in BIOS of UEFI firmware, follow these steps:
- Restart your computer and open BIOS or UEFI.
- Find an option called Advanced or Processor.
- Find the option named Intel Virtual Technology or VT-x or SVM, or AMD-V.
- Enable this option.
For your information, this is a general guide, and the name of the options depends on the hardware manufacturer.
5] Enable nested virtualization using CMD/Terminal
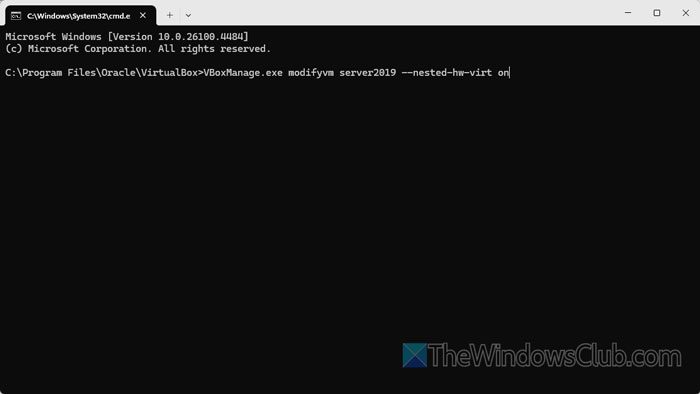
To enable nested virtualization using CMD, follow these steps:
- Open the Explorer and navigate to this path: C:\Program Files\Oracle\VirtualBox
- Right-click on an empty area and select the Open in Terminal option.
- Type this command: VBoxManage.exe modifyvm VM_NAME –nested-hw-virt on
Don’t forget to replace VM-NAME with the original name of the specific virtual machine. Once you do that, the Enable Nested VT-x/AMD-V option will be enabled immediately.
Read: AMD-V is disabled in the BIOS, Not in a hypervisor partition [Fix]
How to enable Nested VT x AMD-V?
To enable Nested VT x AMD-V in VirtualBox, open the Settings of the virtual machine. Then, go to System > Processor. Find the Extended Features option and tick the Enable Nested VT-x/AMD-V checkbox.
How do I fix VT-X is disabled in the BIOS for all CPU modes?
To fix the VT-X is disabled in the BIOS for all CPU modes error, you need to check for VT-x support first. Then, open the BIOS and an option named Intel Virtual Technology or VT-x or SVM, or AMD-V. Enable this option in the BIOS.
Read: VT-x is disabled in the BIOS for all CPU modes (VERR_VMX_MSR_ALL_VMX_DISABLED)