Hyper-V Remote Management allows administrators to control Hyper-V hosts and virtual machines from a separate computer. Instead of needing physical access to the server, you can create/delete/modify VMs remotely, and you can monitor performance & resource usage. In this guide, we are going to see how you can enable and configure Hyper-V Remote Management on Windows 11/10 or Windows Server.
Enable and Configure Hyper-V Remote Management
To enable and configure Hyper-V Remote Management, follow the steps outlined below.
- Configure Hyper-V Host
- Prepare your workstation
- Configure Network Settings
- Adjust Security Policy
Let’s discuss them in detail.
1] Configure Hyper-V Host

First, we need to configure the Hyper-V Host and enable the Windows Remote Management (WinRM) service, allowing temporary password sharing. We will use PowerShell to achieve the same result. If you are on a server without a desktop interface, you can type sconfig.cmd in the black command window and press Enter. Then, select Option 4 (Remote Management), press Enter, choose Enable, and then press Enter again. This enables your workstation to communicate with the server remotely.
Now, open PowerShell as an administrator and run the following command.
To turn on the Windows Remote Management (WinRM) service
Enable-PSRemoting -Force
To allow temporary password sharing (like giving a one-time key)
Enable-WSManCredSSP -Role Server
We then have to verify the connection. You need to run the command in PowerShell on your workstation and not the server.
Test-NetConnection -ComputerName 192.168.21.30 -Port 5985
Make sure to replace 192.168.21.30 with your server’s actual IP. You can run the following command to check the IP of your Hyper-V Server.
Test-NetConnection -ComputerName "HV-Server" -TraceRoute | Select RemoteAddress
Now, move on to the next step.
2] Prepare your workstation

In this step, we’re turning your Windows PC into a remote control for your Hyper-V server. This is like installing a special app and setting up security so you can manage the server from your desk.
To do so, first, we need to install the Hyper-V Management Tool. To do this, follow the steps outlined below.
GUI
- Open Control Panel.
- Go to Programs > Turn Windows features on or off.
- Look for Hyper-V, and tick Hyper-V Management Tools.
- Click Ok.
CLI
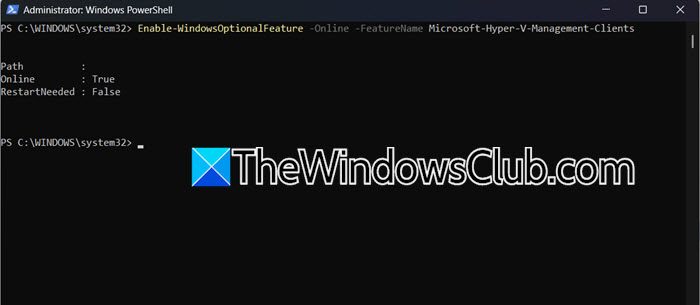
In PowerShell, run the following command.
Enable-WindowsOptionalFeature -Online -FeatureName Microsoft-Hyper-V-Management-Clients
Once done, let’s create a shortcut for your server by running the following command in PowerShell.
Add-Content -Path "C:\Windows\System32\drivers\etc\hosts" -Value "192.168.21.30 EAS"
I used the acronym EAS (Easy Access Server), but you can use any other shortcut name to map your machine’s IP. So, next time, you can type that word, in my case – EAS, instead of IP.
Now, run the following commands to set up the Security.
Set-Item WSMan:\localhost\Client\TrustedHosts -Value "EAS"
cmdkey /add:EAS/user:Administrator /pass:YourSecurePassword
The aforementioned command stores the server’s username/password securely.
3] Configure Network Settings
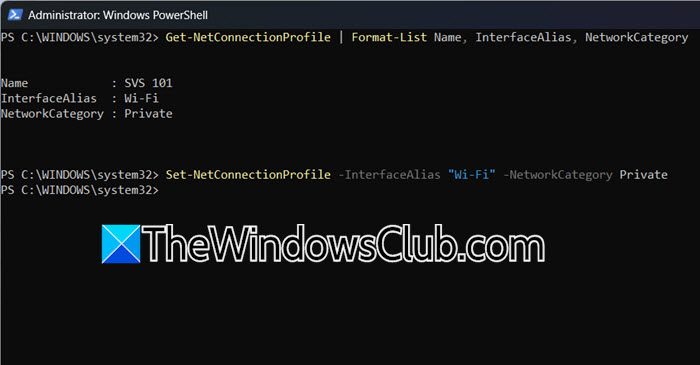
We are going to set your network adapter to Private. If you do so, Windows assumes you’re in a safe location (home/office) and allows remote connections between devices. To do so, open PowerShell as an administrator and then run the following command.
Get-NetConnectionProfile | Format-List Name, InterfaceAlias, NetworkCategory
You need to check InterfaceAllias and then run the following command.
Set-NetConnectionProfile -InterfaceAlias “Wi-Fi” -NetworkCategory Private
Make sure to replace “Wi-Fi” with the actual InterfaceAlias that you got after executing the previous command.
Now, you need to enable special authentication to allow temporary password sharing for certain tasks.
Enable-WSManCredSSP -Role Client -DelegateComputer "EAS"
Once complete, proceed to configure the Group Policy.
4] Adjust Security Policies
Finally, we are going to configure Group Policy to allow secure password sharing with your Hyper-V host. To do so, you need to follow the steps mentioned below.
- Open Run by Win + R.
- Type “gpedit.msc” and click Ok.
- Now, go to the following location.
Computer Configuration > Administrative Templates > System > Credentials Delegation
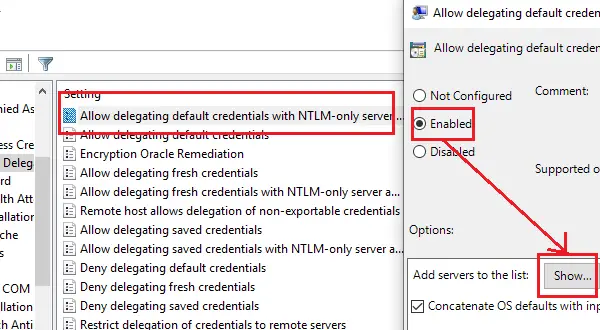
- You need to look for Allow Delegating Fresh Credentials with NTLM-only Server Authentication and double-click on it to open.
- Set it to Enabled and click on Show.
- Now, add server entries – wsman/EAS and wsman/EAS.local. Make sure to follow the format – wsman/HOSTNAME and wsman/HOSTNAME.FULLDOMAIN
- Once done, run the following command to refresh.
gpupdate /force
This should help.
Read: Your Credentials did not work in Remote Desktop on Windows 11
How do I enable remote management in Hyper-V?
To enable remote management in Hyper-V, first configure the host by running PowerShell as Administrator and executing Enable-PSRemoting -Force and Enable-WSManCredSSP -Role Server to activate remote access. On your management PC, install Hyper-V Management Tools via Windows Features or PowerShell (Enable-WindowsOptionalFeature -Online -FeatureName Microsoft-Hyper-V-Management-Clients), then set the network profile to Private using Set-NetConnectionProfile.
Read: How to install Hyper-V in Windows Server
How do I enable Hyper-V management tools?
To enable Hyper-V management tools, open Turn Windows Features on or off in Windows Search, expand the Hyper-V section, check “Hyper-V Management Tools,” and click OK. Alternatively, run PowerShell as Administrator and execute:
Enable-WindowsOptionalFeature -Online -FeatureName Microsoft-Hyper-V-Management-Clients. This installs Hyper-V Manager for remote host management without enabling the Hyper-V virtualization role on the local host.
Also Read: Configure and use Hyper-V in Windows 11.