
Snap Assist is a feature in Windows 11/10, that is not noticed by many. Although this feature is enabled by default in every Windows installation, only a few users use it. In this post, we will learn about how to use Snap Assist on your Windows 11/10 PC. Snap Assist now includes advanced features and improved functionality. Snap Assist helps you arrange your windows easily and organize your space, increasing your productivity.
With Snap Assist on your PC, you can split-screen Windows, and you can place up to four windows on one single screen, which will certainly increase your productivity, as you can continue writing in one window while keeping an eye on the upcoming tweets on your Twitter account.
How to use Snap Assist in Windows 11/10
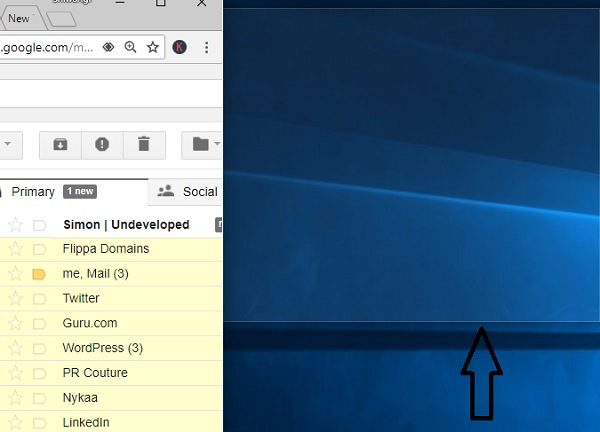
To snap a window on your desktop, you just need to take your mouse cursor on the title bar of the window, left-click, hold and drag the mouse to either right or left corner of your screen. The feature will display a transparent overlay indicating where it will place the window. Just release the mouse button, and it will automatically adjust the window to that transparent overlay. Though it works a bit similarly to the Snap in Windows 7 and Windows 8, is more intuitive and simple in Windows.
Place two windows side by side
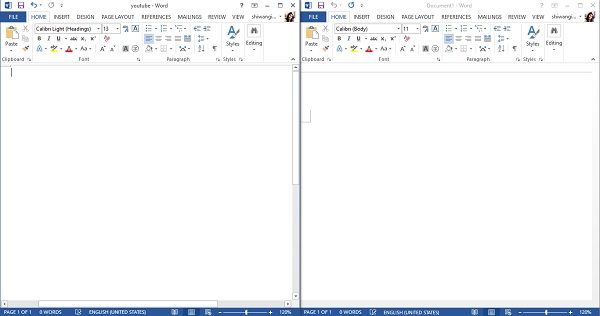
With the Snap Assist feature, you can place two windows side by side, next to each other. Just locate the window you want to snap, take the cursor to the title bar, hold your mouse and drag it to either side of your screen and leave the mouse. Snap Assist will place it on one side and display options to pin the other window. Can you also use Win+? to drag the snap upwards and “Win+?” to snap the window to the top or bottom of your screen, and double-press “Win+?” will maximize the window, and double-press ” Win+? will minimize the window.
Similarly “Win+ ?” will take the window to the left corner of your screen and “Win+?” will take it to the right.
Four Windows in Four Corners
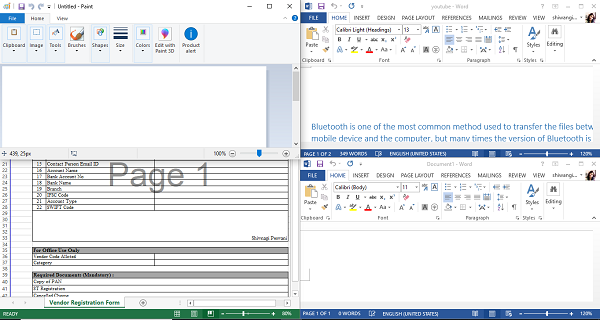
If you want to snap the windows on four corners, hold the mouse and drag it to the corners of your screen and the feature will show you the available space with a transparent overlay. Release the mouse, and it will place the window in the displayed corner. Similarly, open other three apps and drag them to the corners and the Snap Assist will assist you in placing them in four corners. Interestingly, you can use all these four open windows simultaneously thereby increasing your productivity.
Snap Assist Settings in Windows 11/10
Snap Assist Settings in Windows 10 is available System > Multitasking. Press Win+I to open the settings of your Windows PC and type Snap in the search box and it will straightaway open the Snap Assist settings.
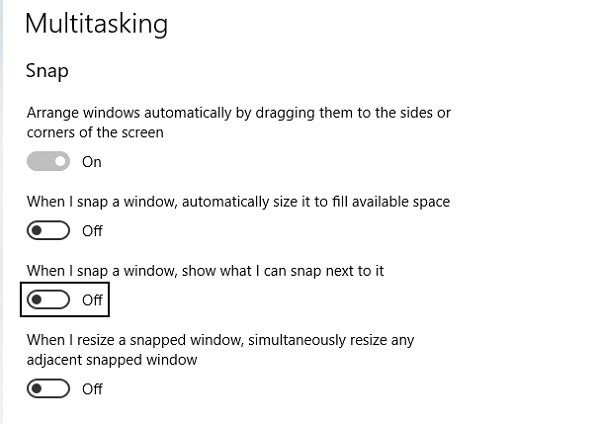
In Windows 11, you will see the setting here:
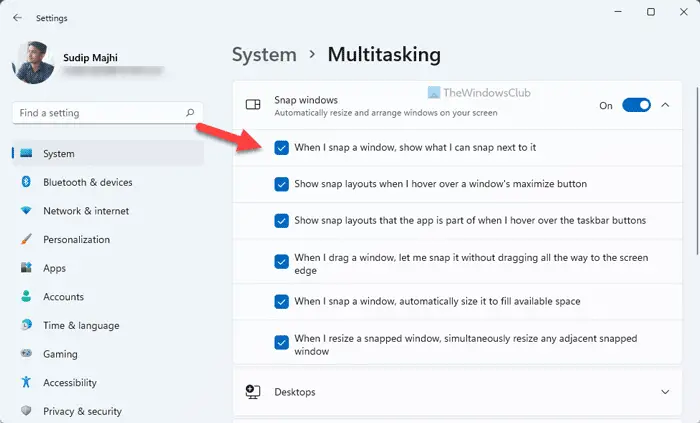
If you want windows to snap automatically, turn the button on, and it will arrange them by dragging them to the sides of your screen. The other settings allow you to check the available space or to check what you can snap next to it etc.
Keeping all these tabs, Off will automatically disable the Snap Assist feature on your PC.
Hope this helps.
