Wireshark is a network protocol analyzer that helps you keep your computer secure. With the help of this tool, you can scrutinize and probe network packets in real-time. In this post, we will talk more about this tool and see how you can use the Wireshark Tool on a Windows PC for Security Audits.
Wireshark Network Analyzer is based on WinPcap, and the latter must be installed on your computer. If it is not already installed, Wireshark will prompt and install it for you. Certain other tools that I’ve used – like URL Snooper – also employ WinPcap to sniff on packets traveling through the network.
What is WinPcap
WinPcap is always installed as a separate program. It is a tool to capture network packets without the interference of any protocols. It includes kernel-level packet filtering, a network statistics engine, and a driver. With the help of this driver, it bypasses all network protocols and accesses the low-level network layers.
For your information, TCP/IP or ISO OSI, etc. models used in a network scenario, for data communication, have a different set of layers. We generally work at the application level and it is the topmost level in both protocols – TCP and OSI. Here is an image to make it clear. It shows layers in both OSI and TCP. WinPcap operates at network level — bypassing all other upper layers
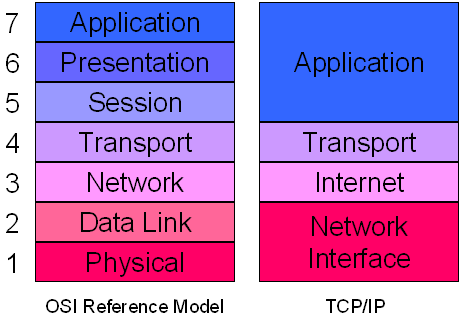
To access the low-level layers, WinPcap bypasses these and other layers and digs out data packets moving in the lower network level. Thus, it helps provide information about outgoing and incoming data packets to different programs. This information is then used by different programs to dig out different information.
WinPcap is listed as a separate program in Windows Settings or Control Panel. If you remove WinPcap, applications dependent on it, like Wireshark, will fail to perform.
Use Wireshark Tool on Windows PC for Security Audits
Wireshark is a tool that helps check network activity on a Windows 11/10 computer for security purposes. It captures and analyzes internet traffic, allowing users to spot anything unusual. This helps security professionals find weak spots, monitor data movement, and ensure that no suspicious activity is happening. The tool has easy-to-use features, letting users filter and inspect network details to understand how their system is communicating online.
Using Wireshark for security checks allows you to look at network traffic to catch possible threats, unusual connections, or errors that may put a system at risk. It allows users to see if someone is trying to access a system without permission, track information flow, and fix internet-related issues. Its simple design makes it useful even for those who are not experts, helping them protect their computers and networks more effectively.
If you want to use the Wireshark Tool on a Windows PC for Security Audits, you need to follow the steps mentioned below.
- Download and install Wireshark
- Use Wireshark Interface
- Start Capturing
Let us talk about them in detail.
1] Download and install Wireshark

First of all, you need to download and install Wireshark on your computer. Since Wireshark is an open-source utility, you can download it for free. To do so, you need to follow the steps mentioned below.
- First of all, you need to go to wireshark.org and click on the Download button (make sure to download the stable version) to start the download process.
- Once the download process is completed, go to the Download folder and run the Installation Media.
- Follow the on-screen instructions until you reach the Choose Components section, and make sure that Wireshark and Tshark are ticked. Other than that, you can tick the options as per your preferences and go ahead.
- Finally, follow the on-screen instructions to complete the installation.
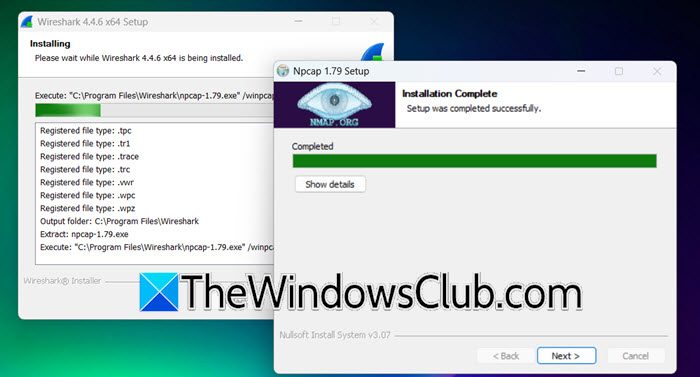
- If you tick Ncap, you will see another installation running simultaneously, follow the on-screen instructions, and complete that first.
- Once done, go back and complete the process.
After installing Wireshark, you need to restart your machine and then start using it.
2] Use Wireshark Interface
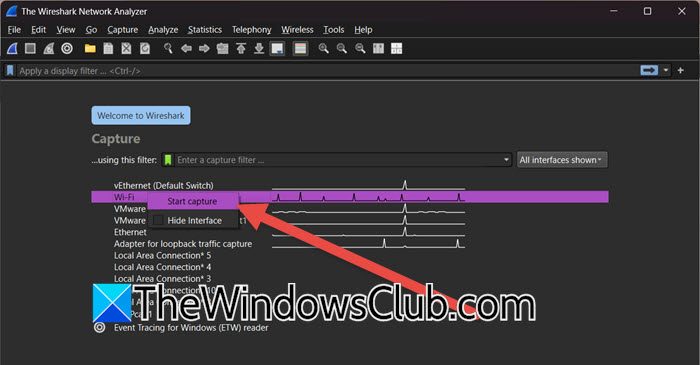
When you open Wireshark, you will see multiple network interfaces at your disposal, such as Virtual Network cards, Ethernet, and WiFi. You need to select the one you want to inspect, right-click on the interface, and select Start capture.

If you want to just glance at the heartbeat, you don’t need to even start capturing, you can just click on the network interface and see the heartbeat. It will start showing real-time packet information and IP address.
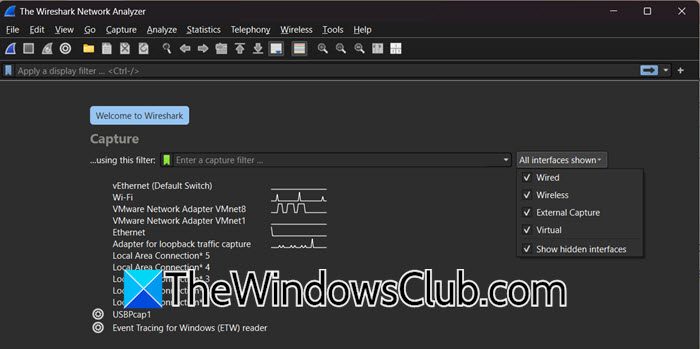
You can also filter the network devices if you want to narrow down your inspection. Just go to the All interface shown drop-down menu and then untick Wired, Wireless, External Capture, and Virtual. You can even see hidden devices by ticking Show hidden devices.
3] Start Capturing

Now that we understand a bit about the Wireshark UI, let us go ahead and start capturing and auditing network traffic. To create your network traffic audit, you first need to capture, as mentioned earlier, just right-click on the network card and select Start capture. You can even save the file by clicking on File > and using Export options.
Once Wireshark is running, it captures all network traffic from the selected interface, which can generate a large amount of data. To make it easier to analyze, you can use the filter bar at the top to narrow down results. For example, if you want to see only HTTP traffic, type “HTTP”. If you need to filter traffic to a specific IP address, type “ip.addr == 192.168.1.1.” This helps focus on relevant data while avoiding unnecessary information.
Then, to examine packet details, click on any packet in the capture window. The middle pane will show different layers of the packet, such as Ethernet, IP, and TCP/UDP. The bottom pane displays the raw packet data in both hexadecimal and ASCII formats, giving a deeper look into how the network communicates.
Once you find a conversation between two devices that you want to follow, you can right-click on a packet and select Follow > TCP Stream or Follow > UDP Stream. This will show all packets exchanged between the two devices in a readable format, making it easier to analyze ongoing communication.
Go ahead and export specific packets or generate a summary report when needed. Wireshark provides options under File > Export Specified Packets to save selected packets for further review. Additionally, the Statistics menu helps generate reports, offering insights into traffic patterns and network behavior.
Other features of Wireshark Network Analyzer
Among other features that caught my attention was the handy toolbar that has options to start and stop packet capturing. It also has options to set up preferences and to launch help. Other options are restarting packet capturing without saving the file, closing the capture file, reloading the capture file, etc. In short, it offers you shortcuts to perform different options without having to navigate using the menu bar.
Color coding is yet another good feature of Wireshark Network Analyzer. You can use the ready-to-use color codes, or you can set up custom color codes in Preferences on the toolbar. Color-coding helps you identify the type of data packets.
The bar just below the toolbar contains options to set up filters. I did not use this, but it is easy to access filters for admins who wouldn’t want to open up the capture options dialog each time. You can directly type into the text box on the filter bar, or you can click on Expressions and then create an expression using the available options. Setting up filters is just like you do when you are handling data in Excel, so it should not be inconvenient.
In the capture window, when it is showing different data packets, you can right-click on a data packet to see its details. The lower window shows details pertaining to that particular data packet.
Hopefully, with the help of this guide, you will understand how to use Wireshark.
Read: Best free Network Monitoring Tools for Windows
How can Wireshark be used for security?
Wireshark helps improve security by capturing and analyzing network traffic, making it easier to detect suspicious activities or unauthorized access. Users can filter data to spot threats, track information flow, and identify unusual connections. Its simple interface allows professionals and beginners to audit network communication and strengthen security measures effectively.
Read: What is Audit Success or Audit Failure in Event Viewer
How to detect security threats in Wireshark?
To detect security threats in Wireshark, filter traffic to find unusual patterns like unexpected connections or unknown IP addresses. Then, check packet details to spot suspicious data exchanges, errors, or unauthorized access attempts.