While installing an OS on Hyper-V virtual machine, you might come across an error saying The Virtual Machine Management service encountered an error while configuring the hard disk on virtual machine [virtual-machine-name]. You might also get an error code named 0x80070050. If so, you can follow this tutorial to know about the cause and fix the issue within moments.

The entire error message says something like this:
The Virtual Machine Management service encountered an error while configuring the hard disk on virtual machine [virtual-machine-name].
Failed to create the virtual hard disk.
At first, you need to know why Hyper-V displays such an error message while creating a virtual machine and installing an operating system. You might already know that you need to enter a name for your virtual machine when you create one, and that you can create multiple virtual machines on Hyper-V.
By default, Hyper-V uses the virtual machine name as the virtual hard disk name. For instance, if you name the virtual machine My virtual machine, the name of the virtual hard disk will be My virtual machine.vhdx.
Let’s assume that you have created a virtual hard disk with the same name as you are using now for the current virtual machine. If so, Hyper-V will display the error message mentioned above. That being said, you have two options to get rid of this problem – either delete the old virtual hard disk or set a different name for the current virtual machine.
Virtual Machine Management service encountered an error while configuring hard disk, Error 0x80070050
To fix The Virtual Machine Management service encountered an error while configuring the hard disk error 0x80070050, follow these steps:
- Delete old virtual hard disk
- Set different name for the current virtual hard disk
To learn more about these steps, continue reading.
1] Delete old virtual hard disk
There are pros and cons to deleting the old virtual hard disk or using this method to resolve the aforementioned error message. The advantage of using this method is that you can free up space and unclutter the directory. However, the problem arises when you have important information on the virtual hard disk that you will use in the future.
However, if the old virtual hard disks are no longer in use, you can certainly delete them. For that, do the following:
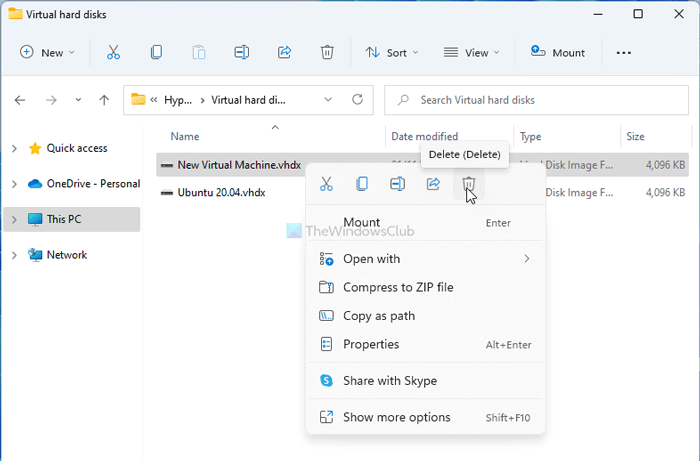
- Open the File Explorer on your computer.
- Navigate to this path:
C:\Users\Public\Documents\Hyper-V\Virtual hard disks - Select the virtual hard disk you want to delete and right-click on it.
- Select the Delete option.
Once done, you can use the same settings to create another virtual hard disk on Hyper-V.
2] Set different name for the current virtual hard disk
If you run into problems deleting the old virtual hard disk, you need to rename your VHDX file. It is a much easier method to get rid of this issue. To set a name for the virtual hard disk, follow these steps:
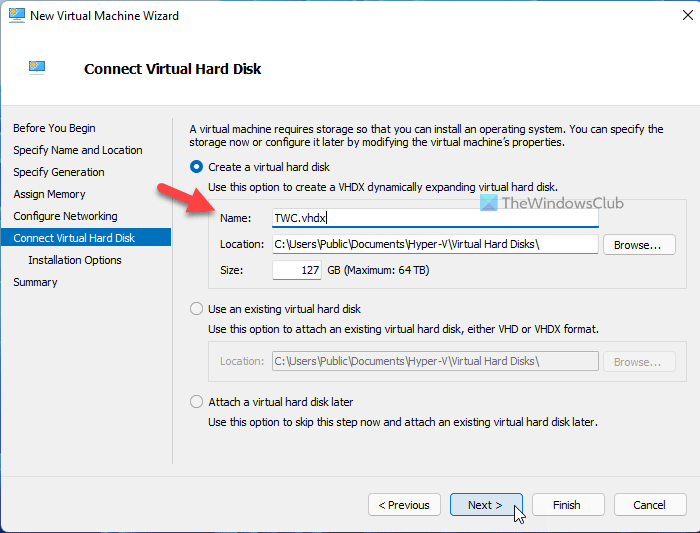
- Go with the virtual machine creation process on Hyper-V.
- Go to the Connect Virtual Hard Disk tab.
- Select the Create a virtual hard disk option.
- Click on the Name box.
- Enter a name with .vhdx
- Make sure the name is different from the previous name.
After that, you can create the virtual hard disk without any issue.
Hope this guide was helpful.
How do I fix The Virtual Machine Management service encountered an error while configuring the hard disk?
To fix The Virtual Machine Management service encountered an error while configuring the hard disk, you need to either delete the old virtual hard disk file or set a new name. There is no other option besides these two to get rid of this issue in Hyper-V. The detailed steps are outlined above; follow them to get the job done.
Related:
- Hyper-V encountered an error while loading the virtual machine configuration
- Hyper-V encountered an error while copying virtual hard disks to destination folder.