
In this post, we will show you how to use AI in Snipping Tool to take perfect screenshots on your Windows 11 PC. Microsoft has recently added an AI-powered feature to its built-in Snipping Tool, making capturing on-screen content smarter and more precise than ever. Known as Perfect Screenshot, this feature uses advanced AI algorithms to automatically adjust your selection based on the content you’re trying to capture, so you don’t have to manually crop or resize screenshots later.
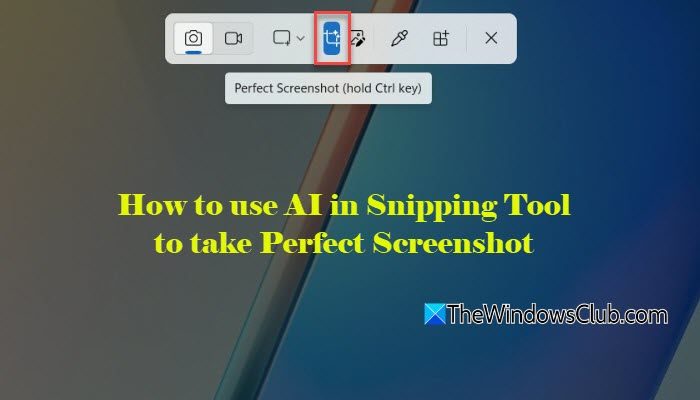
At present, Perfect Screenshot is available only on Copilot+ PCs and is being rolled out gradually with Snipping Tool version 11.2504.38.0 or later. The feature first appeared in Windows Insider builds and may not yet be available to all eligible devices on the stable channel. As part of this update, Microsoft has also introduced a new Color Picker tool in the Snipping Tool, which lets you pick and copy color values directly from anywhere on your screen.
How to use AI in Snipping Tool to take a Perfect Screenshot
To use AI in Snipping Tool to take perfect screenshots, you can follow these steps:
- Open the Snipping Tool
- Select the Perfect Screenshot option
- Draw a selection around the content
- Let AI adjust the capture automatically
- Copy or save your perfect screenshot
Let us see this in detail.
Start by opening the Snipping Tool on your Windows 11 PC. You can do this by searching for Snipping Tool in the Start menu or using the keyboard shortcut Win + Shift + S.
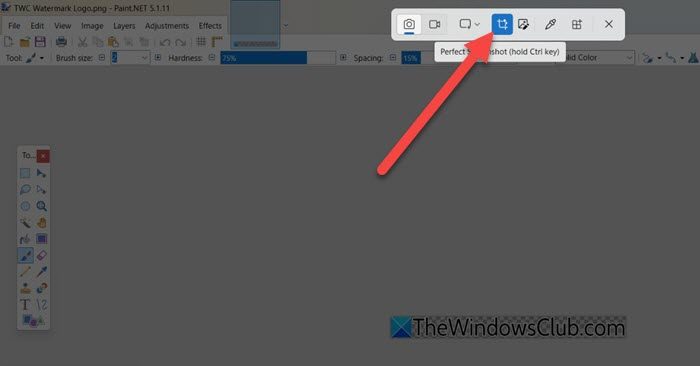
Once the Snipping Tool opens, select the Snip button and make sure the Rectangular snipping mode is selected. After that, choose the Perfect Screenshot option from the toolbar.
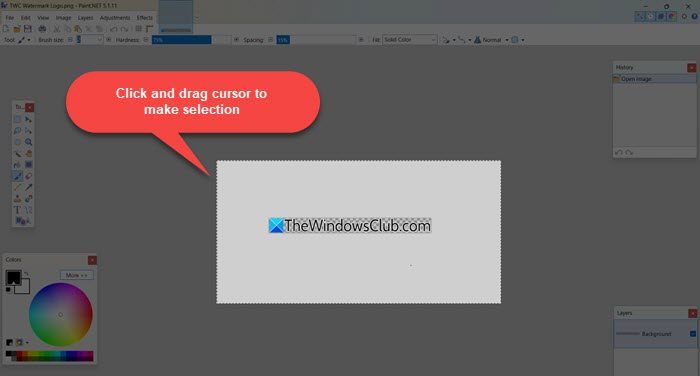
Click and drag your cursor roughly around the content you want to capture. There’s no need to be precise here. Just make sure the main content falls within your selection area.
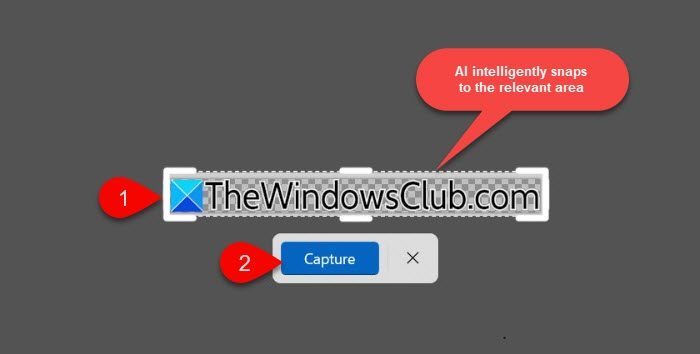
As soon as you release the mouse button, the AI kicks in. It analyzes the content inside your selection and automatically resizes the capture area to fit it neatly. This removes extra whitespace and ensures the screenshot looks clean and well-framed. Click Capture to confirm the selection.
After the snip is taken, the screenshot is added to your clipboard. You can paste it immediately into another app, or use the preview window to annotate, save, or share the image using the Snipping Tool.
A copy of every screenshot you take is automatically saved to the C:\Users<username>\Pictures\Screenshots folder under your account.
Note:
- Perfect Screenshot works best with specific on-screen content, such as text blocks, images, dialog boxes, or UI elements.
- To enable Perfect Screenshot instantly, hold the Ctrl key as you select the area you want to capture.
- Before confirming the capture, you can move or adjust the selected area. This helps ensure the AI captures the content correctly and gives you a clean, well-framed screenshot every time.
- If you don’t see the Perfect Screenshot option yet, your device may not support it, or the feature may still be rolling out to your PC. Make sure the Snipping Tool is updated, then check again later.
Use Color Picker in Snipping Tool to copy Color Codes from screen
You can also use the Color Picker in the Snipping Tool to copy color codes directly from anywhere on your screen. This is especially useful for designers, developers, and content creators who need accurate color information without relying on third-party tools.
Open the Snipping Tool and select the Colour picker option from the toolbar. Your mouse pointer will immediately change into a dropper-shaped icon.
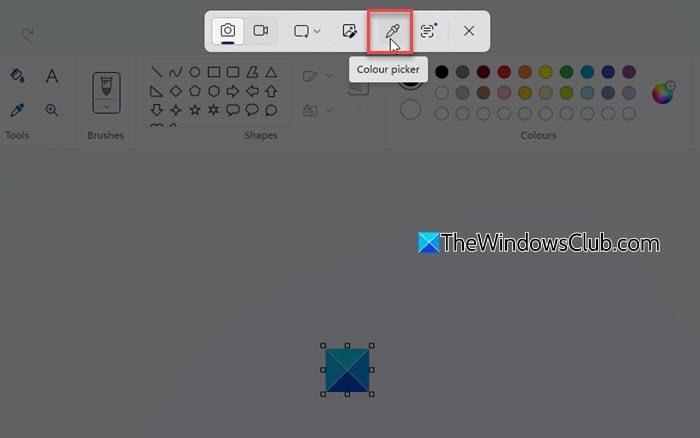
You can then hover this dropper over any area on the screen to sample its color.

As you move the dropper, the tool automatically detects the color and displays its values in the selected format. By default, it displays the value in HEX. You can click the dropdown in the toolbar to select a different color format, including RGB and HSL.
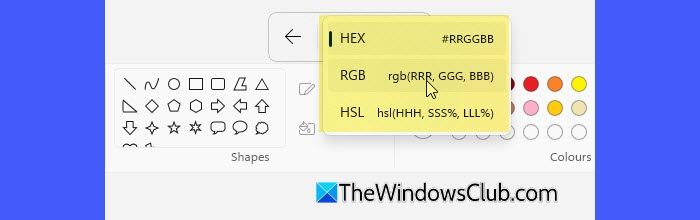
Once you get to the desired area on screen, simply click to copy its color code to your clipboard. A notification pop-up will appear to confirm the action. You can then paste the copied value anywhere to use the exact color code.
Note: Unlike the Perfect Screenshot feature, Color Picker is not exclusive to Copilot+ PCs and is available on supported Windows 11 devices with the latest version of the Snipping Tool.
That’s all! I hope you find this useful.
Read: How to get Snipping Tool on Taskbar in Windows.
How to take high-quality screenshots with Snipping Tool?
To take high-quality screenshots using the Snipping Tool, make sure your display scaling is set correctly, and the content you want to capture is fully visible on the screen. If you’re on a Copilot + device, you can also use the Perfect Screenshot mode to automatically frame content while taking screenshots. After capturing, you can annotate or edit the image and then save it in a lossless format like PNG for better quality.
How to take a full screenshot using a Snipping Tool?
To take a full-screen screenshot, open the Snipping Tool and select the Full-screen option from the Snipping area dropdown. As soon as you select this mode, the tool captures the entire screen instantly without requiring any selection. You’ll then see a notification, and if you click that, the screenshot opens in the Snipping Tool preview window for further actions.
Read Next: Snipping Tool keeps taking screenshots in Windows.
