
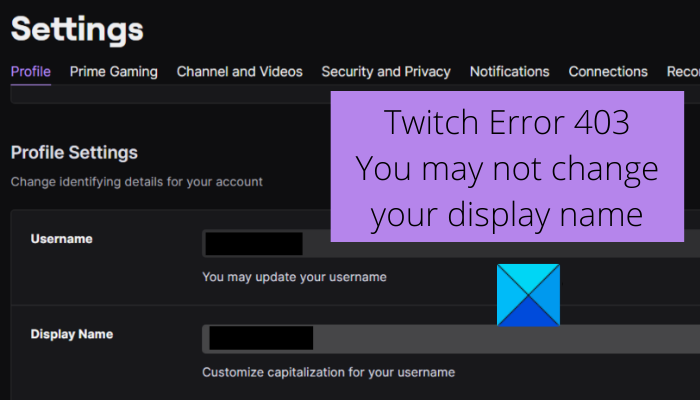
Are you experiencing error code 403 on Twitch? Twitch is one of the most popular live video streaming services worldwide. Millions of users use it, each with a different display name and profile. However, many Twitch users have reported getting error code 403 when trying to change their display name in Twitch settings. The error code comes with the message, “You may not change your display name.”
This error can result from several factors. In any case, you can follow this guide to remove the error. We’ve outlined several methods to fix the error without hassle. Before trying the fixes, let us understand the scenarios that might trigger the error.
What causes error code 403 on Twitch?
Here are the potential causes of error code 403 on Twitch:
- It could be because Twitch services are down at the moment. Hence, make sure all Twitch services are currently operational.
- This error could be caused by a temporary glitch with your account. If that’s the case, try logging out and then logging back into your Twitch account to fix the error.
- Corrupted cache and cookies can also trigger this error. To fix it, delete browsing data, including cache and cookies.
- In some cases, browser extensions you have installed can also trigger the error. So, try disabling the problematic extensions to fix the error.
Based on the above scenarios, you can apply a suitable fix to resolve the error.
Twitch Error 403, You may not change your display name
To fix Twitch error 403 “You may not change your display name”, try the below fixes:
- Check Twitch server status.
- Log out, then login back to your Twitch account.
- Clear browser cache and cookies.
- Disable problematic browser extensions.
- Try some other web browser.
- Contact Twitch Support.
1] Check Twitch server status
Before trying advanced troubleshooting methods, check Twitch’s current server status. You might see this error if Twitch servers are overloaded or experiencing other issues. So, make sure the related Twitch services are operational. You can check the same on status.twitch.tv.
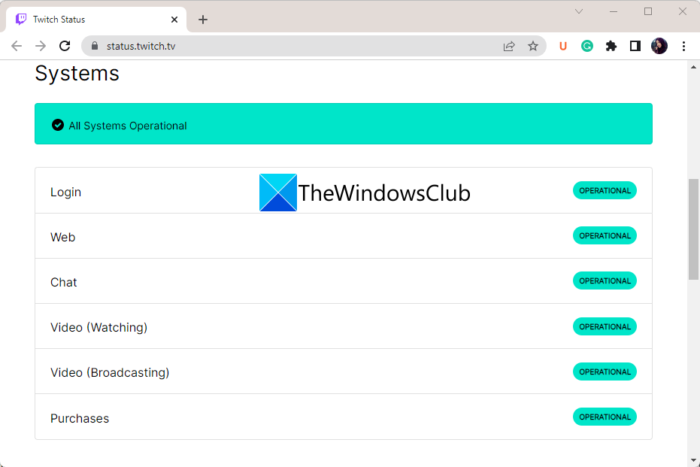
You can also use a free server-status detector tool to find out the current server status of Twitch. If the services are down, you will have to wait for some time to get the error fixed by Twitch. However, if all the Twitch services are operational, you can move on to the next potential fix to resolve the error.
See: Fix Twitch Error 1000 when playing a video.
2] Log out, then login back to your Twitch account
The error could be triggered by a temporary glitch with your account. In that case, try logging out of your account and then logging back in to fix the error. This fix has worked for multiple affected users and might work for you as well. Try that and see whether the error is resolved. Here’s how to do that:
- First, open Twitch in your web browser and click the avatar icon in the top-right corner.
- Now, select the Log Out option to sign out of your account.
- Once you are logged out of your account, click on Log In option and then enter your Twitch credentials to sign in to your account.
- Once you are logged back in, try changing your display name and see if the error is gone.
If you still see the same error, move on to the next fix.
Read: Fix Twitch Freezing, Buffering, and Lag Issues.
3] Clear browser cache and cookies
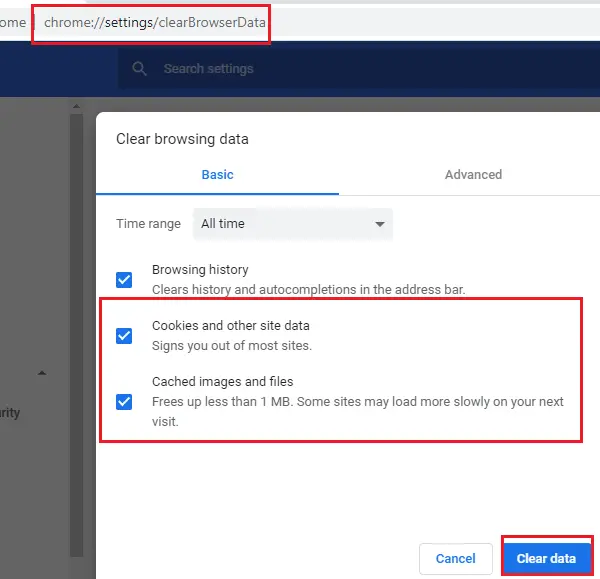
The next step to fix the error is to delete your browser cache and cookies. Accumulated cache and cookies that are corrupted could be a reason for the 403 error on Twitch. Clearing your browsing data should help fix the error.
Here are the steps you can use to clear browser cache and cookies in Google Chrome:
- Firstly, go to Google Chrome and tap on the three-dot menu option present in the top-right corner.
- Now, click on the More tools > Clear browsing data option.
- Next, set the Time range to All time.
- Then, enable the checkboxes associated with options called Cookies and other site data and Cached images and files.
- After that, press the Clear data button to delete the browsing data.
- Once done, relaunch the browser and open Twitch to check whether the error is gone.
In the case of Mozilla Firefox, follow the steps below to clear the cache and cookies:
- First, open Firefox and click on the three-bar menu option present in the top-right corner.
- Now, click on the History > Clear recent history option.
- Next, select Everything as the Time range to clear.
- After that, enable Cookies and Cache checkboxes, and other browsing data that you want to delete.
- Then, press the OK button to clear the data.
- Lastly, relaunch Firefox and check if the 403 error on Twitch is resolved or not.
Here are steps to clear browsing data in Microsoft Edge:
- First, open Edge and select the Settings and more > Settings option.
- Now, go to the Privacy and services section and locate the Clear browsing data section in the right-side pane.
- Next, press the Choose what to clear button and then select All time as the Time range.
- After that, enable the Cookies and other site data and Cached images and files checkboxes.
- Then, hit the Clear now button to delete selected browsing data.
- Once done, relaunch the browser and go to Twitch to check whether the error is resolved.
If the error persists, try the next potential fix.
Read: How to clear Opera Cache, Cookies, Browsing History.
4] Disable problematic browser extensions
You might also receive this error due to a problematic web extension in your web browser. Hence, if the scenario is applicable, you can try disabling problem extensions and then see if the error is fixed. To disable extensions in Chrome, follow the below steps:
- Firstly, go to Chrome and click on the three-dot menu option.
- Now, click on the More tools > Extensions option.
- Next, disable the toggle for any suspicious extension.
- After that, open twitch and try changing your display name.
If you use Firefox, here are the steps to disable browser extensions:
- Firstly, open Firefox and tap on the three-bar menu button.
- Next, from the options that appear, click Add-ons and themes.
- Then, find the problematic add-ons and disable their toggles.
- Now, go to Twitch and see whether the 403 error is fixed.
You can also disable extensions in other web browsers. If this works for you, great. If not, try a few more fixes.
See: How to create, share and use Clips on Twitch?
5] Try some other web browser
If the above methods didn’t work for you, try using some other web browser like Opera GX. Or, you can simply switch from one web browser to another to check which one works for you. If you are currently using Firefox, try using Chrome and vice versa. This is a workaround and has worked for many affected users.
If the error persists, we have one more fix for you. So, move on to the next potential solution.
Read: Fix Twitch Mods Tab not loading.
6] Contact Twitch Support
In case you continue getting the same error even after trying all the above fixes, you can try contacting the support team of Twitch. Just visit the Twitch support page and submit your query. The professionals will assist you and guide you to fix error code 403 on Twitch.
Hopefully, this guide helps you fix Twitch error code 403 and you are able to change your display name.
Now read: Fix Twitch Error 6000 successfully once and for all.
Can I change display name on Twitch?
Yes, you can change your display name on Twitch once every 60 days. Go to your profile icon on Twitch and select Settings. Then go to the Profile tab and scroll down to the Profile Settings section. Here, you can see a field named Display Name. Click the Edit button, then enter the new display name you want to keep. Finally, click Save Changes to apply the new display name.
Why is my username unavailable on Twitch?
If a username is unavailable on Twitch, the most likely reason is that another user already has it. Other reasons could be that the username breaks the ToS or is trademarked, or that the username is abandoned.
