Taking screenshots in Windows is very easy because the operating system has a built-in tool for doing just that. However, that program is quite limited in what it can do; therefore, some users prefer to download third-party software to achieve their desired results. There are many free screenshot tools on the web right now for Windows 11/10, and the majority are more than competent. But today, we’re going to talk about one, and it’s called Sniptool – Screen Capture.
We’ve been using it for a few days now and can say for certain that it has worked quite well since then. The user interface is easy to understand, and all the important features are located in an easy-to-reach section. In terms of the settings are, well, there’s not much to talk about there than the ability to change the hotkey to take screenshots. Yes, other similar tools have a broader settings area, but what we have here is something simple, and as such, we can understand why the settings section is underwhelming at best.
Sniptool Screen Capture Tool for Windows PC
Capturing and annotating screenshots can be a major issue without the right tools. However, with Sniptool, the problem is resolved instantly.
Sniptool is a screen capture tool that lets you capture one or more selected areas on your desktop and save it with optional annotations. You can combine multiple captures into one canvas and add text, arrows, number bullets and shapes to annotate your capture. There is also an option to blur parts of the image for privacy. Your finished screenshot can be saved as JPG or PNG file.
1] Taking a screenshot

It’s very easy to take screenshots with this software. After launching, the user should see four options. Click the first to take a screenshot of a particular area on your screen or the second to take a screenshot of the entire region, if that’s the idea from the start.
Once the user has selected the area, everything around the image will get blurred out. After that, then, it’s time to take the next step, and this is an important one, you see.
2] Open Editor
One of the important features of screenshot tools is the ability to edit taken images. We can confirm that Sniptool offers this option, which is accessible through one of the four buttons on the main screen.
After taking the screenshot, click the Open Editor icon to get started. From here, the user will have a range of tools at their disposal, so let’s discuss them a bit further, shall we? Good.
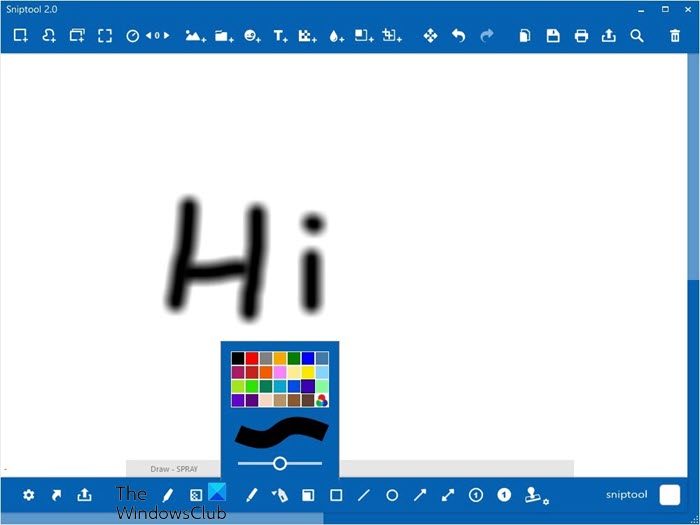
3] Edit your screenshot
Now, after opening the image in the editor, one should take a look at both the top and bottom section. There are several icons available, and all of them were designed to spice up your image. For example, users can add text to images with relative ease, and not only that, but also arrows, circles, or any other shape they can draw.
We also appreciate the fact that users can blur any section of an image with just a few mouse clicks. Not every screenshot tool comes with this feature, so we’re quite happy that its developer didn’t omit it – because it’s very important for bloggers.
Sniptool also includes a GIF Recording mode, new editing options, and a dock mode.
Overall, we have a great deal of affection for Sniptool Screen Capture. Currently, it’s our primary tool, and it will likely remain so for a long time to come. You can download Sniptool directly from the official website when you are ready.