If the Reliability Monitor isn’t showing data or updating in Windows 11/10, it usually means the RACAgent task isn’t running, or its logs are corrupted. This post will show you how to fix the issue.
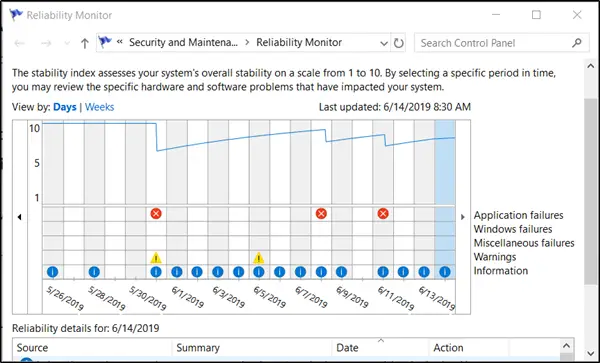
Reliability Monitor is a built-in tool found in Windows systems. It provides a day-to-day snapshot of your system’s health. Thus, it warns you of any impending disaster before your system finally breaks down. Although useful, the Reliability Monitor can sometimes behave erroneously. For instance, it may fail to show any updates even when they are installed.
Reliability Monitor not showing data, updating or working in Windows 11
When you open the Reliability Monitor application and find that it is not showing data or does not generate any reports, here’s what you need to do to fix the issue.
- Enable Data Collection for Reliability Monitor
- Reset Reliability Monitor
The above actions, when executed, will fix the Reliability Monitor.
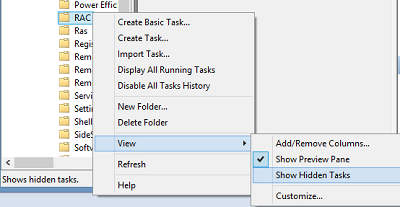
1] Enable Data Collection for Reliability Monitor
Reliability Monitor uses data provided by the RAC Agent scheduled task. Reliability Monitor will display a Stability Index rating and specific event information 24 hours after the system is installed.
The RACAgent scheduled task runs by default after the operating system is installed. If disabled, it must be enabled manually from the Task Scheduler snap-in for Microsoft Management Console (MMC). So you need to enable Data Collection for Reliability Monitor.
2] Reset Reliability Monitor
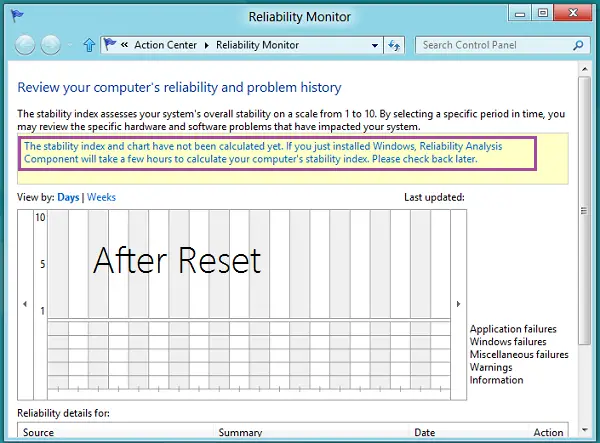
If the Reliability Monitor is not working, you may Reset the Reliability Monitor and see if it helps.
If the Reliability Monitor is already open, then close and reopen it. After a reset, the Reliability Monitor may take up to 24 hours to display results again.
After you have successfully tried one of the two procedures mentioned above, the Reliability Monitor should be working properly.
