
There could be times when Windows Security or Windows Defender Quick Scan might not be working on Windows 11 or Windows 10 computers. In those cases, you can follow these tips to troubleshoot the issue. This article covers common scenarios and solutions so you can fix them in minutes.
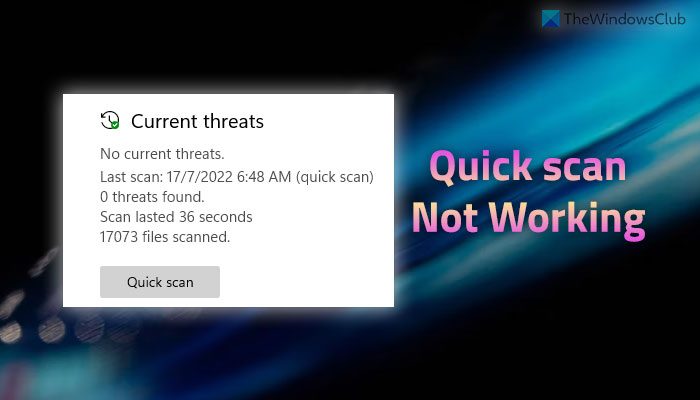
Windows Defender Quick Scan not working in Windows 11
If Quick Scan is not working in Windows Defender on Windows 11/10, follow these steps:
- Uninstall other security software
- Disable Group Policy settings
- Verify Registry files
- Restart Microsoft Defender Antivirus Service
- Run SFC and DISM tools
- Use System Restore point
To learn more about these steps, continue reading.
1] Uninstall other security software
If Windows Security or Windows Defender isn’t working properly, make sure you don’t have any other third-party antivirus app installed. If you have more than one security software installed on your computer, one of them won’t work. That is why we recommend uninstalling any third-party security program you have.
After that, you can try the other solutions below.
2] Disable Group Policy settings
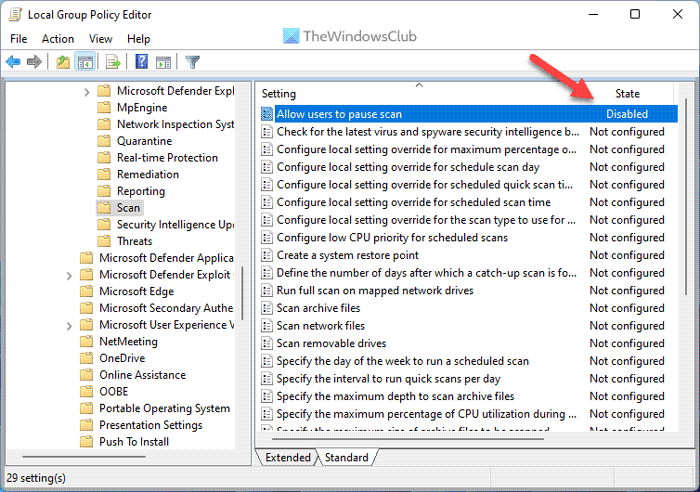
Sometimes, incorrect Group Policy settings can cause this issue. Although the Local Group Policy Editor helps you enable or disable specific features of Windows Security, an essential function might not work properly if you set things up incorrectly. That is why we recommend setting all settings to the factory defaults and checking whether the problem persists.
For that, do the following:
- Press Win+R to open the Run prompt.
- Type gpedit.msc and click the OK button.
- Navigate to Computer Configuration > Administrative Templates > Windows Components > Microsoft Defender Antivirus
- Find all the Enabled and Disabled settings here and in other included folders.
- Double-click on each setting and choose the Not Configured option.
- Click the OK button.
After you finish this step, close all windows and restart your computer.
Read: Windows Defender Offline Scan vs Full Scan vs Quick Scan explained
3] Verify Registry files
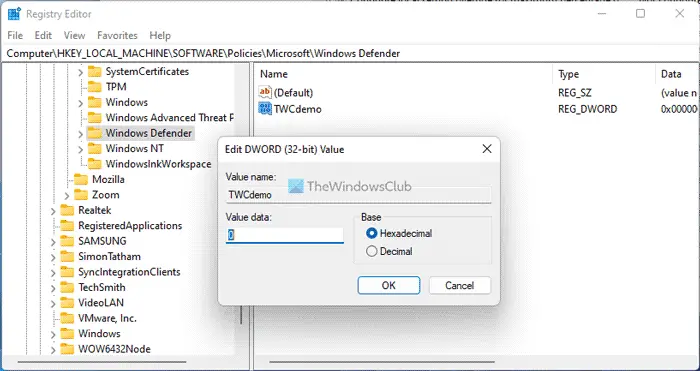
You can also enable or disable the same Group Policy settings using Registry Editor. That is why it is recommended to check the Registry files as well. If any setting is enabled, disable it there.
Precaution: It is recommended to backup Registry files before changing any value.
- Press Win+R > type regedit > press the Enter button.
- Click the Yes option.
- Navigate to this path:
HKEY_LOCAL_MACHINE\SOFTWARE\Policies\Microsoft\Windows Defender - Find all the REG_DWORD values with Value data of 1.
- Double-click on each of them and enter 0.
- Click the OK button and restart your computer.
However, if you cannot find any REG_DWROD value here, you do not need to do anything else.
Troubleshoot: Definition update issues for Microsoft Defender
4] Restart Microsoft Defender Antivirus Service
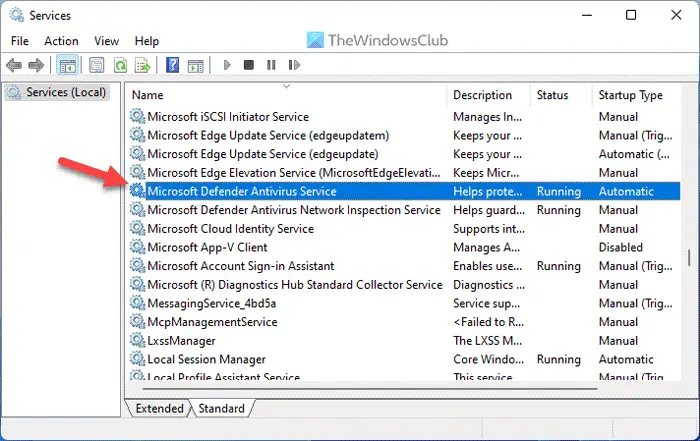
The Microsoft Defender Antivirus Service runs Windows Security on your computer. If this service is stopped, you might find interruptions while using Windows Defender. Try restarting this service to see whether it resolves the issue.
For that, do the following:
- Search for services and click on the search result.
- Find the Microsoft Defender Antivirus Service.
- Double-click on this service and click the Stop button.
- Click the Start button.
Sometimes, the Start and Stop buttons are grayed out. If so, you don’t need to do anything else, since this service is already running in the background.
5] Run SFC and DISM tools
SFC and DISM are the best utilities for fixing corrupt system files. If this issue occurs due to corrupt system files, you can get rid of it by running these tools:
6] Use System Restore point
This is probably the last thing you need to do when nothing else has worked. If you have created a System Restore point earlier, you can use that to get Windows Defender working again. Whether you use Windows 11 or Windows 10, this method works smoothly on any PC. Therefore, follow this guide to restore Windows using System Restore point.
That’s all! I hope these solutions worked for you.
Windows 11 Quick Scan stuck
If Quick Scan in Windows Defender is stuck, cancel the scan, close the security window, and restart your computer and see if that helps. Next, check Settings > Windows Update to install pending security definitions, and uninstall any conflicting third-party antivirus software. If the issue persists, clear the Windows Defender scan history cache folder located in your ProgramData directory and then try and see if it has helped.
Read: Windows Defender Start Actions not working
How do I run a Quick scan in Windows 11?
To run a Quick scan in Windows 11, open Windows Security first. Then, switch to the Virus & threat protection section on the left-hand side. Under the Current threats menu, you can find an option called Quick scan. Click this button to scan your C: drive.
Why is Windows Virus scan not working?
Several reasons could be why the Windows virus scan isn’t working on your computer. From having a second antivirus app to a corrupt system file, anything could cause this error. However, you can try the suggestions above to fix the problem on your Windows 11 or Windows 10 PC.
Read: Windows Defender Offline Scan not working.
