If you want to print to the Microsoft XPS Document Writer on a Windows 11/10 PC, here is how you can do that. The Microsoft XPS Document Writer (MXDW) is a print-to-file driver that enables a Windows application to create XML Paper Specification (XPS) document files. It allows you to create .oxps files in any program that has a print option.
How to print to the Microsoft XPS Document Writer on Windows PC
To print to the Microsoft XPS Document Writer on a Windows PC, follow these steps:
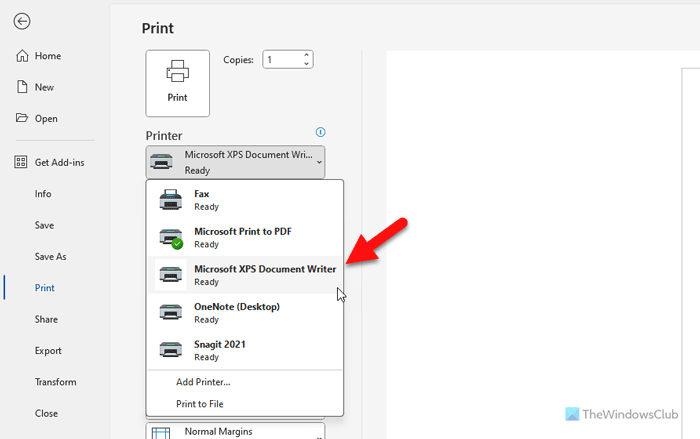
- Click on the File menu.
- Switch to the Print tab.
- Expand the drop-down list and select Microsoft XPS Document Writer.
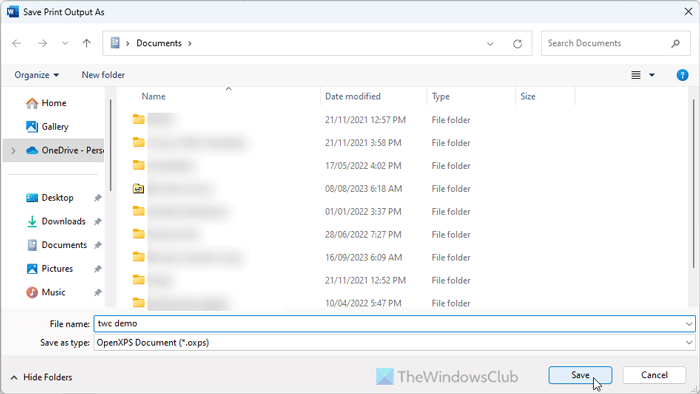
- Select all the settings as per your requirements.
- Click the Print button.
- Select a location and give it a name.
- Click the Save button.
To learn more about these steps, continue reading.
Note: We have shown this example with Microsoft Word. However, you can try it with any other program.
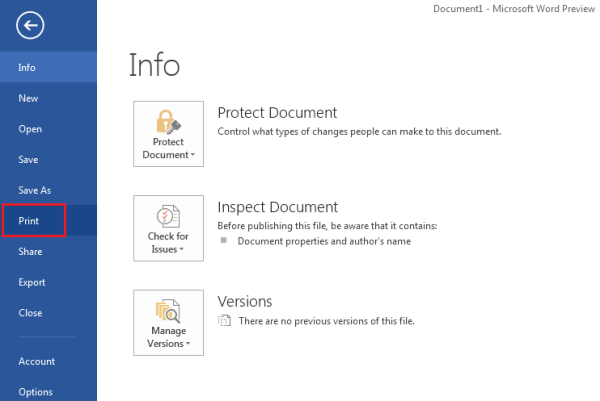
First, you need to write down the document and click the File menu. Then, switch to the Print tab. Alternatively, you can press Ctrl+P to do the same thing.
Next, you need to choose the Microsoft XPS Document Writer and change settings as per your requirements.
Click the Print button, choose a location where you want to save the file, and give it a name.
Finally, click the Save button to save the file.
However, if you use an older version of Windows, you can go through these steps:

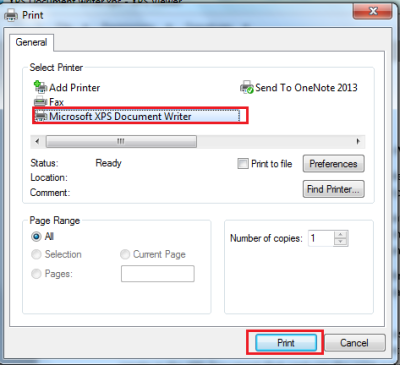
Click on the File menu of a document or a file you want to print to .xps format and then click Print.
A Print dialog box will be visible on your computer screen. From it choose Microsoft XPS Document Writer. Here, I tried this with my Word 2013 file.

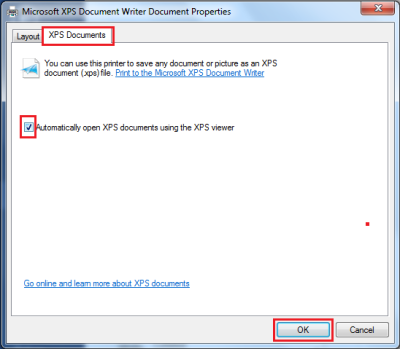
Now, to view the document using the XPS Viewer after you print it, click Preferences and then from the 2 tabs visible choose the ‘XPS Documents’ tab.
Next, check the box that says ‘Automatically open XPS documents using the XPS viewer’ if it is unchecked, and then click OK.
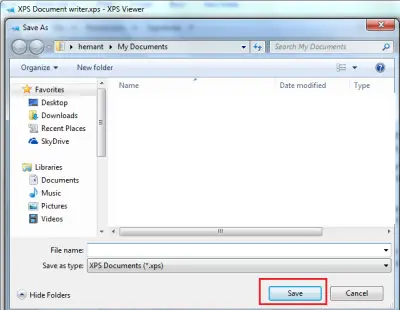
Click Print to print the document or file.
When requested, enter a file name and browse to the location where you want to save the .xps file. Click Save. Windows will save .xps files in your Documents folder by default.
If you would like to attach a digital signature to an XPS document before you send or share it, you can do so. Attaching a signature helps to identify the creator of the XPS document and prevents anyone from modifying it.
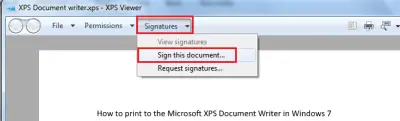
Additionally, you can also choose who can view the document and for how long by applying permissions before sharing the document.
Hope this helps.
How do I enable Microsoft XPS Document Writer?
To enable Microsoft XPS Document Writer in Windows 11/10, you need to search for turn windows features on or off in the Taskbar search box and open the respective panel. Then, tick the Microsoft XPS Document Writer checkbox and click the OK button. Let it be finished and restart your computer.
Is Microsoft XPS Document Writer the same as Microsoft Print to PDF?
No, Microsoft XPS Document Writer is not the same as Microsoft Print to PDF in terms of options, features, and workflow. The main difference is that the former one saves files in OXPS format whereas the latter one saves the file in PDF. Apart from that, PDFs are PostScript whereas XPS files carry XML patterns.
Read:
- Fix Microsoft XPS Document Writer not working
- How to Add or Remove Microsoft XPS Document Writer Printer.