PGAdmin is a crucial tool for managing PostgreSQL databases, but users frequently encounter problems when installing, launching, or connecting to it on Windows 11. In this post, we will see what you can do if PGAdmin is not installing, working, or opening in Windows 11.

Fix PGAdmin not installing, working or opening in Windows 11
PgAdmin often fails to install or launch on Windows 11 due to a combination of strict Windows file permissions and software conflicts. The app struggles to create or access its configuration files in the %APPDATA% folder, which can be blocked by Windows Security or corrupted from a previous install. Additionally, conflicts arise if the required PostgreSQL service isn’t running, if the default port is blocked, or if there are issues with the bundled installer package. These factors typically result in permission errors, connection failures, or abrupt application closures.
If PGAdmin is not installing, working, or opening in Windows 11, follow the solutions below.
- Clear the pgAdmin Configuration Directory
- Install pgAdmin separately
- Temporarily Configure Windows Security
- Verify and Manually Start PostgreSQL Service
Let us talk about them in detail.
1] Clear the pgAdmin Configuration Directory
PGAdmin stores its operational data, like your settings, connection details, and session files, in the %APPDATA% folder. If these files become corrupted, get locked by a previous crash, or have incorrect permissions, the application cannot start properly. Deleting the entire folder forces pgAdmin to generate a brand new, clean set of configuration files upon its next launch, effectively giving it a fresh start.
Follow the steps below to do the same.
- Ensure all pgAdmin processes are closed via the Task Manager.
- Open File Explorer, paste %APPDATA%, and click Enter.
- Delete the entire pgAdmin folder within.
Relaunch pgAdmin. It will recreate fresh configuration files.
Finally, check if the issue is resolved.
Read: How to install SQL Developer in Windows 11
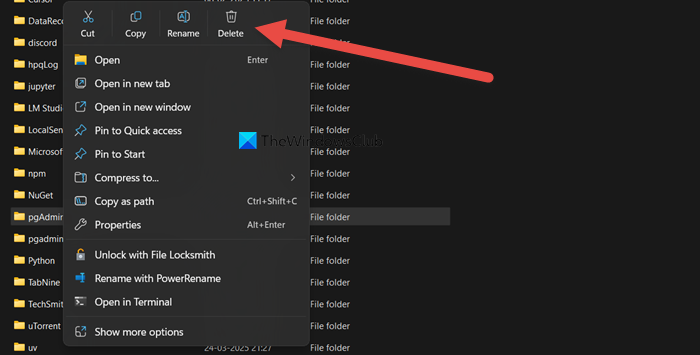
2] Install pgAdmin separately
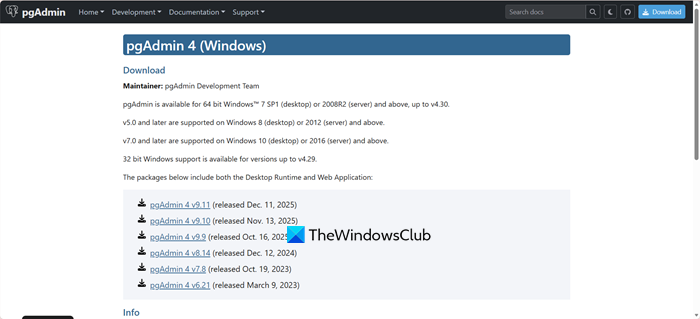
The standalone installer is a complete package that installs pgAdmin with all its required components in one tested setup, avoiding dependency issues or version conflicts. Using it as an administrator ensures the installer has permission to write to protected folders without problems.
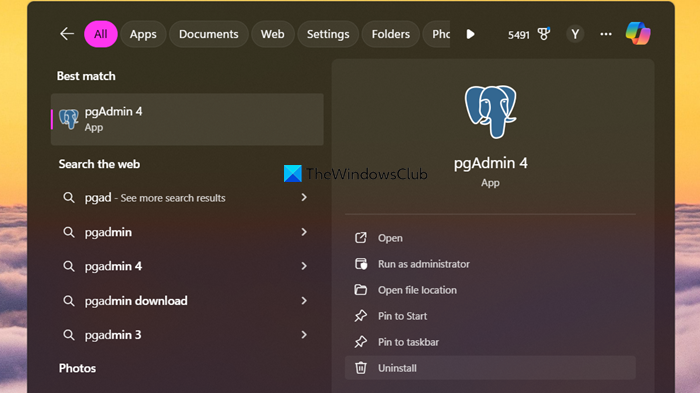
If you have a faulty installation, uninstall pgAdmin, search for pgAdmin in the Start Search, and then click on Uninstall if it’s already installed.
Download the standalone pgAdmin installer directly from the official website pgadmin.org.
Run the installer as an administrator. This method is often more reliable than the one bundled with PostgreSQL.
If you are unable to uninstall PGAdmin, uninstall PostgreSQL completely, then install PGAdmin, and finally install PostgreSQL.
Finally, you need to check if the issue is resolved.
Read: How to install Oracle Database on Windows 11
3] Temporarily Configure Windows Security
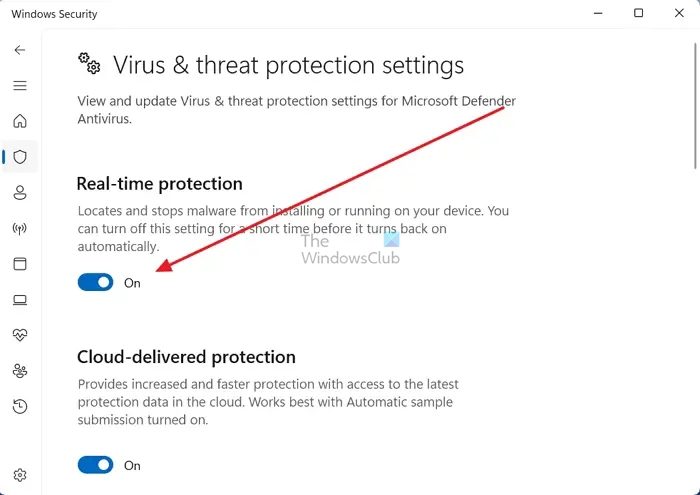
Windows Defender’s real-time protection may sometimes block legitimate installations, and Controlled Folder Access can prevent applications from writing to protected directories. Both can interfere with pgAdmin’s setup. Temporarily disabling these features allows the installer to place all necessary files and complete the configuration. Be sure to turn them back on right after to keep your system secure.
You need to open Windows Security, and then go to Virus & threat protection. Go to Virus & threat protection settings, and click on Manage settings.
Now, temporarily turn off Real-time protectionand Controller folder access.
Retry the installation or launch pgAdmin. Hopefully, it will launch without any errors
Remember to turn these security features back on afterward; if not, your system will be vulnerable to viruses and malware.
Read: Difference between SQL and MySQL : Comparision
4] Verify and Manually Start PostgreSQL Service
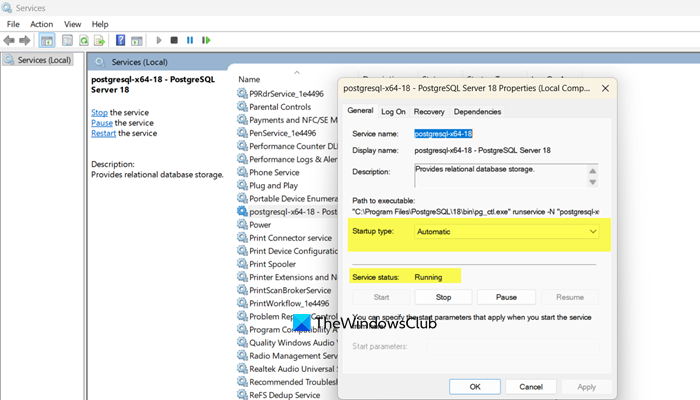
If PGAdmin is not starting, we need to check some PostgreSQL Services, as it is only a management interface that connects to the separate PostgreSQL database service running in the background. If this service is stopped or fails to start automatically, pgAdmin will be unable to connect and will fail. Manually starting the service in Windows ensures the required database engine is active, allowing pgAdmin to establish a connection and function properly.
Open Run (Win + R), type services.msc, and hit Enter. In the Services window, locate the postgresql-x64-xx service (where “xx” is your version). If its Status is Stopped, right-click it and select Start. You can also set Startup type to Automatic.
After configuring the service, start PGAdmin and see if that resolves the issue.
Hopefully, with these solutions, your issue will be resolved.
Read: Best Open Source SQL Clients for Database Management
Can PostgreSQL be installed on Windows 11?
Yes, PostgreSQL can be installed on Windows 11. The official PostgreSQL project provides installers certified by EDB specifically for Windows, including versions compatible with Windows 11, which bundle the server, pgAdmin, and other tools for a straightforward setup.
Read: Oracle SQL Developer crashing on startup on Windows computer
Is PostgreSQL port 5432 or 5433?
By default, PostgreSQL uses port 5432. However, if you install a second instance or if port 5432 is already in use on your system, the installer may automatically select the next available port, which is often 5433. You can confirm or change this port during installation or in the server’s configuration file.
Also Read: Install and configure SQL Server Management Studio.