Microsoft Office certainly makes it easier to password-protect your important documents like Word, PowerPoint, and Excel by making use of its password protection and permission features. This helps you prevent tampering with your documents, workbooks, and presentations. In this tutorial, let us learn to protect Office documents with a password and permissions.
How to password-protect Office files like Word, Excel and PowerPoint
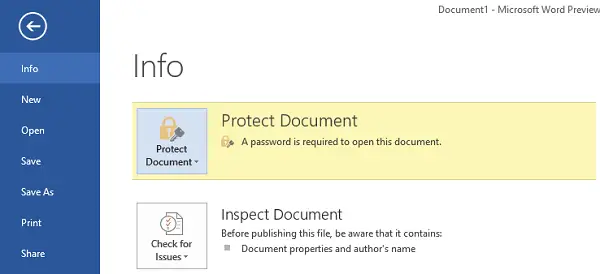
Open the desired Word document you would like to password-protect and click on the ‘File’ option. Towards the right-hand side you will observe a ‘Protect Document’ option.
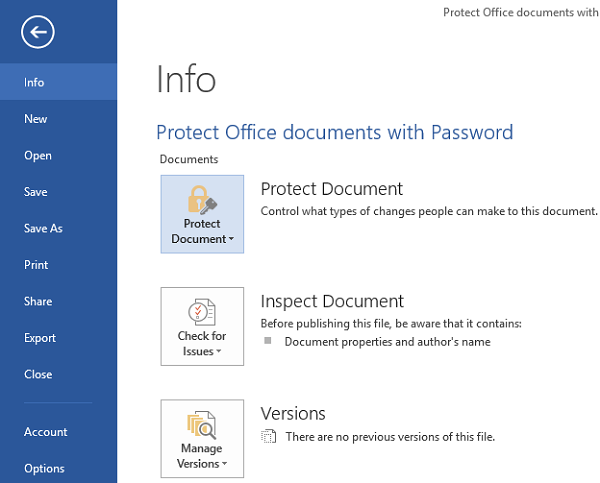
Click on the option and you will find new options highlighted below
- Mark as Final
- Encrypt with Password
- Restrict Editing
- Restrict Permission by People
- Add a digital Signature
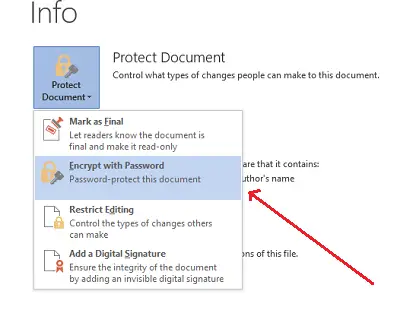
Our special interest lies in protecting the document with a password of choice i.e. Encrypting it with a password. So, select the second option from the above.
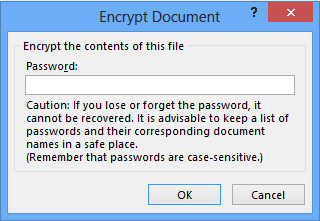
When done, the Encrypt Document dialog box appears. In the Password box, type a password. Remember, if you forget your password, Microsoft will be unable to retrieve it, so keep a list of your passwords and their corresponding file names in a safe place.
Choose a strong password and then select OK.
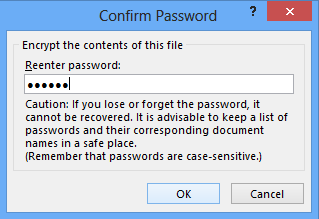
Re-enter your desired password in the Confirm password window and click OK.
You will now see the new required permissions.
Hope that helps!

Now read: How to Password Protect PDF File in Word.
If you need to stronger protection for your files and folders you may try one of these Free File Encryption Software for Windows.