
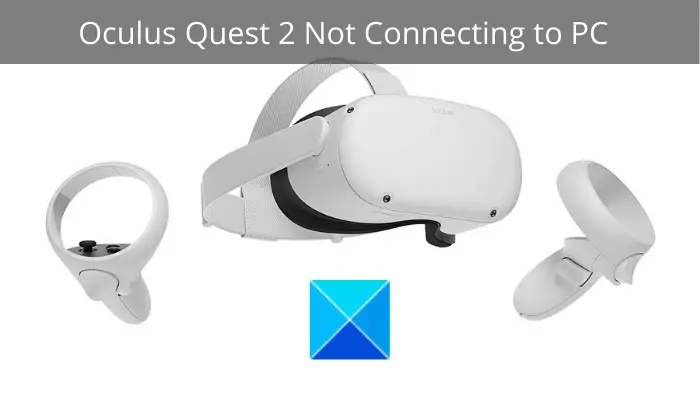
Are you unable to connect your Meta Quest to your Windows PC? Here is a full guide to help you if Meta Quest is not connecting to your Windows 11/10 PC. Meta Quest (earlier called Oculus Quest) is an advanced all-in-one virtual reality (VR) system and headset developed by Facebook Reality Labs. It lets you enjoy and play VR games and have the best immersive experience. Now, many users have reported being unable to connect their Quest device to their PC. If you are one of the affected users, try the fixes mentioned in this post to resolve the issue.
Why won’t my Meta Quest connect to my PC?
There are can be different reasons for individuals being unable to connect Meta Quest to their PCs. Here are some potential causes for this issue at hand:
- If your PC doesn’t meet the minimum requirements to support Quest devices, you will experience the problem at hand. So, the first thing you should do is ensure your PC meets the minimum specifications to run Meta Quest.
- The problem might be caused by the USB cable or port. So, do check your USB port and cable, and make sure all the connections are secure.
- If your Meta Quest app is not updated, you are likely to encounter the issue. If applicable, update your Meta Quest app.
- The issue might also occur because of outdated device drivers, especially USB and graphics drivers. If this applies, you can update your device drivers to the latest version and then try connecting Quest to your PC.
- If you have just switched from Meta Quest Air Link (wireless) to Meta Quest Link (wired) connection, you might face the problem at hand. So, disable Air Link from your Quest settings to fix the issue.
- Your USB power-save settings may be causing the issue. So disable your USB power-saving settings to fix the issue.
- If there are issues with your Quest device, such as corrupted data, it might not connect to a PC. So, factory reset your Quest device to resolve the issue.
Based on the above scenarios, you can try a suitable solution to fix the issue.
Why is my Meta Quest Link not connecting to my PC?
If your Oculus / Meta Quest Link software is not working on your PC, the problem might be caused due to outdated graphics, USB, and other system drivers. Also, if your system is not up to date, you are likely to encounter the problem at hand. Other than that, a higher resolution, enabled in-game overlay feature, enabled Public Test Channel, or system file corruption can also cause this issue.
Meta Quest not connecting to PC
If you are unable to connect your Meta Quest (Oculus Quest) to your Windows 11/10 PC, then try the following suggestions:
- Check your system specifications.
- Check your USB Cable/Port.
- Update the Meta Quest software.
- Log out, then log in to your account again.
- Perform a power cycle on your devices.
- Update device drivers.
- Disable Air Link.
- Turn off USB Power Saver Settings.
- Factory Reset your Quest device.
1] Check your system specifications
The first thing you should do to fix the problem is make sure your PC meets the minimum requirements for running Meta Quest headsets. If it doesn’t, you will have to upgrade your PC to use Quest without any issue.
On Windows 11, the recommended system requirements for running Meta Quest via Meta Horizon Link are a modern Intel i7 or AMD Ryzen 7 processor, an NVIDIA RTX 20‑series or newer / AMD Radeon RX 6000‑series GPU, 16 GB DDR4 RAM, Windows, and at least one USB‑C port with a high‑quality 3‑meter cable for stable data and power transfer
If your PC meets the minimum specifications and you are still unable to connect the Quest to your PC, try the next fix.
2] Check your USB Cable/Port
You require a high-quality USB cable to connect Quest to your PC, especially one that supports data and power simultaneously. So, ensure that you have connected the device to your PC via a suitable USB cable. Also, make sure the USB port you connected your device to is working properly. Try connecting Quest to a different USB port and see if the device connects properly. Additionally, make sure all connections to the PC are secure and proper.
If there is no issue with your USB cable or port, move on to the next potential fix.
Read: Fix Meta Quest Mic not working on Windows PC.
3] Update the Quest software
This problem may occur if you are using an outdated version of the Meta Quest desktop application. Hence, if the scenario is applicable, you need to update your software to the latest version. To do that, simply visit the app’s official website and download the latest version. After that, run the installer, and it will install the latest version of the app on your PC. Then try reconnecting the Quest device to your PC and see if the issue is fixed.
If you are using the latest version of Meta Quest Link software and still facing this issue, try the next potential fix.
4] Log out, then log in to your account again
It is a workaround and has worked for many affected users. You can try logging out of the Quest software, then logging back into your account. If there is a glitch with your account or some other temporary issue with the software or Quest device, this might fix it.
5] Perform a power cycle on your devices
Sometimes, a simple restart is all you need to do to fix a problem. You can try the same in this case as well. Just close the Meta Quest software and turn off your PC and Meta Quest. Now, unplug your devices from the main switch and wait for about a minute. After that, turn on your PC and Meta Quest like you normally do. Then, try connecting Quest to your PC and see if it connects or not.
6] Update device drivers
Outdated and faulty device drivers can also cause this problem. You need updated USB and graphics drivers for this device to work smoothly. Hence, make sure all your device drivers, including graphics and USB drivers, are up to date to avoid such issues on your PC.
There are multiple ways to update your device drivers on Windows 11/10 PC. The most common and reliable method is to go to the official website of your device manufacturer and search for the latest drivers. Then, download and install the drivers on your PC. Another easy method to manually update your device drivers is via Windows Settings, Device Manager, etc., on Windows 11/10. You can also use free third-party driver updater software to download and install your drivers automatically.
After updating your device drivers, restart your PC, then try connecting Quest to your PC to see if it works.
If your drivers are up to date and you are still facing the issue, move on to the next potential solution.
See: Meta Quest Software not installing on Windows 11.
7] Disable Air Link
If you have just switched from the wireless Air Link to a wired Link connection, you might encounter this issue. Hence, try disabling Air Link to fix the issue. Here is how to do that:
- Firstly, go to your Quest Settings and navigate to Experimental.
- Now, disable the Air Link option.
- Next, try connecting Quest to your PC and see if the issue is fixed or not.
8] Turn off USB Power Saver Settings
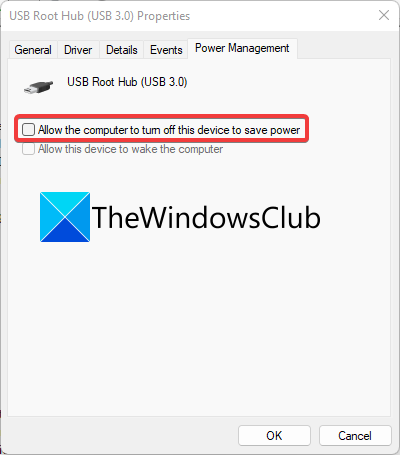
You can also try disabling the USB power saver settings to fix the issue. Here is how to do that:
- Firstly, press Win+R to open the Run dialog box and enter devmgmt.msc in it.
- Now, in Device Manager, expand the Universal Serial Bus controllers category and right-click on your USB Input Device.
- Next, from the context menu, select the Properties option.
- After that, go to the Power Management tab and disable the checkbox associated with the Allow the computer to turn off this device to save power option.
- Lastly, try reconnecting your Quest device to your PC and see if the problem is fixed now.
9] Factory Reset your Quest device
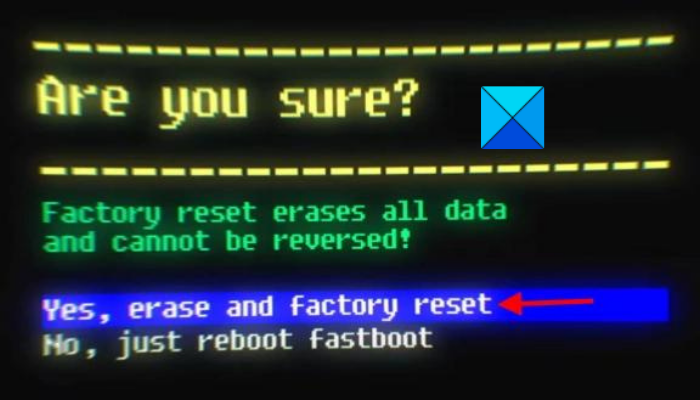
The last resort to fix the problem is to factory reset your Quest device. If the problem at hand is caused by an issue within the Quest, this should fix it. However, do note that this will delete your game data, so you will need to download your games afterward.
Here are the steps to factory reset your Quest:
- Firstly, press and hold the power and volume buttons until the device turns on.
- Now, highlight the Factory reset option and then tap on the power button to choose it.
- Next, choose the Yes, erase and factory reset option and press the power button to start the reset process.
Hopefully, you can connect the Meta Quest device to your PC now.
Now read:
