You may see Network Policy Server denied access to a user, Event ID 6273 if the NPS (which acts as a RADIUS server) has rejected their authentication request. This commonly happens when trying to connect to a secure network resource like Wi-Fi or a VPN. The event is definitely recorded in the Windows Server event logs as Event ID 6273 or 6272, signaling a failed connection attempt that administrators must investigate. In this post, we will see what you can do to fix this issue.

Network Policy Server denied access to a user, Event ID 6273
An NPS access denial (Event ID 6273) happens when a user’s connection request does not meet the rules set by the NPS network policies. Common reasons for this include entering the wrong username or password, the user account being disabled or locked, the user not being part of an Active Directory group with permission according to the policy, or the connection attempt not meeting specific conditions, such as time restrictions or the correct NAS Identifier. It can also occur if the computer trying to connect does not meet the Network Access Protection (NAP) policies, if those are set up.
If the Event Viewer log says Network Policy Server denied access to a user, Event ID 6273 you can follow the solutions mentioned below.
- Verify User Credentials and Account Status
- Check NPS Network Policy Conditions and Permissions
- Validate the RADIUS Client Configuration
- Ensure Correct Network Access Permission is Set
Let us talk about them in detail.
1] Verify User Credentials and Account Status
The most common cause is simple human error in entering a password or an account that is locked, disabled, or has expired. This is the fastest issue to check and resolve.
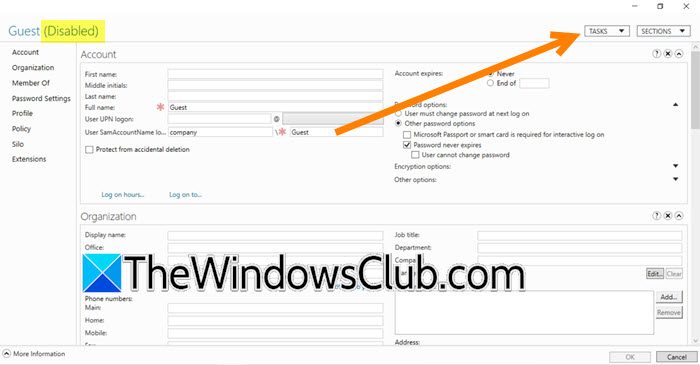
Ask the user to carefully re-enter their password, making sure that Caps Lock is turned off. Then, on your Domain Controller, open Active Directory Users and Computers and locate the user’s account. Right‑click the account and select Properties, then navigate to the Account tab.
Now, if you see Disabled written in front of the user, click on the drop-down menu called Tasks, and select Enable.
Once the user is enabled, ask the client to reconnect to the server.
2] Check NPS Network Policy Conditions and Permissions
The user may be authenticating correctly, but they might not belong to the user group specified in the Network Policy Server (NPS) policy that grants access. Additionally, their connection may not meet other policy conditions, such as the name of the VPN concentrator or the time of day. To check this, you need to follow the steps mentioned below.

- On the NPS Server, open the Network Policy Server console.
- Navigate to Policies > Network Policies.
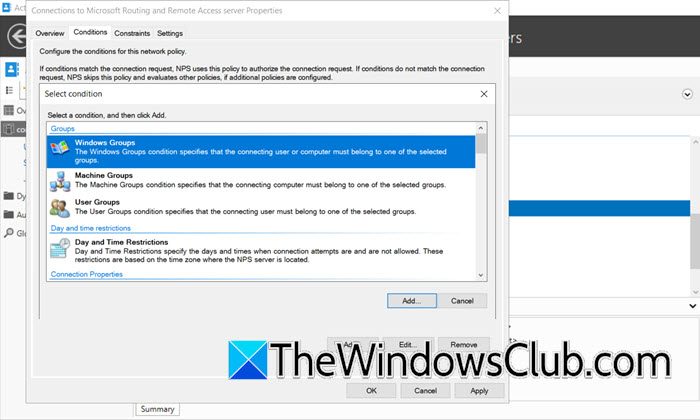
- Double-click on the policy that you expect to grant access (e.g., “VPN Access Policy”).
- Go to the Conditions tab. Check if the user is a member of the Windows Groups specified here. If not, add their group.
- Review all other conditions, such as NAS Identifier, Day and time restrictions, and Health Policy.
- Go to the Settings tab, and under RADIUS Attributes, ensure that Access-Accept is specified.
After making the changes, check if you still encounter the issue.
3] Validate the RADIUS Client Configuration
If the network access server (NAS), such as a Wi-Fi access point or VPN gateway, is not properly configured as a RADIUS client in NPS, NPS will reject its authentication requests. A common reason for this issue is a mismatch in the shared secret. You can share the steps mentioned below to validate the RADIUS Client Configuration.
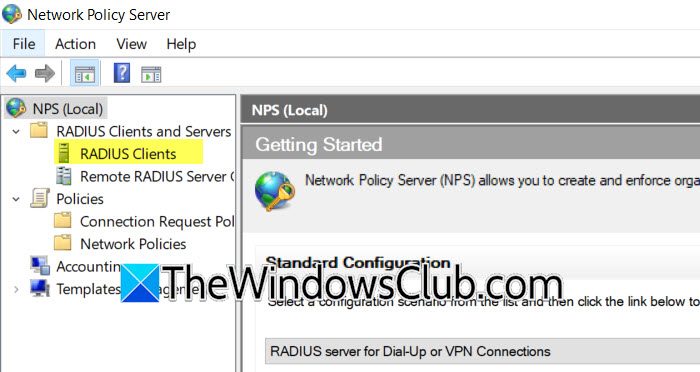
- In the Network Policy Server console, expand RADIUS Clients and Servers and select RADIUS Clients.
- Locate the RADIUS client (the NAS device IP/hostname) that is forwarding the request.
- Right-click it and select Properties.
- Verify that the Shared Secret matches exactly what is configured on the NAS device (it is case-sensitive).
- If in doubt, update the secret in NPS and then update the configuration on the NAS device to match.
Finally, check if the issue is resolved.
4] Ensure Correct Network Access Permission is Set
In Active Directory, each user’s dial-in properties have a setting that can explicitly control access. This can be set to “Deny access,” overriding any permissions granted by NPS policies. Follow the steps below to do the same.
- On your Domain Controller, open Active Directory Users and Computers.
- Now, locate the user’s account, right-click it, and select Properties.
- Go to the Dial-in tab.
- In the Network Access Permission section, choose the option to Control access through NPS Network Policy. This is the recommended setting, as it allows your NPS policies to determine access decisions. Alternatively, you can select Allow access” for a specific user as a test.
- Click OK.
Hopefully, with the help of these solutions, you will be able to resolve the issue.
Read: Enable or Disable Network Discovery or Sharing in Windows 11
Why can’t I connect to WiFi or VPN at work?
If you receive an “access denied” message when trying to connect, it is usually due to a login issue. First, ensure that you are entering the correct password. If your password is accurate but you are still facing issues, your network account may have been temporarily locked or disabled by the system administrator. In this case, you will not be able to access the network until your account is reactivated.
Read: Your computer can’t connect to the remote computer
How do I fix a Network Policy Server denial for a user?
To resolve this issue, an administrator should check if the user’s account is active and unlocked in Active Directory. They should also verify the NPS policy to ensure the user belongs to the correct security group. Checking the Windows Event Log on the NPS server for “Event ID 6273” will provide the specific reason for the denial, like a wrong password or failed policy conditions.
Also Read: Wireless Network not detected when using VPN on Windows PC.