
It is quite frustrating when you open Word only to find that every formatting button, menu option, and toolbar command is greyed out and unresponsive. Fortunately, this is a common Windows-based issue that can be resolved easily. In this article, we will see what to do if Microsoft Word toolbar is greyed out.
Microsoft Word Toolbar greyed out
If the toolbar is greyed out or unresponsive in Microsoft Word, execute the following solutions.
- Force a license refresh
- Rename the corrupted Normal. dotm template file
- Disable all Word add-ins in safe mode
- Remove document-specific restrictions and protection flags
- Reset the entire ribbon and Quick Access Toolbar
- Disable compatibility mode flags on the Word executable
Let’s get started with the troubleshooting guide.
1] Force a license refresh
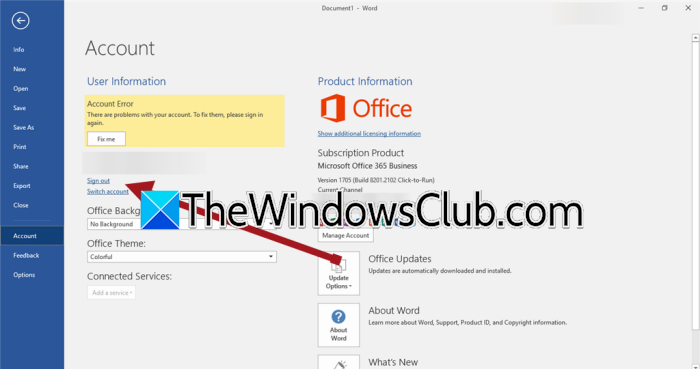
An expired or unverified license is one of the main reasons Word locks its toolbar. This is because Microsoft disables editing tools until the user’s subscription is confirmed. In such situations, resigning terminates the cached license token and forces a fresh authentication handshake with Microsoft’s activation servers. To do the same, see the steps given below.
- Launch MS Word and click on File, and select Account.
- Navigate to User Information, click on the Sign Out link, and close Word completely by checking Task Manager to ensure no WINWORD.EXE processes remain.
- Once done, reboot the device, and then re-launch Word, signing back in with the same Microsoft 365 account credentials.
Wait 1-2 minutes for the licensing server to revalidate, then check whether the toolbar is active. If not, see the next solution.
2] Rename the corrupted Normal. dotm template file
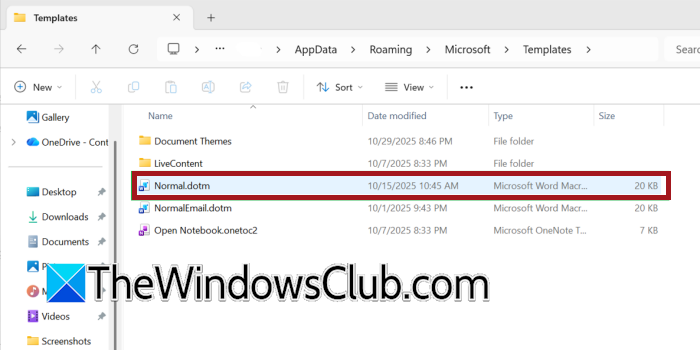
The Normal.dotm file stores all ribbon customizations, Quick Access settings, and macro defaults. Word will fail to load UI elements correctly if this file becomes corrupted and therefore greys them out. It is advised to rename the file so that upon restart, Word will automatically generate a brand-new Normal. dotm with factory-default settings.
- Close Word completely, and click Win + R to open the Run dialogue box.
- Type %AppData%\Microsoft\Templates, press Enter, and there, locate the Normal. dotm file.
- Right-click on it, select the Rename option, and change the name to Normal. old.
After the procedure, check the toolbar, and if it is still greyed out, proceed to the next solution.
3] Disable all Word add-ins in safe mode
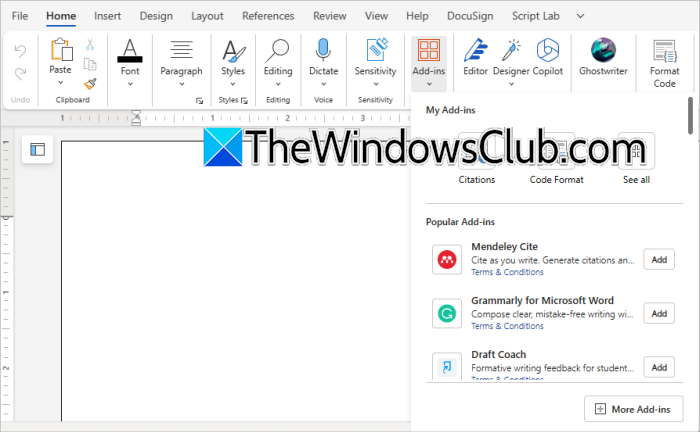
Third-party add-ins often inject code into Word’s ribbon, and a buggy or outdated one can disable native controls. Starting Word in Safe Mode loads the application with zero add-ins. If the toolbar works there, users can find out the culprit by disabling them one at a time. After identifying it, they can disable that problematic add-in so that Word’s UI no longer receives conflicting commands.
- Hold down the Ctrl key and double-click the Word shortcut to launch it in Safe Mode. Alternatively, click Win + R, type winword / safe, and press Enter.
- If the toolbar works normally, go to File, click on Options, and select Add-ins. Navigate to the bottom of the window, change the Manage drop-down to COM Add-ins and click the Go button.
- Unselect all the add-ins, click OK, and close Word.
Restart Word normally, and if the toolbar is fixed, go back to the Add-ins list and re-enable one add-in at a time until the culprit is found. If disabling add-ins does not restore the toolbar, proceed to the next step.
4] Remove document-specific restrictions and protection flags
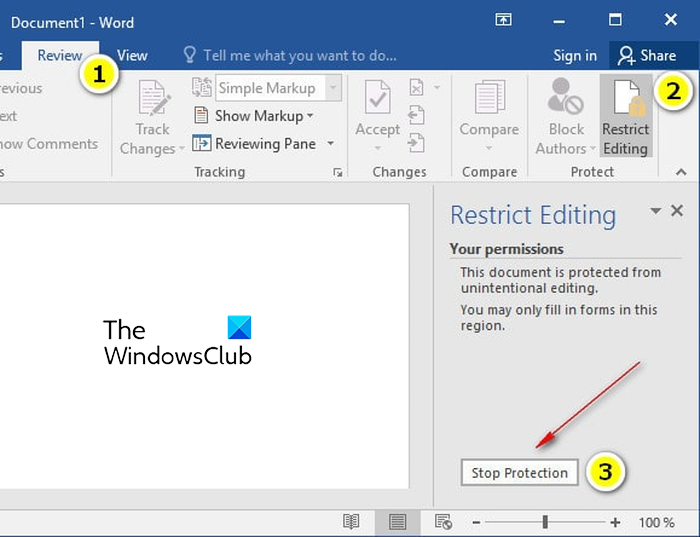
Certain document-level settings like Mark as Final, Restrict Editing, or Protected View are designed by Microsoft to intentionally grey out editing tools to prevent unauthorised changes. So, to resolve the issue, we need to clear these flags to tell Word that the file is no longer in a protected state and can be accessed. Moreover, saving a copy creates a new file that inherits none of the old restriction metadata.
- Open the affected document, go to File, and then click on Info.
- Click on the Protect Document button, and if Mark as Final is highlighted, click it again to unmark it.
- Next, go to the Review tab, select Restrict Editing, and in the pane that opens, click Stop Protection. As a fallback, go to File, click on Save as option, choose a new folder and a new file name, and save it.
- Close the original and open the copy.
The toolbar should now be editable. If not, go to the next solution.
5] Reset the entire ribbon and Quick Access Toolbar
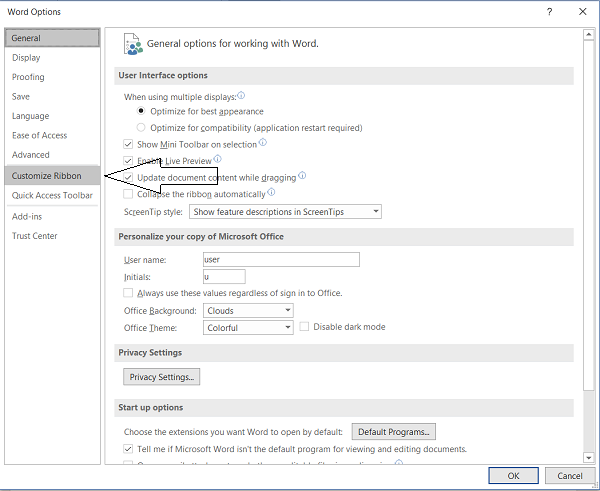
The XML data that defines the ribbon layout and Quick Access buttons can become malformed, causing Word to fail to render interactive controls. If we reset the function, it will delete all customized ribbon and QAT data and restore Microsoft’s factory default configuration for both elements. To reset the Customized Ribbon, follow these steps.
- Right-click anywhere on the greyed-out ribbon and select Customize Ribbon option.
- In the dialogue that appears, look in the bottom right corner and click the Reset dropdown button.
- Choose the Reset all customisations option, click Yes, and then switch to the Quick Access Toolbar.
- Click the Reset button again, then select Rest only Quick Access Toolbar, and click OK.
Restart Word, and the factory ribbon should now be fully active. If resetting the ribbon and Quick Access Toolbar did not yield results, see the next solution.
6] Disable compatibility mode flags on the Word executable
Legacy compatibility settings can trip up Word’s ability to load its modern interface. Moreover, files we download from the Internet are often automatically blocked by Windows. This forces Word to open those files in Protected View, and consequently, nearly every editing tool is greyed out and unavailable. Therefore, we need to disable them on the Word executable.
- Launch File Explorer and navigate to the following location.
C:\Program Files\Microsoft Office\root\Office16\ - Right-click WINWORD.EXE, select Properties, and go to the Compatibility tab.
- Navigate to the Compatibility mode, untick the Run this program in compatibility mode for box, and any boxes under Settings.
- Click Apply and OK.
Now, reopen Word and the file, and hopefully, the toolbar should be fully enabled.
How do I unlock the toolbar in Word?
To unlock a collapsed ribbon, press Ctrl+F1 or double-click any tab to restore the buttons permanently. To unlock the Quick Access Toolbar, right-click it and select Show Quick Access Toolbar. If individual toolbars are locked, right-click the ribbon area and uncheck the Lock the Toolbars option. To learn more, check out the article mentioned above.
Read: Word Read Aloud isn’t available because something is preventing it from starting.
How to reset taskbar settings?
To restart taskbar settings, restart File Explorer via Task Manager. For a deeper reset, go to Settings > Personalization> Taskbar to toggle options off/on. Alternatively, users can also delete the Taskbar registry key and then reboot the device.
Also Read: Merge and Center button is not working, missing, greyed out Excel.
