In this post, we will show you how to view, manage, disable, install or remove Office Add-ins in Word, PowerPoint, Outlook, Excel, etc Office programs.
Microsoft Office is a powerful suite of software designed to improve your productivity. However, every user can improve it by simply installing one of the many available add-ins. Today, we’re going to discuss how to install, enable, and disable Office add-ins with ease. Just bear in mind that we will be focusing on Microsoft Word as our example, since the procedure is very similar across the apps.
Manage Add-ins in Office programs
Now let us see how to view, manage, disable, install or remove Add-ins in Word, PowerPoint, Outlook, Excel, etc, Office programs. As mentioned, we are taking Word as an example but the procedure is similar for others.
1] How to install an Office add-in
OK, so the first thing you will want to do as a Microsoft Word user is to fire up a document, and navigate to Insert.
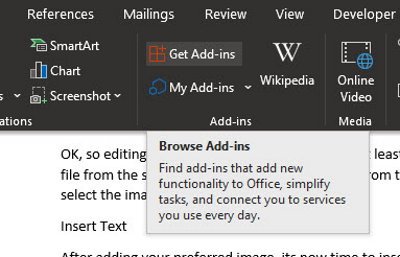
From here, please click the section labeled Get Add-ins, and wait for a new window to appear.
This window contains all the add-ins available for the tool. In the left pane, the user can select a category or search for a specific add-in. From the right, that is where folks should see a list of add-ins. Just find the ones you want and click the button that reads “Add”.

After adding an add-in, it should now appear in the Ribbon.
Click it to see more options or launch it for use.
2] How to remove an Office add-in
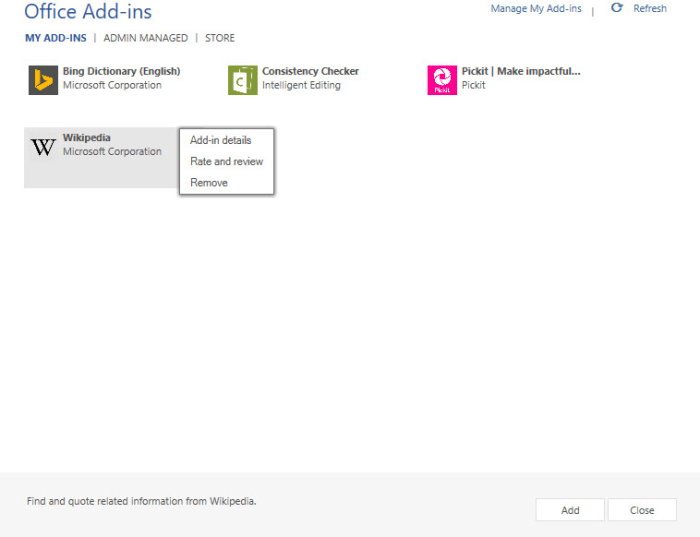
OK, so to get rid of the add-in, right-click the icon on the Ribbon and select Remove Add-in. Another way to do this is by returning to the Insert tab, and right under Get Add-ins, there is another button called My Add-ins. Go ahead and click on it, please.
From the window that appears, the user should see all installed add-ins. Right-click on either, then select Remove to get rid of.
Read: We can’t start this add-in because it isn’t set up properly in Office
Manage Com Add-ins in Office programs
1] How to install COM Add-ins in Office
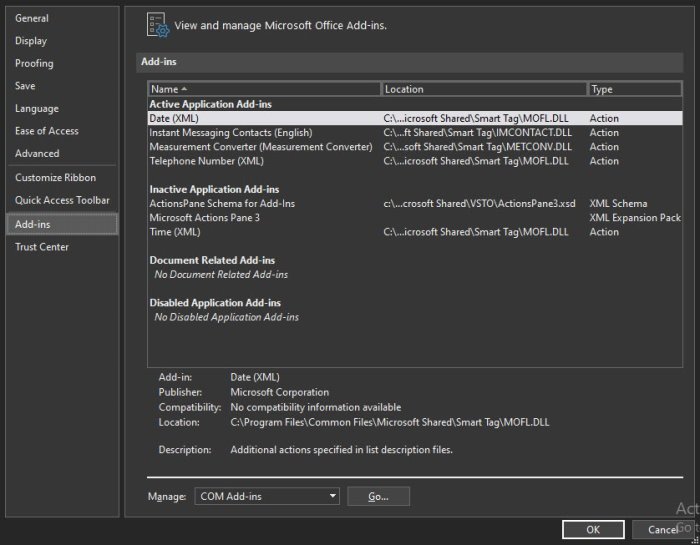
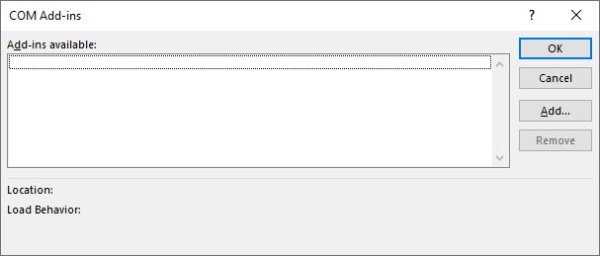
Installing one of these is pretty simple and straightforward, though not on the same level as regular add-ins. You see, the user will be required to click Files, then Options to open the options menu. Look for the words, Add-ins. Select it, then choose COM-Add-ins, and hit the button that says Go.
Finally, click Add in the section that appears, and search for the add-in stored on your hard drive. Once you’re done with it, follow the procedure again, but this time, hit Remove instead to delete it.
2] Disable all Office add-ins
Have you ever felt the need to disable all add-ins in a single go? You may find yourself wanting to do this because of corruption or something else.
Go to File > Options > Trust Center, then select Trust Center Settings. From the new section, select Add-ins, and under (COM, VSTO, and Other), move along and tick the box beside Disable All Application Add-ins.
Bear in mind that disabling it could prevent your office suite from performing certain tasks.
Read: Add-in error, This add-in could not be started in Excel
Unable to install Add-ins in Excel
If you’re unable to install add-ins in Excel, first ensure you’re running Excel as an administrator, then check that the add-in file is compatible with your version (e.g., .xlam or .xla). Clear any disabled items by going to File > Options > Add-ins > Disabled Items and re-enable them. If the add-in still won’t load, unblock the file by right-clicking it in File Explorer > Properties > Unblock. Finally, update Office or repair the installation via Control Panel > Programs > Office > Repair to fix any corrupted components.