Scribe AI makes the time-consuming task of creating clear and professional step-by-step guides much easier. The tool simplifies the documentation process by automatically capturing the screen actions and turning them into easy-to-follow instructions with screenshots and descriptions. Whether you are onboarding employees, showing someone how a process works, or guiding a client step by step, Scripe can make it quicker for you. In this article, we will walk through how to use Scribe AI to create efficient and polished guides in just a few clicks.
Can I use Scribe for free?
Yes, Scribe can be used for free. The free plan lets users create unlimited step-by-step guides with automatic texts and screenshots. However, features like advanced customization and export options are only available in paid plans. Now that this is clear, let’s see how to create a step-by-step guide using Scribe.
How to use Scribe AI to create step-by-step guides?
To create step-by-step guides using Scribe AI, follow the steps mentioned below.
- Sign in to Scribe AI
- Install the Scribe extension or app
- Start and stop recording
- Review and edit the guide
- Create a Page
- Share or Export
Let’s get started with this guide.
1] Sign in to Scribe AI
The first thing we need to do is sign in to Scribe AI. So, navigate to scribehow.com, click on the Generate Step by Step Guide for Free button if you are a new user, sign up using your email address, or connect with a Google or Microsoft account. If you already have an account, simply click on the Log in options and enter your credentials. After signing, you’ll land on the Scribe Dashboard, where we will begin creating the first guide.
2] Install the Scribe extension or app
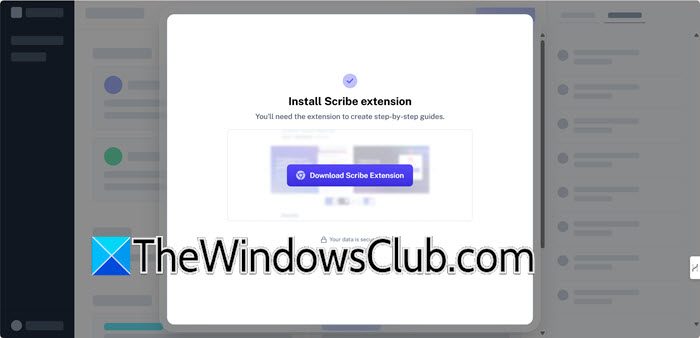
Scribe will prompt the users to install its Chrome extension, which is necessary to capture the browser-based workflows. To use the desktop or mobile version, you must have a subscription plan, so if this is not a complicated scenario for you, let’s see how to capture the screen and stop the recording.
- Once logged in, click on the Add to Chrome button, and confirm the installation process by selecting the Add extensions option. After it is successfully installed, the Scribe icon will appear in the top-right corner of the browser toolbar.
- For the desktop version, select the Download Scribe Desktop recorder, and choose the Operating system. However, you would need Scribe Pro for this.
- Follow the setup wizard, click the Install button, and launch the app from the Start Menu once the installation process is completed.
Now, log in using the same credentials as your web account.
3] Start and stop the recording
The next step to begin creating the step-by-step guide is to capture the screen using Scribe, and for that, follow the instructions mentioned below:
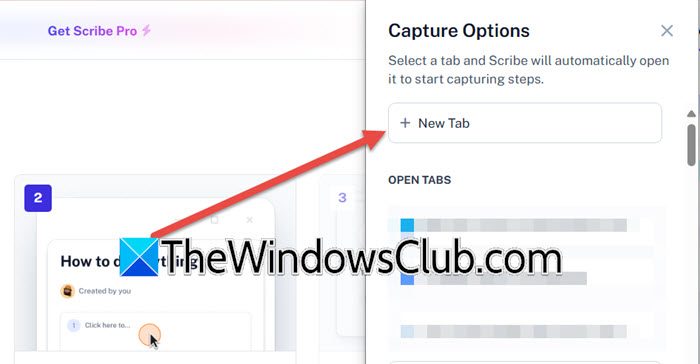
- Click on the +New button, select the Capture a Scribe option, and click on the New tab option or click on one of the existing tabs.
- Next, go through the process you want to document. For example, demonstrating how to fill out a form, setting up a user account, or generating a report, and such like. As you perform each step, Scribe will automatically capture each action, including clicks, keystrokes, and key transactions.
- After you have completed the process, navigate to the Show Controls box and select the Complete Capture option.
Scribe will automatically stop recording and begin processing the steps.
4] Review and edit the guide

After recording the screen, Scribe will generate a draft guide that will include screenshots of each step and text instructions that will explain all the steps as well as shows where they would need to click. Now users can edit the guide to add or change step descriptions, and remove unnecessary steps by clicking on the Delete button in the red box just above it. Moreover, users can blur or highlight sensitive information in a screenshot as well as rearrange the steps accordingly. There are options available to add custom branding, titles, notes, and section headers in the editing panel.
Read: How to enable and use Rewrite AI in Notepad on Windows 11
5] Create a Page
Creating a Page in Scribe allows users to organize multiple Scribes into a single cohesive document. To create a Page, follow the steps mentioned below:
- On the dashboard, click on the New button, and select the Create a Page button.
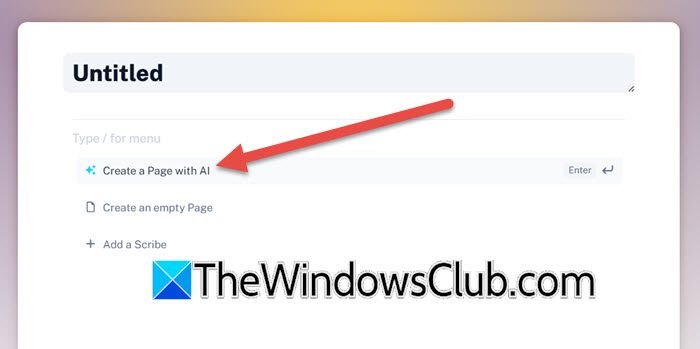
- Provide a title for the Page, and then select any one option from the three available on the screen- Create with AI, Create an empty page, and Add a Scribe.
- To add an existing one, click on Add a Scribe and search for the name of the Scribe.
- Set whom to share it with using the drop-down beside the Scribe, add headings, include annotations, and then save it.
This will categorize all the Scribes.
Read: How to use Napkin AI to turn Text into Graphics
6] Share or Export
If you are all done with the scribe, it looks good, and you are ready to share it with others, you can do it in three different ways. Users can either share it as a link, export it as a PDF, HTML, or markdown file, or use the embed code to insert the guide into the website or knowledge base. Here’s how to do the same:
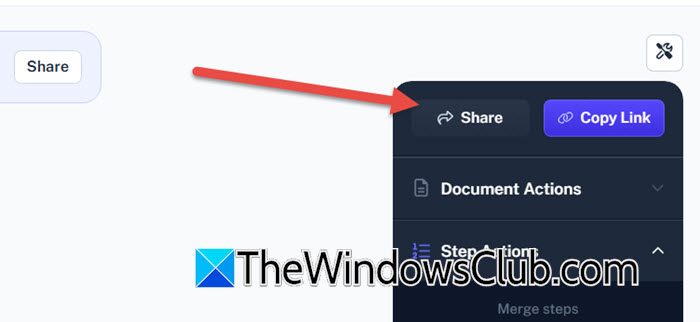
- Open the Scribe you want to share, and click on the Share button.
- Now, either copy the generated link and share it, or enter the email ID addresses of the team members or clients, and set the permission to only view or edit before sending it.
- To add the scribe to the website, use the Embed option to generate an iframe link, and paste the link into the company wiki. Alternatively, users can also export the scribe in PDF, HTML, and Markdown files and share it via email or upload it to the shared devices.
That’s all you need to know to create a guide in Scribe.
Read: How to use Freepik AI Image Generator
What is the guide me feature in Scribe?
The Guide Me feature in Scribe provides an interactive walkthrough to help users follow a step-by-step process within their browser. It ensures accuracy by highlighting actions like where to click, speeds up task completions, and builds users’ confidence. It allows users to stay focused by guiding them directly in their workflow without needing to switch tabs or documents.
Also Read: How to use Suno AI to create Songs free.