
In the past, most streaming platforms did not allow users to save live streams to their servers, but that has changed. Twitch, one of many such platforms, has had this feature for some time now, but not everyone knows how to use it. The Twitch feature in question is called Video on Demand, or VOD for short. This allows users to save their streams for viewers to watch them soon after the stream has ended. Now, this feature may not be enabled by default, which is why this article exists.
We must say that this task does not take much effort to complete from start to finish, and that is largely due to Twitch’s easy-to-understand design.
How to save Live Streams on Twitch
If the Twitch platform is not automatically saving your recently ended live streams for others to view, do not worry; we have the information you need.
- Open the Twitch website
- Log into your Twitch account
- Go to Creator Dashboard
- Take a step to the Stream section
- Enable Video on Demand
1] Open the Twitch website
To begin, you must first navigate to the official Twitch website. Type the URL into your web browser’s address bar, then press Enter.
2] Log into your Twitch account
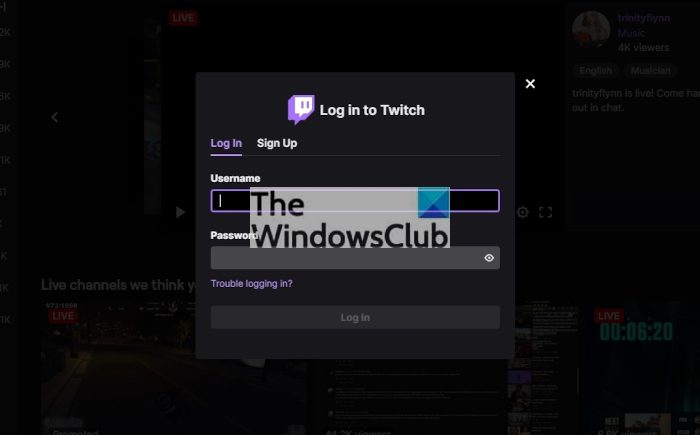
The next step to take here is to log in to your Twitch account. To do this, please click the Log In button at the top-right of the homepage. From there, type your username and password, then complete the task by hitting the Log In button at the bottom.
3] Go to Creator Dashboard
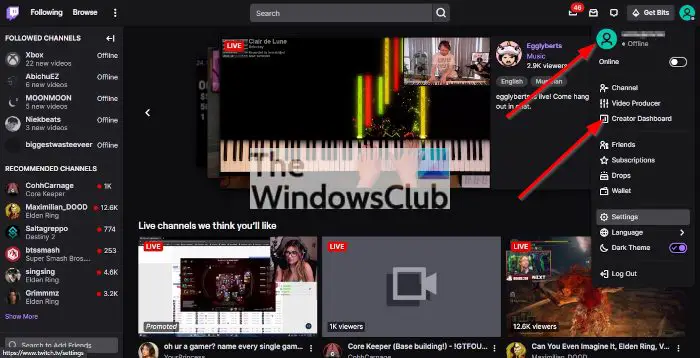
After you’ve logged into your account, the next step is to click on your profile picture to reveal a dropdown menu. From there, you must select Creator Dashboard to move on to the next area.
4] Take a step to the Stream section
Once the Creator Dashboard is opened, please look to the left pane, and click on Settings. After that, select Stream to showcase a new section to the right.
5] Enable Video on Demand
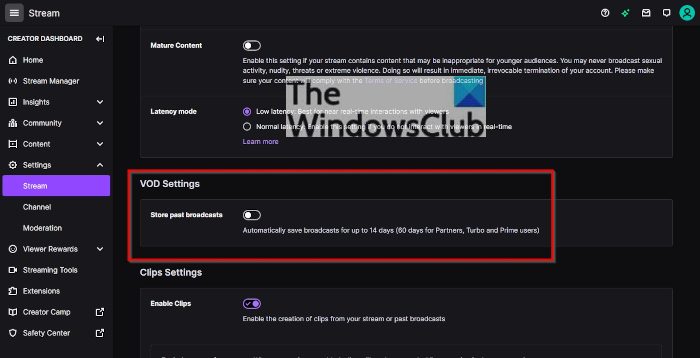
Finally, scroll down until you reach VOD Settings. From below it, click the toggle button next to “Store past broadcasts”. From now on, Twitch will automatically store all streams without any effort on your end.
How to save Twitch live streams to your hard drive
In addition to saving your recent live streams to Twitch itself, you can also save these files to your hard drive.
- Open Twitch.tv
- Open the Channel section
- Go to Edit Videos
- Download the video you want
1] Open Twitch.tv
If you haven’t already, please visit www.twitch.tv via your web browser of choice, then log-in right away.
2] Open the Channel section
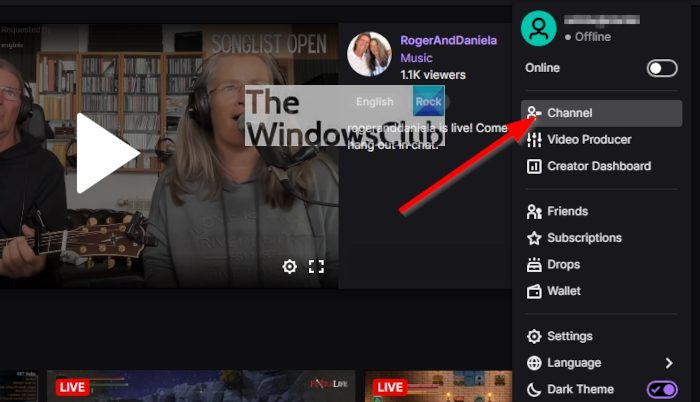
Next, click your user avatar to open the dropdown menu. From that menu, then, please click on Channel.
3] Go to Edit Videos
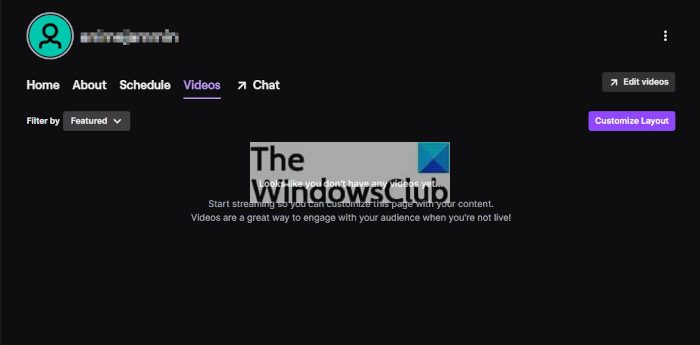
Once you’ve fired up the Channel area, click the Video tab, then select Edit Videos in the top-right pane.
4] Download the video you want
You should now see a list of your videos saved on Twitch. To download, please click on the video, then select the vertical dots to the right. Finally, you should see a dropdown menu appear. Click on the Download button from the menu and that’s it, you’re done.
Read: Fix Twitch Error 6000 successfully
What is Twitch used for?
Twitch is a web platform that allows users to watch their favorite broadcasts via live or pre-recorded streams. Folks who use Twitch usually broadcast live streams of video games they like to play, and in most cases, the broadcast includes audio commentary from the player.
What is live streaming?
OK, so live streaming is when a video is sent over the internet in real time without being recorded and stored in advance. A typical live stream you might be used to is news reports on TV and live content on Twitch, YouTube, and many others.
