In this post, we will show you how to resolve Merge Conflicts in Git. Git allows developers to create branches from the main codebase to make independent changes. These changes can then be merged into the existing code. This enables teams to work in parallel without waiting for others to complete their tasks.
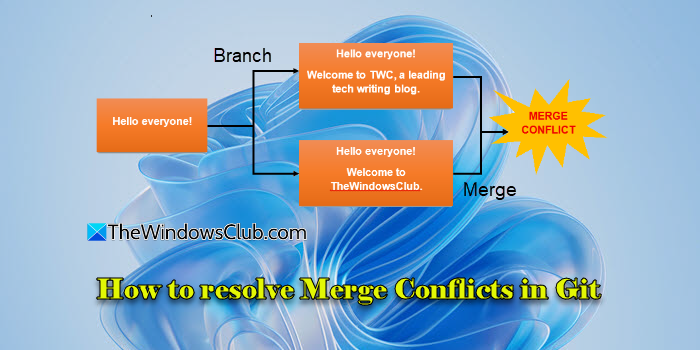
However, merge conflicts can occur if the same parts of code are changed in different branches. Git cannot always resolve these conflicts on its own. In such cases, you need to step in and fix them manually.
How to resolve Merge Conflicts in Git
There are several ways to resolve Merge Conflicts in Git, depending on your workflow, tools, and comfort level. You can resolve them directly in the terminal using Git commands, use a text editor like VS Code, or rely on GUI tools such as GitHub Desktop, Sourcetree, or GitKraken. Let us understand how merge conflicts happen and how to resolve them with the help of a simple example using Git and Visual Studio Code (VS Code).
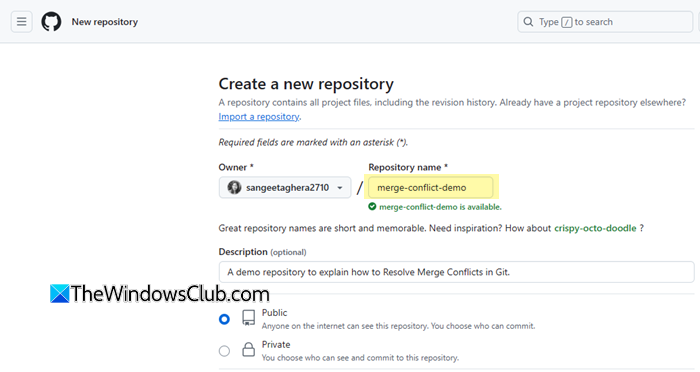
Go to your GitHub account and create a new repository with a README.md file. Let’s name this repo merge-conflict-demo.
In the next commit (on the main branch), edit the README.md file and add some text content. Commit the changes.
Note: It’s not required to edit the README.md after creating the repository. The purpose of this step (here) is to simulate a change on the main branch so that a conflict can later occur when merging different branches that also modify the same file.
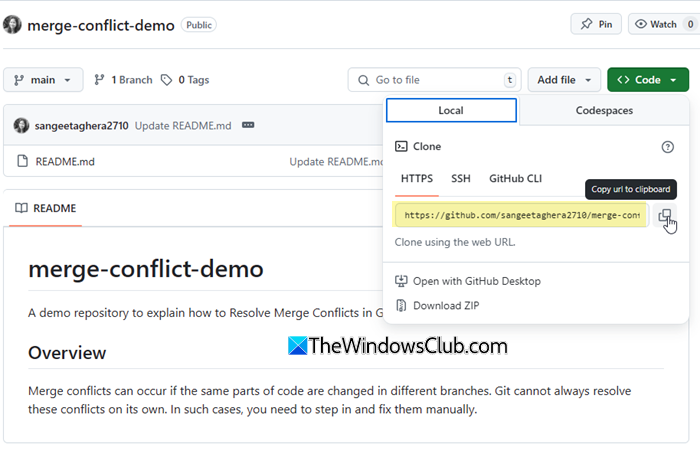
Go to Code > Local and copy the repo’s HTTPS link.
Next, create a directory on your local computer. Name it something like TWC_Git_Merge_Demo. Open this directory in VS Code, launch the terminal (three dots > Terminal > New Terminal), and clone the GitHub repo using:
git clone https://github.com/sangeetaghera2710/merge-conflict-demo.git
Next, navigate into the cloned repo, and create a new branch named feature1:
cd merge-conflict-demo
git checkout -b feature1

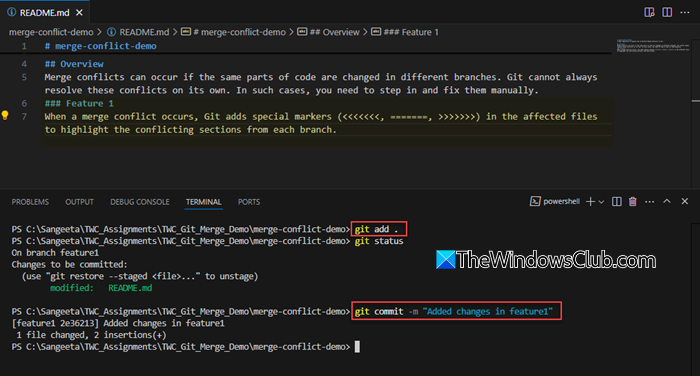
Add some text to the README.md file, then stage and commit the changes:
git add .
git commit -m "Added changes in feature1"
In this example, we have used git add . instead of git add README.md
git add . stages all changed files, while git add README.md stages only the specified file. Also, git status is used to display the current state of the working directory and staging area.
Next, switch back to the main branch and create another branch named feature2:
git checkout main
git checkout -b feature2
Now edit the same README.md file, but add a different line of text. Again, stage and commit:
git add README.md
git commit -m "Added changes in feature2"
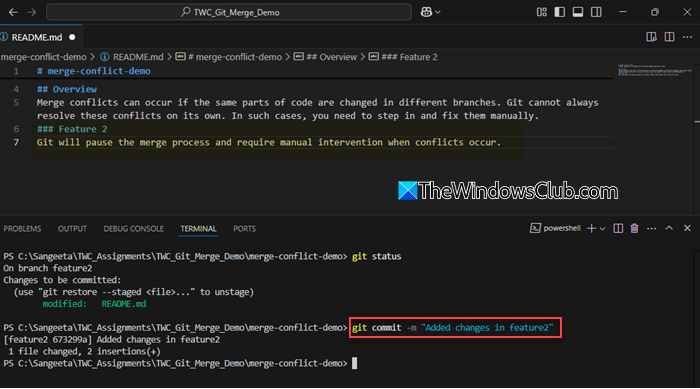
Now switch back to the main branch and merge feature1 into it:
git checkout main
git merge feature1
This merge should complete without any conflicts.
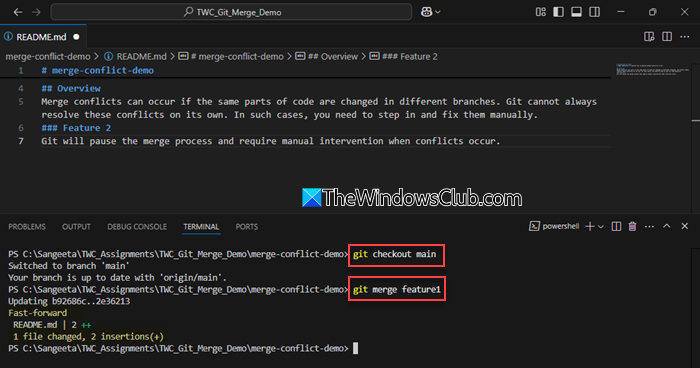
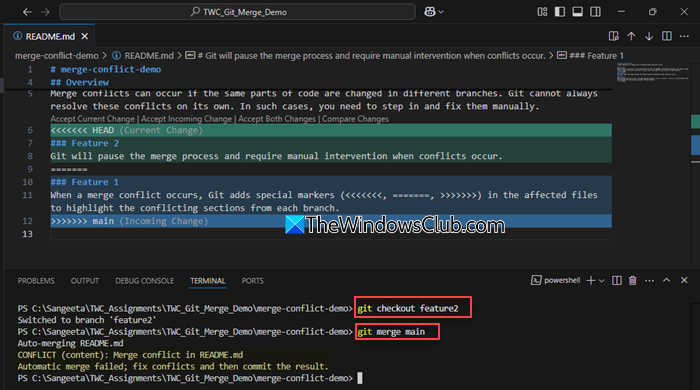
Next, switch to the feature2 branch and merge the updated main into it:
git checkout feature2
git merge main
This time, a merge conflict will occur in the README.md file since both branches modified the same section.
Read: How to merge two branches in Git
Resolving Merge Conflict
When a merge conflict occurs, Git adds special markers (<<<<<<<, =======, >>>>>>>) in the affected files to highlight the conflicting sections from each branch. These markers help you identify the conflicts, allowing you to manually decide which version to keep or how to combine the changes before finalizing the merge.
Open the conflicted file (README.md) in VS Code. You’ll see conflict markers as shown in the above image.
VS Code offers you four options to resolve conflicts manually:
- Accept Current Change: Keep changes from feature2.
- Accept Incoming Change: Keep changes from main (which includes feature1).
- Accept Both Changes: Keep both sets of changes.
- Compare Changes: View the differences before deciding.

Click Compare Changes. When you click Compare Changes in VS Code during a merge conflict, it opens a side-by-side diff view of the conflicting file. This view shows your current branch’s changes (on the left) and the incoming changes from the branch you’re merging (on the right). This allows you to compare both versions line by line before choosing how to resolve the conflict.
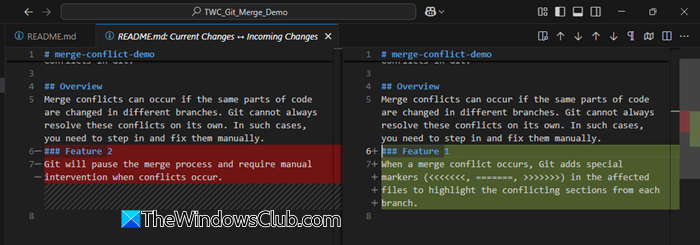
You can then manually edit the file or use one of the options like Accept Current, Accept Incoming, or Accept Both directly from that view.
After resolving the conflict, save the file. Then stage and commit the changes.
git add README.md
git commit -m "Resolved merge conflict in README.md"
That’s it! You’ve successfully resolved a Git merge conflict using Visual Studio Code.
I hope you find this useful.
Read: How to download and install Git in Windows.
How do I revert a commit in Git?
To revert a commit in the Git repository, you may use the git revert command. Instead of removing the commit from your project history, this command identifies how to invert the changes introduced by the commit and appends a new ‘revert commit’ with the resulting inverse content. This helps preserve the history, which is important for both reliable collaboration and the integrity of your project.
Read Next: Fix Unable to find Git in PATH on Windows computer.
