In this post, we will show you how to merge two branches in Git. Branching allows multiple developers to work independently and simultaneously on the same codebase. Developers often create branches to build new features or fix bugs without affecting the main code. Once the work is complete, these changes need to be combined back into the main branch. This process is called merging.

Which command is used to merge two branches?
There are multiple ways to merge code in Git. For example, you can use the git merge or git rebase command to merge code changes locally on your machine. However, if you’re working in a team environment, you can create a pull request on GitHub to merge your changes into the main branch. In this post, we’ll cover both methods in detail.
How to merge two branches in Git?
To merge two branches in Git, you can use one of the following methods:
- Using a Pull Request (on GitHub)
- Using Merge or Rebase (in local Git)
To understand the merging process, let’s first create a new repository on GitHub.
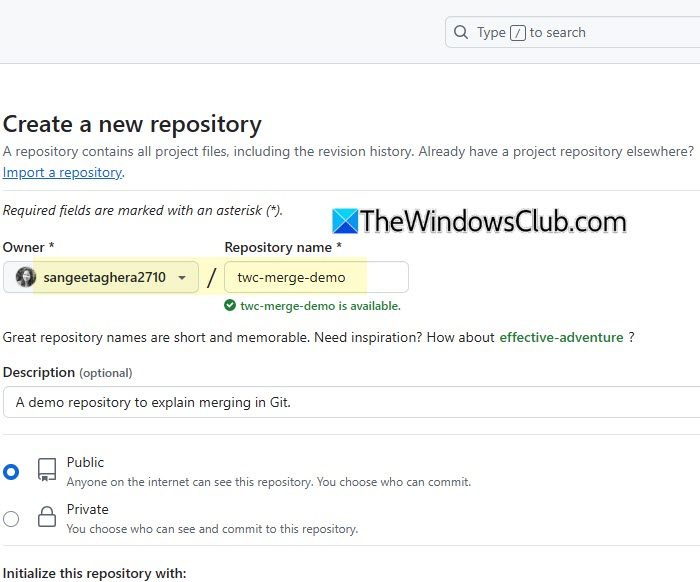
Log in to your GitHub account. Click New in the left pane of your dashboard. Fill in the required details under Create a new repository. For this example, we’ll name the repository twc-merge-demo. Check the box to add a README file. Click Create repository.
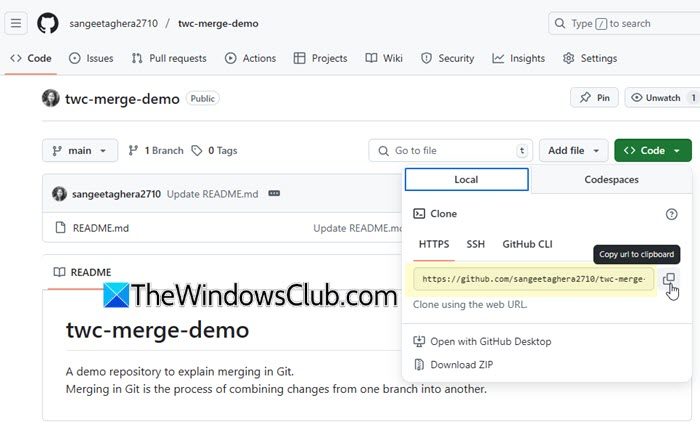
At this point, the repository has one README.md file (a markdown file to store essential project information) and one commit, the initial commit that GitHub automatically creates when you add a README.
Let’s make a change in the repository and make another commit. Click the edit (pencil) icon next to README.md. Make any small change to the content and click Commit changes. In the Commit changes dialogue, enter the name and description for your commit and again click Commit changes.
The repository now shows this new change as the latest commit. Now let’s clone the repository to our local machine.
Click the Code dropdown next to the repository name. Under Local, click the copy icon next to the HTTPS link.
Next, go to your desktop and open Visual Studio Code (we assume you already have Visual Studio Code and Git installed and configured on your Windows PC). Click the Explorer icon in the left pane and open the directory where you’ll be keeping your project files. For this example, we’ve created a blank directory called TWC_Git_Merge_Demo.
Next, click the three dots on the menu bar and select Terminal > New Terminal. In the terminal, type git clone and paste the HTTPS link using CTRL + V, then press Enter. This will clone the GitHub repository to your local machine. You’ll see the folder appear in the Explorer pane of Visual Studio Code.
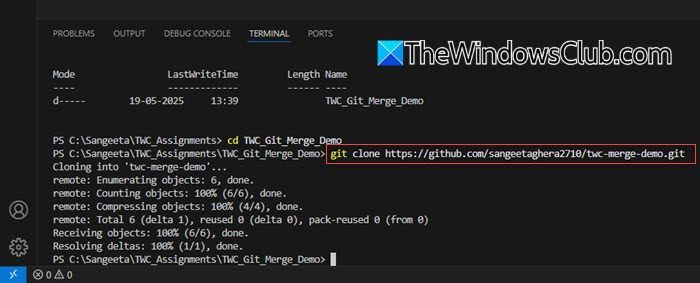
Next, use the cd command to switch to the cloned project folder:
cd twc-merge-demo
Then run the following command to check the current Git status:
git status
The above command generates some text that confirms that we’re on the main branch (there’s only one branch as of now) and the code on our local machine is up-to-date with the code on the main branch of our default repository on cloud (default or ‘origin’ is the repository we cloned locally on our syetem).
We can check which branch we’re currently on using the git branch command as follows:
This shows we’re on the main branch. Now let’s create a new branch called method1 and switch to it. In the terminal, execute the following command:
git checkout -b method1
Now let’s add a new index.html file to the code while we’re in the method1 branch. Go to the Explorer pane in Visual Studio Code. Right-click in the twc-merge-demo folder and select New File. Name the file index.html, add some sample HTML code, and save it.
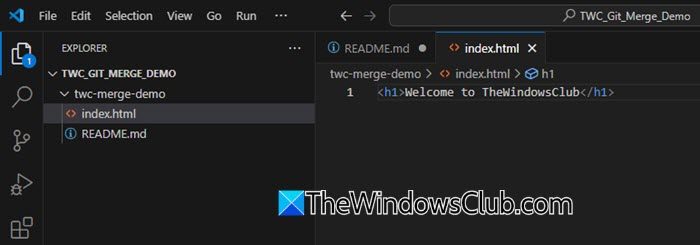
Then, stage and commit your changes using the following commands:
git add .
git commit -m "Added index.html in method1 branch"

Now this new file, index.html, exists in the method1 branch (not in the main branch). To push these changes to GitHub, we’ll execute the following command:
git push origin method1
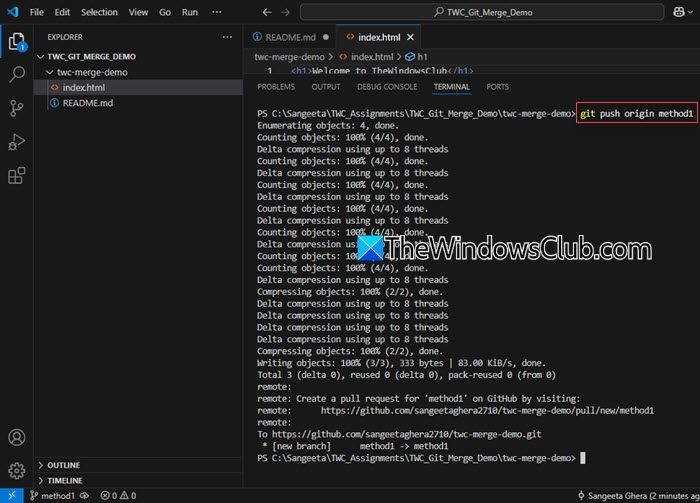
This command creates a new branch named method1 on our remote GitHub repository and pushes the local changes to it.
To verify this, go back to the GitHub repository in your browser and refresh the page. Under the Branches section, you’ll now see both main and method1.
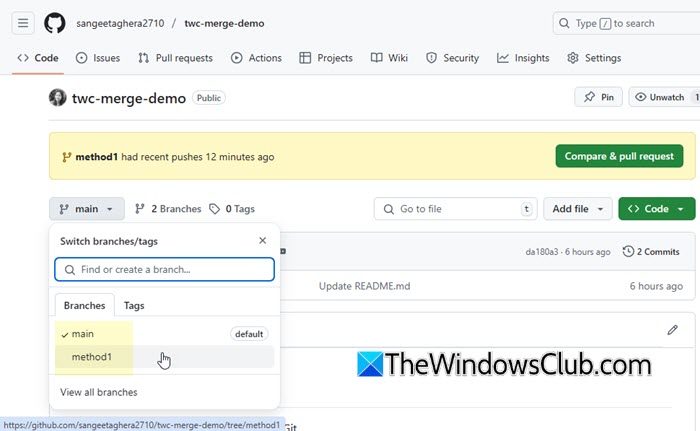
We’ll now merge the method1 branch into main. This can be done in two ways.
1] Using a Pull Request (on GitHub)
A pull request is useful in a team setting. It allows developers to review, discuss, and approve code changes before merging them into the main branch.
On GitHub, you’ll see a Compare & pull request button next to the newly pushed method1 branch. Click it. You’ll now see that you’re trying to merge method1 into the main branch. Add a title and description summarizing the changes you made. Click Create pull request.
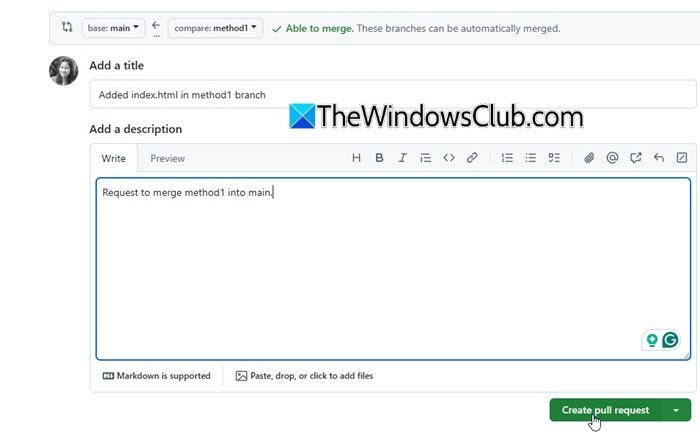
When we create a pull request, the following things happen:
- Git checks if the changes from both branches can be merged automatically. If there are no conflicts, you’ll be allowed to merge the branches directly. If there are conflicts, Git will ask you to resolve them manually before proceeding.
- In team environments, senior developers or project managers may review and comment on the changes before approving the merge.
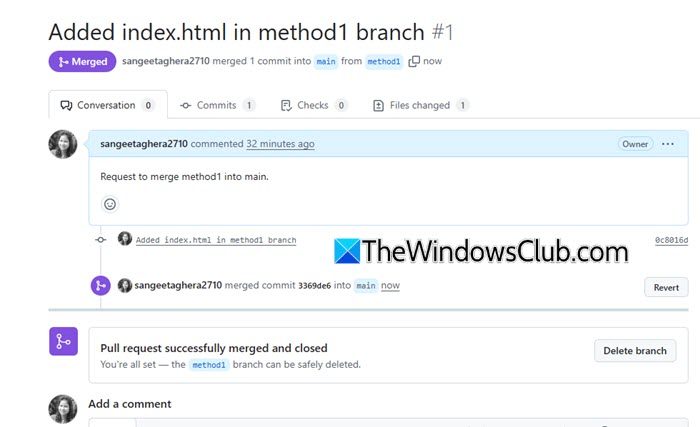
Since there are no conflicts in our case and we’re the sole contributor, we can simply click Merge pull request.
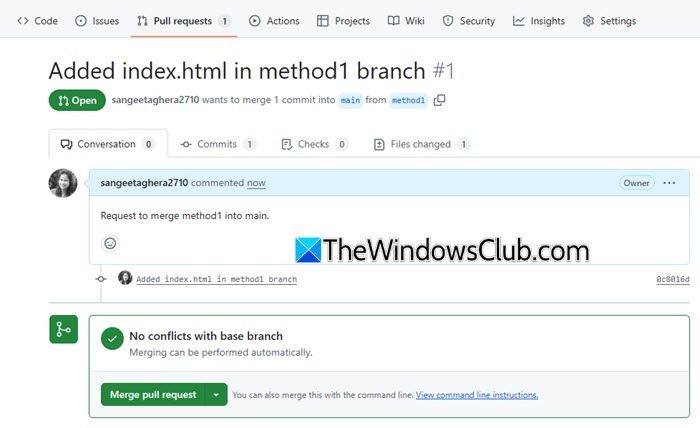
A Commit message appears reflecting the merge. Go ahead and click Confirm merge to finalize the process.
After that, you’ll see the message, “Pull request successfully merged and closed“. This confirms that the changes from your method1 branch have been successfully merged into the main branch.
To get these changes in our local Git, we will execute the following command in Visual Studio Code:
git pull origin main
Read: How to resolve Merge Conflicts in Git
2] Using Merge or Rebase (in local Git)
Apart from creating a Pull Request on GitHub, you can also merge two branches locally using Merge and Rebase commands. Both git merge and git rebase combine branches, but merge preserves history with a merge commit, while rebase rewrites history to create a cleaner, linear timeline.
Here’s how both commands work:
Switch to the main branch
git checkout main
Then merge the method1 branch into main:
git merge method1
Or, if you’re on method1 and want to rebase it onto main:
git checkout method1
git rebase main
Then switch back to the main branch and merge the changes if needed.
Finally, push the merged result to GitHub:
git push origin main
I hope you find this useful.
Read: Find all Git Commands in one place here at Git Explorer.
How to merge two branches in git without conflict?
To merge two branches in Git without conflicts, ensure that both branches are up to date with the latest changes from the remote repository by running git pull. Next, make sure that the changes in the two branches do not overlap, especially in the same lines of code. Once verified, switch to the target branch and run the merge command. If there are no conflicting changes, Git will complete the merge automatically without prompting for any manual resolution.
Read Next: Fix Unable to find Git in PATH on Windows computer.