Automatic Screen Rotation is common for those who use big screen devices like phones and laptops to read stuff or watch videos. If your device is equipped with gyroscope sensors and an accelerometer, Windows 11/10 has the ability to rotate the screen to either portrait or landscape mode, accommodating the content you’re viewing. While this seems like a convenient feature on paper and in most cases, it can be a bit annoying at times. Autorotation can disturb your viewing experience, so you may want to disable it on your PC. There are several ways in which you can do this. In this article, we will be discussing how you can disable Auto rotation on Windows 11/10.
How to disable Automatic Screen Rotation on Windows 11/10
There are three ways to disable the automatic screen rotation on your Windows device. Bear in mind that this option only extends to certain Windows devices, as has been specified above. This means that if you don’t see the options discussed, then your device isn’t offering the feature. Here’s a quick summary of all that we will be discussing in this article.
- Via Windows Settings
- Via the Action Center
- Via Registry Editor.
1] Disable auto screen rotation via Windows Settings
- Open Windows Settings by pressing the Windows + ’I’ key combination
- On the Settings homepage
- Select System
- Click on the Display sub-option
- Under the Scale and Layout head here, you’ll see a Rotation Lock option.
- Toggle it off and close the Settings window.
2] Disable auto screen rotation via the Action Center
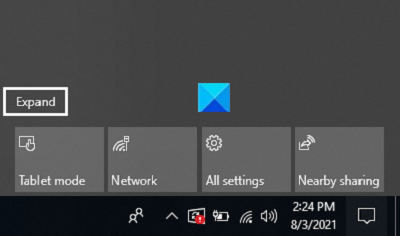
- The Action Center is the button to the extreme right of your taskbar, an icon that looks like a chat bubble. Click on it
- You’ll only see a handful of options firsthand, so click on Expand
- If you find the Rotation Lock option to be enabled, click on it to turn it off
3] Turn off auto screen rotation via Registry Editor
Lastly, the same change can be implemented via the Registry Editor. Users should note that any changes made to your Registry, if not done properly, can cause irreversible damage to your PC. Thus, you’re advised to back up your existing registry settings before making any changes.
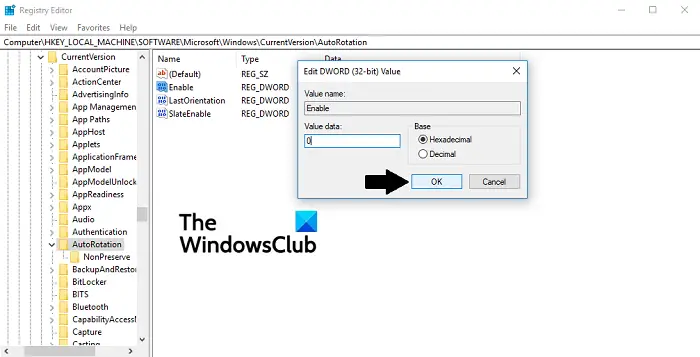
- Open the Run dialog box by pressing Windows + ‘R’ keys
- Type ‘Regedit’ and press enter
- In the address bar on top, paste the following location
HKEY_LOCAL_MACHINE\SOFTWARE\Microsoft\Windows\CurrentVersion\AutoRotation
- Here, you’ll see a DWORD value by the name of Enable. Right-click on it and select Modify
- Change its bit value data from 1 to 0 and click on Ok to save the changes
- Close the Registry Editor and restart your PC to make the changes take effect
If you want to undo this process, simply visit the same DWORD value and revert its Value data to 1.
We hope this post has brought some clarity to the Automatic Screen Rotation feature on Windows computers and how to disable it if desired.
TIP: Windows Sensors Troubleshooter from Microsoft will fix issues relating to Location, Screen Rotation, Motion and other Sensors on your Windows PC.
How do you fix your computer screen when it’s zoomed in?
If you observe that the text and icons on your computer screen are larger than they usually are, chances are that the Windows Magnifier is turned on. While this setting may be of us on occasion, that isn’t the case always. You can press the Windows and Esc keys together to turn it off. The Ease to access settings can help you modify it too. If you want to manually reduce the icon size on, say, your Desktop, press the Ctrl button and scroll down your mouse.