If you are an IT admin and want to create a setup to manage access permissions to Windows Autopatch resources effectively, try using RBAC or Role-Based Access Control. You can give permission to users, allowing them to control devices to manage Windows Updates. In this post, we will see how you can configure RBAC for Windows Autopath and talk about this permission.
RBAC or Role-Based Access Control
Windows Autopatch is a cloud service that automatically keeps your devices safe by updating Windows, Microsoft 365 apps, Microsoft Edge, and Microsoft Teams. It installs the latest security fixes from Microsoft to protect against threats and vulnerabilities. This helps organizations maintain security without manual effort. Recently, Microsoft added RBAC (Role-Based Access Control) support to all Autopatch features, starting its rollout in late May 2025.
RBAC is a security model that ensures people only have necessary access (“least privilege”). While already used in Intune, Defender, and networking, it now works fully with Autopatch. This solves a big challenge for large organizations with multiple teams: controlling what administrators can see and change. With RBAC, you can now limit access (like read-only permissions) and define exactly who manages which updates, making your update process more secure and organized.
Configure RBAC for Windows Autopatch
To manage and configure RBAC for Windows Autopatch, you need to follow the steps mentioned below.
- Assign the required roles for Windows Autopatch
- Assign the role and permissions for RBAC
- Manage RBAC
Let us talk about them in detail.
1] Assign the required roles for Windows Autopatch
First of all, we need to assign a Policy and profile manager and Windows Autopatch administrator if you want to give full permission to a user to manage updates with Windows Autopatch in Intune. To do so, you need to follow the steps mentioned below.
- First of all, open Microsoft Intune Admin Center.
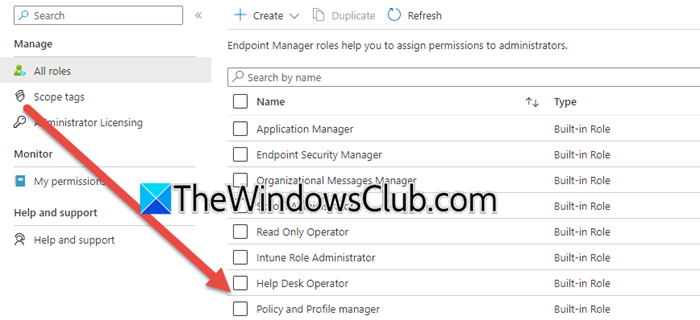
- Then, go to Tenant Administration > Roles > All roles.
- Look for the Policy and Profile Manager role, and tick it.
- Click on Assignments > +Add.
- Select users/groups needing full policy control and then click on New > Select groups > Review + assign.
- Do the same with Windows Autopatch Administrator.
If you want to group, make sure that the user has Microsoft Entra group creation permissions. In Azure AD, go to Groups > General, and set “Owners can manage groups” to Yes.
If you want some users to have limited permissions, you need to use the Windows Autopatch reader role. By virtue of this role, the user will only have read-only permission to access Windows Autopatch groups, Windows Autopatch reports, support requests, and messages, and doesn’t allow them to make any changes.
2] Assign the role and permission for RBAC

Now that you have the permission to manage Windows Autopatch, let us go ahead and get hold of the permissions for Role-Based Access Control. In this case, we require two permissions – Device configuration permissions and Windows Autopatch group permissions. For the former, we need to give assign, create, delete, read, update, and view reports permissions to manage Intune policies, whereas for the latter, we are supposed to give read, create, edit, and delete privileges for the Windows Autopatch group’s experience.
Follow the steps mentioned below to do the same.
- In Microsoft Intune Admin Center, go to Tenant Administration.
- Now, go to Roles > All roles.
- Select or create a role – Autopatch Device Manager.
- Now, go to Permissions > Device configurations > Enable.
- You need to give it Assign, Create, Delete, Read, Update, and View Report.
- In the same Role, go to Resource, and select Windows Autopatch groups.
- Grant it Create, Read, Update, and Delete.
- Finally, save the Role.
Now, you need to enable Microsoft Entra Group Creation. For that, go to Azure Portal > Azure Active Directory. Then, navigate to Groups > General settings. Finally, set Owners can manage groups to “Yes”.
Alternatively, grant specific users Entra ID > Roles and administration, and assign the “Group Administrator” role to required users.
Once done, we need to check if you have the permission. For that, in the Microsoft Intune admin center, go to Tenant administration > Roles > My Permissions. Now, review the category of your permissions in the Resource column and the specific actions you can take in the Permission column. When you create Windows Autopatch groups and assign devices, it automatically sets up the necessary software update policies based on your chosen settings.
3] Manage RBAC
You can apply Intune scope tags as needed, which will change what you see in the report. After you set everything up, Windows Autopatch can assign permissions using Intune’s built-in roles for safely managing Windows updates. By working with your existing Role-Based Access Control (RBAC), you can effectively manage updates and share these tasks across teams in different locations.
That’s it!
Read: How to install and configure Windows Admin Center
How to register a device in Autopatch?
To register a device in Windows Autopatch, just enroll it in Microsoft Intune and assign it to an Autopatch group; the system handles the rest automatically. Your device must run Windows 11/10 Pro or Enterprise (version 21H2 or newer). Once assigned, Autopatch silently registers the device within 24 hours and starts managing updates.
Read: How to grant or get Elevated Privileges in Windows 11
What are the requirements for Windows Autopatch?
If you want to use Windows Autopatch, your device must have Windows 11/10 Pro or Enterprise (version 21H2 or newer), it should be enrolled in Microsoft Intune, and have 150 MB of free storage. Also, your organization needs Windows 11/10 Enterprise E3/E5 (or Microsoft 365 E3/E5/Business Premium) and Azure Active Directory Premium P1/P2. Additionally, you must have the permission to enroll devices in Intune.
Also Read: Enable Administrator Protection in Windows 11.