
Microsoft Edge offers a feature named Workspaces. Inspired by the idea of individual browsing tabs and virtual desktops on Windows and Linux, this feature is designed to smooth the user’s browsing experience via individual windows for separate, unrelated tasks. It has been designed to help people better manage the difficulties they face while working on several tasks at once and boost their productivity. In this article, we will demonstrate how to enable this feature in Microsoft Edge.
Workspaces in Microsoft Edge are like virtual desktops, but for your browser. They let you organize sets of tabs into separate, named spaces so you can keep different projects, tasks, or contexts neatly separated. For example, you could have one workspace for “Work,” and another for “Personal.” Each workspace remembers its own set of tabs, so switching between them is seamless.
How to enable Workspaces in Microsoft Edge
Open Edge Settings and search for ‘workspaces’ using the Search bar.
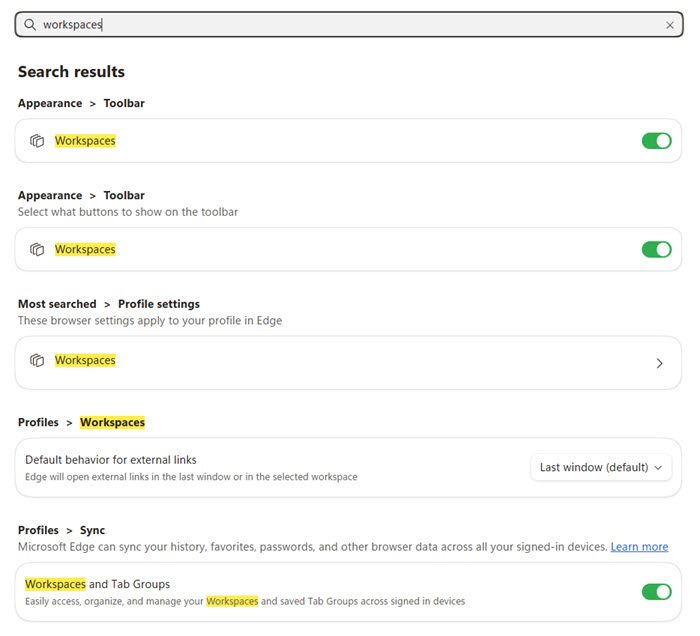
Here, ensure that the following settings are turned on:
- Profiles > Sync > Workspaces and Tab Groups
- Appearance > Toolbar.
How to create Workspaces on Edge
After successfully enabling the workspace feature, you can create and customize workspaces of your own, depending on your work requirements. The first step is to make sure that the Workspace icon (looks like overlapping squares) is in the top-left of your browser window.
Click on the Workspace icon and create your first workspace. You can create one with 6 tabs or a blank one.
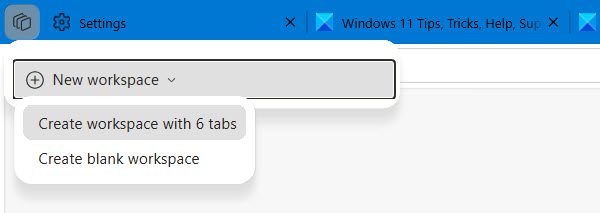
Name it based on the work you will be conducting in that workspace.
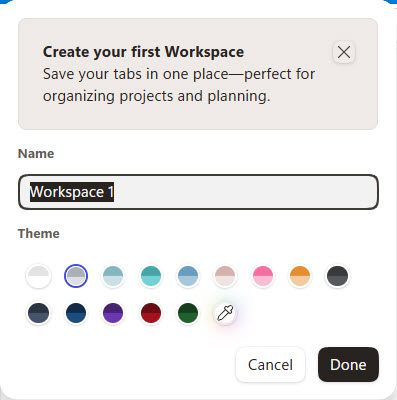
You can also assign one of the eight available colors to that workspace. Click Done after you finish creating your workspace.
If you wish to create more workspaces, click on the ‘+’ sign beside the workspace option.
We recommend naming these workspaces based on your needs. Assigning a related color will enhance and ease out your working experience.
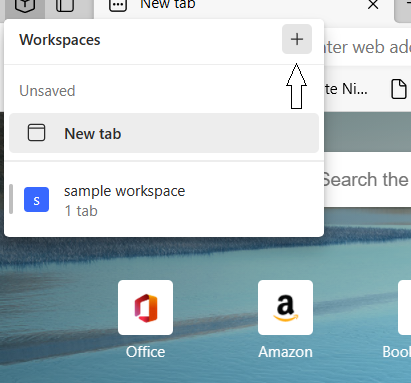
If you want to delete a Workspace, you can open up the settings to edit the said workspace and further click on ‘Remove.’
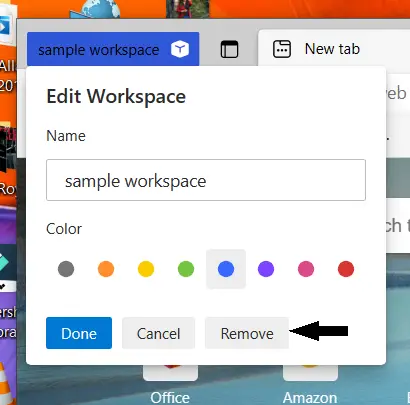
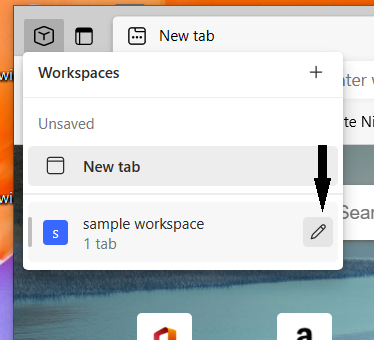
To rename or edit any particular workspace, use the pencil icon located behind the workspace’s name. Make the changes you want and click on the ‘Done button to save them.
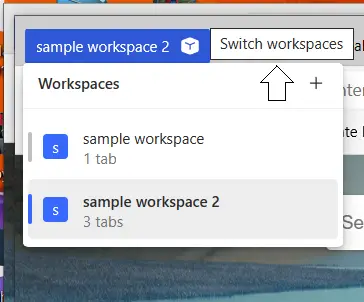
An option to switch workspaces is also available on the top, making it easier to for you to switch between activities.
How to use Microsoft Edge Workspaces
Now that you know how workspaces can be created on Edge, it is time for you to learn how to use them to better optimize your browsing work and use them to the best of your advantage. An easier way to think about them is as separate browsing windows, which sounds pretty common, but customized names and color-coded setups help you divide your time and attention better.
To move between Workspaces, click on the label at the top-left and choose the workspace you want to move to. The vertical line, colored the same as the workspace’s name, indicates which workspace is active at the moment. All the inactive ones are greyed out. A small drawback of workspaces is their inability to move tabs from one workspace to another, in which case you might use the drag-and-drop option.
For those of you who are wondering, yes, the workspace feature can be used along with tab groups. If you haven’t yet enabled Tab Groups on your Edge browser, you can do so.
Despite the seemingly similar interfaces and applications, the Edge workspace is a much more refined way to execute your work. Users should also keep in mind that while it’s true that Workspaces, coupled with Tab Groups, can help users boost their, it is not for everyone. Needlessly dividing tabs between Workspaces when they can all be put in one browser window can be a time-waster. The absence of an option to reorder workspaces is also something we hope will change in the future.
Managing Edge Workspaces in a nutshell:
- Switching: Click the Workspaces icon and choose the one you want to enter.
- Adding tabs: Any tab you open while inside a workspace stays in that workspace.
- Closing & reopening: Workspaces persist even if you close Edge, so your tabs are saved.
- Sharing: You can invite others to collaborate by sharing a workspace link. They’ll see the same set of tabs in real time.
I hope this article resolves any doubts you have regarding the Workspace feature in Microsoft Edge and helps you perform your daily work at a much higher speed with greater efficiency.
