One useful feature in Windows 11 or Windows 10 is the ability to move installed Microsoft Store apps and Programs to another drive. You can also change the path of the default installation directory for new apps. This post shows how to move installed Microsoft Store Apps to another Drive in Windows 11/10.
Can I move an installed program to another drive?
You can move Microsoft Store apps and some Programs installed programs to another drive in Windows 11 or Windows 10. First, you can use the Windows Settings panel or the built-in option. Second, you can use the app called Application Mover. For future installations, you can change the default Installation Path in Windows 11, choose the Installation Directory during setup or Pick a Drive for installation in Microsoft Store before downloading the app.
How to move installed Programs or Apps to another Drive in Windows 11
Use Windows Settings to move installed Programs and Apps to another Drive
There was a not-so-easy way to change the default installation location for apps, but it worked for some and not for others. Windows 11/10 has made it easy to get things done. The new Settings window includes all the options to move Windows 11/10 apps to another drive. But you should know that only Microsoft Store apps and some desktop programs can be relocated through Windows Settings; others require reinstallation.
Windows 11

To move the installed Microsoft Store app to another drive in Windows 11, do the following:
- Press Win+I to open Windows Settings
- Select Apps settings
- Click Apps and features
- Scroll down and locate the app
- Click on the 3-dotted line and select More
- Next, select the drive you want to move the app to and press Move
- The app will be moved.
Please note that this option is not available for all apps.
Windows 10
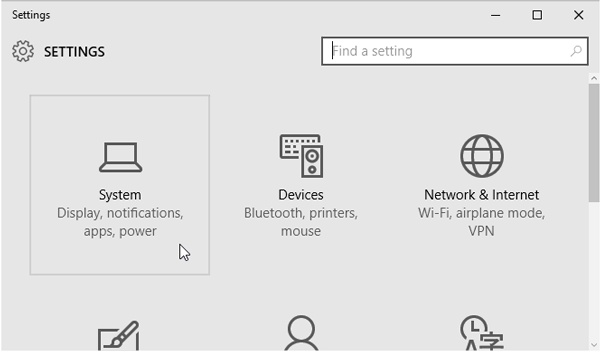
Press Win + I to open the Settings panel. Then, click on the System button.
Next, go to Apps & Features section and wait for Windows to determine the app size. Now, find the app that you want to move to another drive. Then, click on the app and select Move.

Next, select a drive and click on Move.

It will take a few moments to complete, as it depends on the app’s size.
Once the process is completed, the Windows Store app will be moved to a new location.
If you are facing low disk space after upgrading, you can use this technique to move apps from the default system drive to another drive and even direct new installs to another location.
Move installed apps setting is grayed out

This post will help you if the Move installed apps setting appears to be grayed out.
Move programs to another drive in Windows 11 has no Move option

If there is no Move option for a program in Windows Settings,it means that Windows cannot move that program to another drive, as the program does not support such a move.
Read: How to move Program files from SSD to HDD in Windows?
Use Application Mover to move installed Programs and Apps to another Drive

Moving applications is not as easy as copy-paste. A lot needs to change, especially in the registry, shortcuts, and start menu entries. If you are looking for a free program to get this done, then Application Mover is worth trying. It has been designed to move programs from one path to another on the same hard disk or to another hard disk.
First, run the Application Mover program with admin permission and allow it when prompted with the UAC window. When it is open, you will have the following options.
- Select an existing program folder location.
- Select the final destination where you wish to shift the program
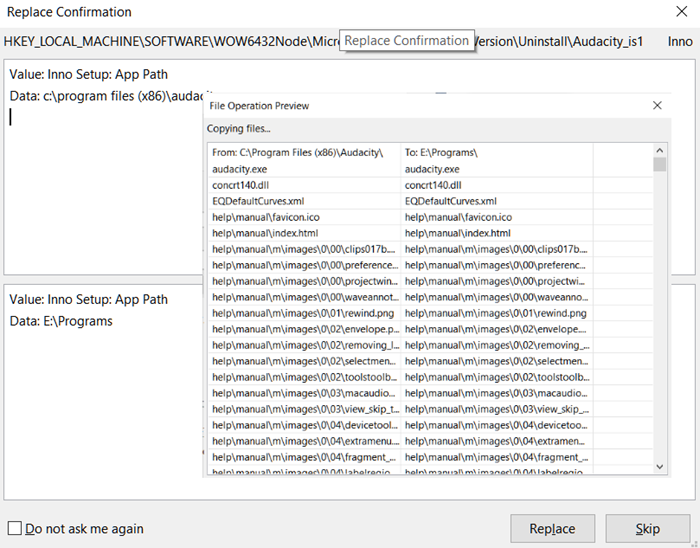
- It would be best to make a couple of choices, including updating the current registry path, updating shortcuts, and installing log files.
You can choose to append to a log file, log changes made to a file, and so on. It also scans all Windows shortcuts in the Start Menu and adjusts path references to the new location. You would be asked to confirm all the changes if you selected the Confirm Changes option. A list of items will be displayed, showing the old and new locations. It includes EXE, DLL, and any other file. If there is any registry change, it will be displayed too.
While it is best to make sure the application is closed when you move it, the pending changes are done after the reboot.
Once moved, you should see the application in the recently installed programs. Launch it, and check if everything works as expected.
You can download it here from the official website.
Related reads:
- How to move Games & Programs using FolderMove
- How to Move Steam Games to another Drive.
How do I move programs from C to D in Windows 11?
To move programs from C to D driver in Windows 11, you can make use of the Application Mover on your computer. You need to enter the current path of the installed program in the Current Path box. Then, you can enter the D:\ drive in the New Path box and click the OK button. The app will be shifted to the new path immediately.