Security is the most important concern for our computer systems for almost all of us, as we do not want to let others access our data illegally. So to improve out the security of your computer, Microsoft has assigned the picture password function. We have already seen how to set up a Picture Password or PIN in Windows 11/10.
In this article, we’ll tell you how you can enable or disable the picture password sign-in function. In fact, the picture password sign-in is enabled by default, so in case you want to disable it, this article will help you to do that.
Disable Picture Password Sign-In option in Windows 11/10
1. Press the Windows Key + R simultaneously and put regedit in Run dialog box.
2. Navigate to the following location:
HKEY_LOCAL_MACHINE\SOFTWARE\Policies\Microsoft\Windows\System
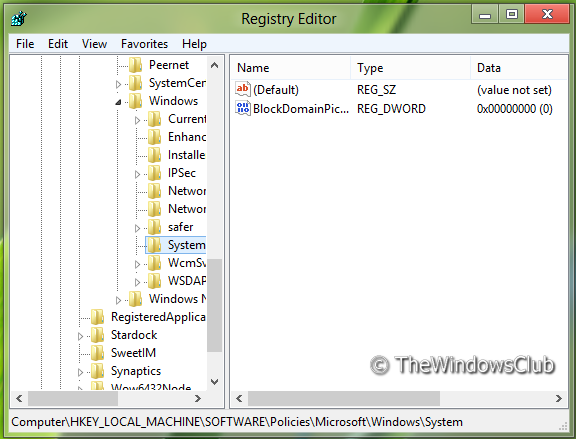
3. Now right-click in right pane of the window. Create a DWORD value and name it “BlockDomainPicturePassword“.
4. Right-click on above created DWORD value, select Modify. You will got this window:
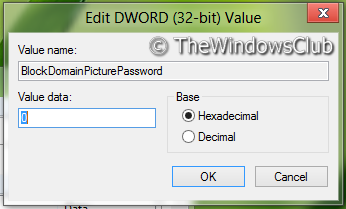
5. Now you can use following values for Value data section:
- Enable Picture Password Sign-In = 0 (Default Setting)
- Disable Picture Password Sign-n = 1
6. That’s it. Reboot to see the results.
Turn Off Picture Password Sign-In using Group Policy Editor
1. Press Windows Key + R combination and put gpedit.msc in Run dialog box.
2. In the left pane navigate to:
Computer Configuration -> Administrative Templates -> System -> Logon.

3. Now look in the right pane, you’ll get the policy named Turn off picture password sign-in as shown above.
4. Double click on this policy to get the window shown below.
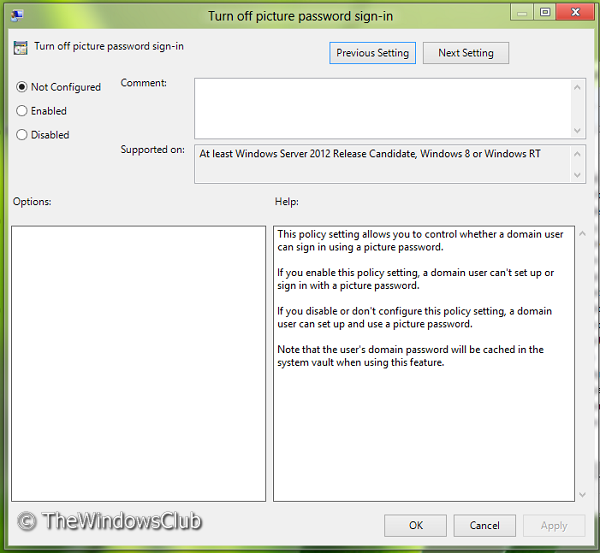
5. Now you can use the following settings:
- Enable Picture Password Sign-In = Disabled/Not configured (Default Setting)
- Disable Picture Password Sign-In = Enable
After making changes click Apply followed by OK.
That’s it. Reboot to see the results.