Some Windows users have noticed painfully slow downloads or laggy network responses inside WSL. This can be due to multiple reasons, but ultimately, the components working with NAT are at fault here. In this post, we will see how to restore full network speed for apt, curl, git, and any other network operations inside your Linux environment.

WSL 2 uses a virtualized network adapter with Network Address Translation (NAT). This NAT layer introduces extra overhead and can conflict with Windows networking components. Additionally, the default WSL network settings (such as IPv6, DNS, or MTU) often don’t match your physical network. Windows Defender may also scan every packet passing between WSL and the outside world, drastically reducing throughput. Finally, older WSL versions lack the performance optimizations available in newer Windows 11 builds.
WSL slow download speed
If you experience slow download speeds in WSL and the network is generally slow, follow the solutions below.
- Enable mirrored networking mode
- Disable IPv6 inside WSL
- Switch to a faster DNS resolver
- Exclude WSL from Windows Defender real-time scanning
- Adjust the network MTU size
WSL Network slow
1] Enable mirrored networking mode
Mirrored networking makes WSL share the same IP address and network interfaces as Windows, bypassing the NAT layer entirely. This removes the primary source of slowness and significantly reduces latency. To do so, follow the steps mentioned below.
- Close all WSL instances and terminals.
- Open Windows PowerShell or Command Prompt as an admin.
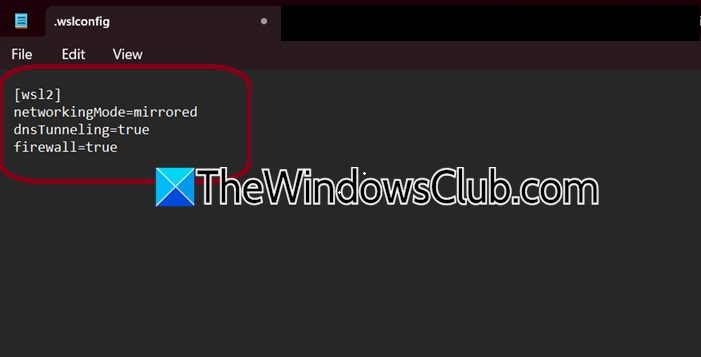
- Create or edit the .wslconfig file in your Windows user folder.
notepad "$env:USERPROFILE\.wslconfig"
Now, add the following lines to the file.
[wsl2]
networkingMode=mirrored
dnsTunneling=true
firewall=true
Save the file and restart WSL completely.
Now, run the command wsl --shutdown.
Finally, launch WSL and see if it helps.
2] Disable IPv6 inside WSL
Many routers and ISPs handle IPv6 poorly, causing timeouts, retries, and slow fallbacks to IPv4. Therefore, disabling IPv6 forces all traffic through the faster IPv4 path. To do the same, follow the steps mentioned below.
- Open your WSL terminal.
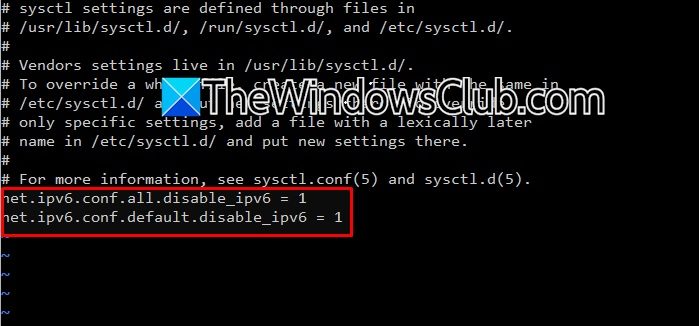
- Edit the sysctl configuration file using the command sudo nano /etc/sysctl.conf
- Add these two lines at the end:
net.ipv6.conf.all.disable_ipv6 = 1
net.ipv6.conf.default.disable_ipv6 = 1
- Save the file and apply the changes:
sudo sysctl -p
- Test speed with curl -4 -o /dev/null http://speedtest.tele2.net/100MB.zip.
Finally, check if the issue is resolved.
3] Switch to a faster DNS resolver
WSL inherits Windows DNS settings but often uses a slow or unreliable resolver. Cloudflare (1.1.1.1) or Google (8.8.8.8) respond faster and reduce delays for every domain lookup, noticeably speeding up apt update and package downloads.
In your WSL terminal, disable automatic DNS generation:
sudo nano /etc/wsl.conf
Add these lines:
[network]
generateResolvConf = false
Save and exit. Then remove the old resolv.conf and create a new one:
sudo rm /etc/resolv.conf
sudo nano /etc/resolv.conf
Paste the following:
nameserver 1.1.1.1
nameserver 8.8.8.8
Save the file and protect it from overwriting:
sudo chattr +i /etc/resolv.conf
Restart WSL with wsl --shutdown from PowerShell.
4] Exclude WSL from Windows Defender real‑time scanning
Windows Defender scans every file read or written by WSL processes, including temporary download data. This adds huge CPU overhead. Excluding the WSL virtual file system stops scanning and instantly boosts download speeds. You need to follow the steps mentioned below to do the same.
- Open Windows Security.
- Go to Virus & threat protection > Manage settings.
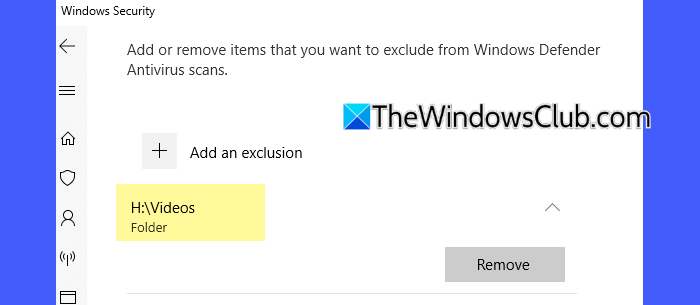
- Navigate to Exclusion, and click on Add or remove exclusions.
- Click on Add an exclusion > Folder.
- Paste to the path – \\wsl.localhost\.
- Click on Select Folder. Confirm that the exclusion appears.
- Also, add an exclusion for your specific distribution folder if you know its path (e.g., C:\Users\YourName\AppData\Local\Packages\…\LocalState\rootfs).
Restart WSL completely: close all terminals, then run wsl --shutdown in PowerShell.
5] Adjust the network MTU size
An incorrect Maximum Transmission Unit (MTU) causes packet fragmentation and retransmissions, silently killing performance. Setting the proper MTU (usually 1500 for Ethernet or 1420 for PPPoE/VPN) eliminates this overhead.
First, find your optimal MTU on Windows. Open PowerShell as admin and run.
ping -f -l 1472 8.8.8.8
Lower the number (1472, 1450, 1400) until you get a reply without fragmentation. Add 28 to get the MTU.
To make it permanent, create a startup script.
sudo nano /etc/wsl.conf
Add the following lines of code.
[boot]
command = "ip link set dev eth0 mtu 1500"
Save, exit, and then run.
Hopefully, with the help of these solutions, your issue will be resolved.
Read: Run RHEL/Fedora on Windows Subsystem for Linux (WSL)
How to increase WSL speed?
Enable mirrored networking mode in .wslconfig to bypass the NAT bottleneck. Disable IPv6 inside WSL to avoid fallback delays. Switch to fast DNS resolvers like 1.1.1.1 and exclude \\wsl.localhost\ from Windows Defender real-time scanning. Adjust your MTU to 1500 and ensure you run wsl –update to grab Microsoft’s latest performance patches.
Read: How to update WSL Kernel on Windows 11
Why is my download speed so slow on LAN?
WSL 2 uses a virtual NAT that adds overhead and may misreport your physical network adapter. Windows Defender also scans every file transfer, severely cutting throughput. A mismatched MTU or problematic IPv6 routing on your local router can further fragment packets. To fix, switch to mirrored networking, exclude WSL from antivirus scans, and verify your LAN cable or Wi-Fi signal strength.
Also Read: WSL stopped working with Error 0x80070003,