
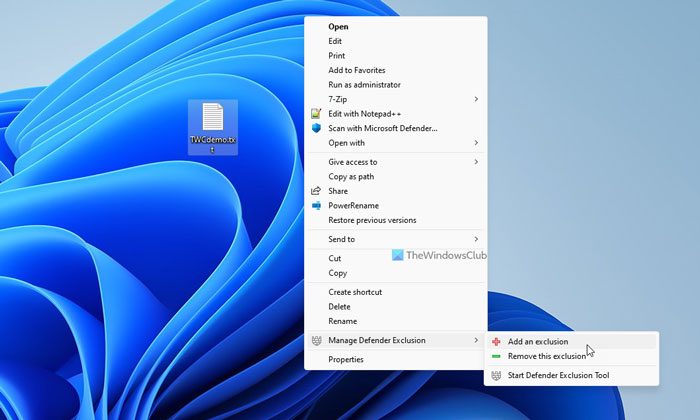
While you can manually add some files or folders which you want to exclude from being scanned via Windows Defender UI, Defender Exclusion Tool is a free tool that lets you add Add an exclusion to the Windows Defender context menu for files. Using this context menu item, you can add a file to the Exclusion list with a click.
Add An Exclusion item to Windows Defender context menu
When working on a Windows platform, it is best to stick to known and approved applications for security. You need to make sure that your antivirus, be it from Microsoft or a third-party app, is not scanning critical files and ending up quarantining them.
One way to avoid accidentally quarantining or deleting known good files and folders is to add them to the list of exceptions so they are not scanned.
When you are going by the manual route to add files to the Windows Defender Exclusion list, you have to go through the following steps:
- Open Settings.
- Choose the ‘Update and Security’ option.
- Go to ‘Windows Defender Security Center’.
- Find ‘Virus and Threat protection settings’ and click on it.
- Now go to ‘Add or remove exclusions’.
- Find the ‘Add an exclusion’ option.
- Browse through and select the files, folders, processes, or file types that you want to add to the protected exclusion list.
The procedure above is simple, but imagine having to do that every time you add such a file or a process to the list. It is time-consuming and tedious.
Defender Exclusion Tool adds Add to Exclusion item to context menu
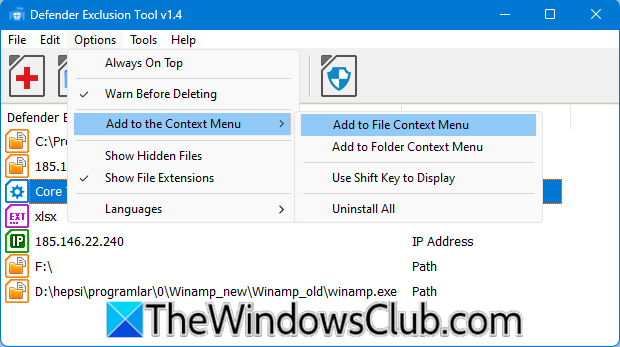
This is where Defender Exclusion Tool can help. The app adds entries to the context menu that let you easily manage Exclusions:
- Add to exclusions
- Remove this exclusion.
You can simply right-click on a file and select Add an exclusion.
You can also drag and drop the file or folder on its GUI. You can remove a file or folder from the exclusion list by selecting the item and clicking the delete button with the trashcan icon. Alternatively, you can right-click on the file or folder concerned and click the ‘Delete selected’ option. This does not delete the file or folder; it only removes it from the list of exclusions.
To install, all you need to do is download the tool and extract the contents of the zip file into the location you want to store it in. Now double-click the.exe file and your Defender Injector is ready. It supports Windows 11 and Windows 10. It is only available in English. The steps are simple, and it makes putting files into and out of the exclusion list very easy.
That’s it! Hope it helped.
How do I add an exclusion to Windows Defender?
To add an exclusion to Windows Defender or Windows Security, you need to open it first. Then, go to the Virus & threat protection tab and find the Exclusions section. Next, click on the Add or remove exclusions button and click on the Add an exclusion option. Next, you need to choose the category of the exclusion and select the file or folder accordingly.
How do I get rid of Scan with Microsoft Defender from context menu?
To get rid of the Scan with Microsoft Defender option from the context menu, you need to take the help of the Registry Editor. For that, open the Windows Registry, and navigate to this path: HKEY_CLASSES_ROOT\*\shellex\ContextMenuHandlers\EPP. Then, right-click on the EPP key and select the Delete option. Finally, click on the Yes button to delete this sub-key. Once you do that, you need to close all windows and restart your computer.
