
What are Digital Signatures and why are they useful? In this article, we discuss three methods by which you can find out, check or verify the Digital Signature of programs on Windows 11/10.
Whenever files are created digitally, whether they are media files, executable files, documents, or any other type, they are digitally signed by the source of that data. For example, when Google releases the setup file, which is an executable for the Google Chrome browser, it is digitally signed. So, when the file is downloaded directly from the official source, its authenticity can be verified.
In another scenario, someone else can host the same file on their servers as well. That is fine because that file will not be modified by any means. But if that file is torn down and some modifications to the code are made, then the digital signature gets removed automatically, and hence the authenticity of the file will not be verified, as the digital signature is removed automatically, which re-compiles the tampered setup file. So this is how it actually works.
Now, we also need to learn about how to verify the digital signatures that come with the file. So, let us just get started.
Check Digital Signature for a Program in Windows 11
We will discuss three methods to check the Digital Signatures of the programs on Windows OS.
1] Via File Explorer
First, open Windows File Explorer and navigate to the location where your program is saved.
Right-click on the setup file and then click on Properties.
Navigate to the tab that is labeled as Digital Signatures.
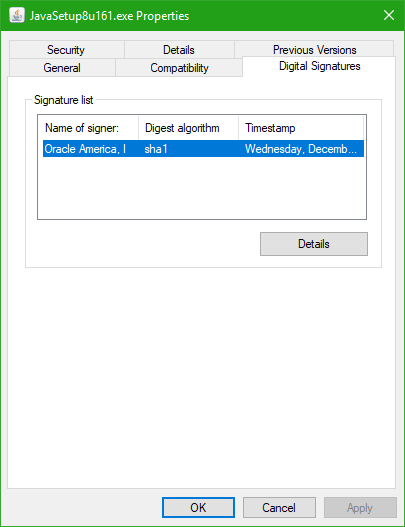
In the Signature List, if you see entries, that means that your file is digitally signed.
You can double-click on any of those entries to view additional details about the signing authority.
Hence, you can tell whether the file is signed by the software’s original distributor.
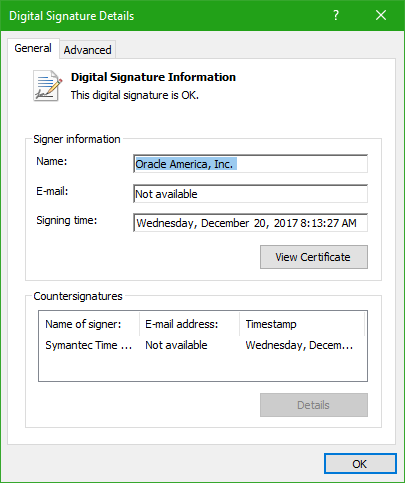
Additionally, in the Detailed view of signature, you can click on a button that says View Certificate to view additional details about the certificate that comes with the signature.
2] Using DigiCert Certificate Utility
Use this link to download the latest version of DigiCert and run the executable file.
Accept the terms of use displayed at the start and then click on the tab that says Code Signing and then in the header section, click on Check Signature.
Select the setup file that you need to check the digital signature.
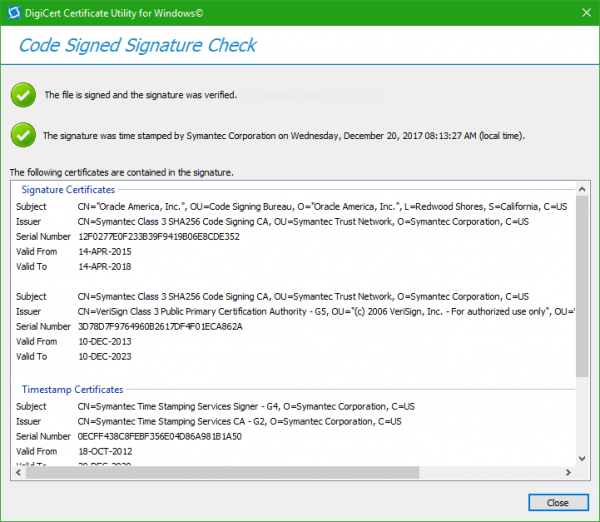
This will prompt DigiCert to verify the signature and display the full information summary in a new window.
There are two things that DigiCert verifies. They are as follows:
- Whether the file was signed and whether the signature is valid.
- It checks the signature’s timestamp.
If you get two green checkmarks as shown in the screen snip above, the verification is successful. You have additional information in that window too for your comfort.
3] Using SignTool
Microsoft ships a program with the Windows SDK that is called as SignTool.
Windows SDKs, or Software Development Kits, are not shipped built-in with Windows. It is intended for developers, and they are supposed to install it separately. If you are interested in giving this method a try, make sure you have a suitable SDK for yourself. You can download the Windows SDK from here.
4] Using sigverif Tool
Press Win + R, type sigverif, and hit Enter.
The File Signature Verification tool will scan system files.
It will show whether files are signed and valid.
5] Using PowerShell
Execute the following command in PowerShell:
Get-AuthenticodeSignature "C:\Path\To\Program.exe"
If Status field says:
Valid– Signature is good.NotSigned– No signature.UnknownErrororHashMismatch– Signature problem.
Hope this helps.
This post will help you if you see The digital signature for this file couldn’t be verified message.
