Microsoft keyboard shortcuts vary in their application for different individuals. It is convenient for those who are used to them. However, those who cannot get used to them because they cannot remember the shortcuts to use them, it does not make much sense. Microsoft, thoughtful as the developers are, listed shortcut keys in the menu for some programs. Some use that. And some people are unaware of it. If you’ve just discovered this and want to learn how to utilize it, you have come to the right place.
You might not have found the shortcut keys listed in the menu because they are not visible. By default, this feature is disabled. To use the list of shortcut keys, you must enable it. Don’t worry, the process of enabling the shortcut keys in the menu does not involve using some shortcut keys.
Underline & Highlight Menu Shortcut Keys in Windows 11/10
Both the processes listed below are for Windows 11/10. The process is quite simple, and the settings are available in the Ease of Access Keyboard Settings on Windows 11/10. All you need to do is follow the simple steps listed below.
Via Windows Settings
This is a simple method.
In Windows 11, open Settings > Accessibility > Turn on Underline access keys.
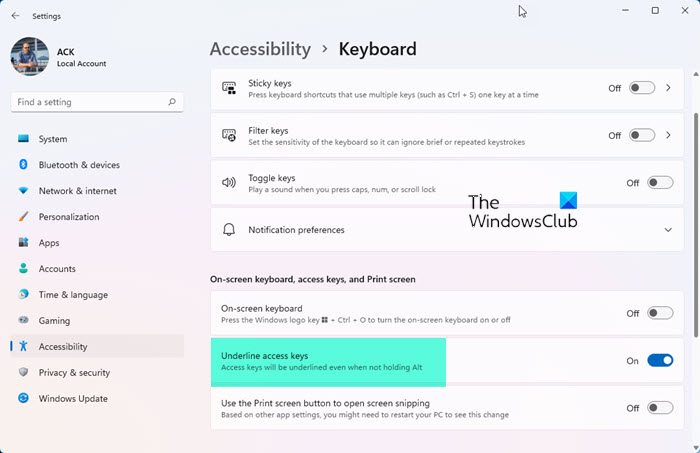
When you have enabled the shortcut keys in the menu, several other things also change. This isn’t an individual setting by default. So, when you have enabled the shortcut keys highlight, there will be other things highlighted in your Windows OS. One of those things is, the power level slider in the Battery section. It won’t be highlighted by default, but after you have followed the steps to show the shortcut key, it will also be automatically highlighted.
If this is annoying for you, you can make a physical note of the shortcut keys for different menus when it is enabled, and then disable it altogether, following the same steps mentioned above, to access the space where you can disable it.
If you don’t mind this, you can have fun browsing what else the enabling of the shortcut keys changed in your system. It will be a good pastime for a while, and you might also find the highlighting feature more convenient to guide you through what you need.
In Windows 10:
- Open ‘Settings’ to find the main menu.
- Find ‘Ease of Access’ and select it.
- Go to ‘Keyboard’. You will find it in the left panel.
- Scroll down on the right pane and find the ‘Other Settings’ segment.
- In the Other Settings, find ‘Enable shortcut underline’ and select it.

If this works, you will see the shortcut keys underlined in the menus you open.
Via Control Panel
Another way you can enable the keyboard shortcuts is through the Control Panel:
- Go to Control Panel from the search bar.
- Select ‘Ease of Access Center’.
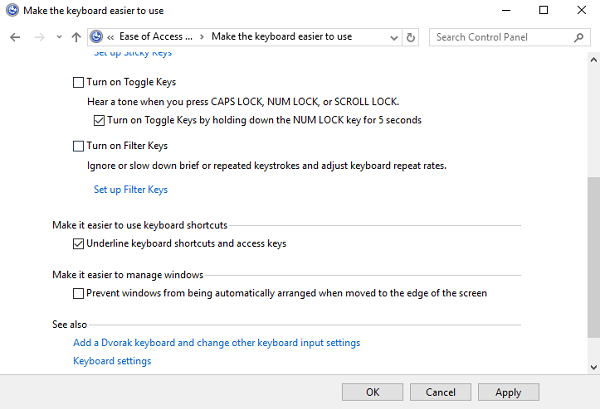
- Scroll down to find the ‘Make the keyboard easier to use’ option and click it.
- Scroll down to find the ‘Underline Keyboard Shortcuts and Access Keys’ option. Click on it.
- Scroll a down a little more to find ‘OK’ and click it to save the changes.
Microsoft will be moving everything to Settings. The good old Control Panel will soon become obsolete.
You can trust Microsoft to ensure the Settings panel is organized and convenient to use. Maybe it is for the better, but the Control Panel will be missed.
What are the shortcut keys for underlining?
On Windows 11/10, you can use Ctrl+U to underline text in various apps. No matter whether you use Word, WordPad, PowerPoint, Excel, or anything else, the same shortcut works on all of them. Even if you use a browser-based text editor, you can use the same keyboard shortcut to underline text. That said, it is a universal hotkey for Windows 11/10 users.
What is the shortcut key for highlighting all?
In order to highlight the entire text or select the whole text, you need to press Ctrl+A. This keyboard shortcut works on all apps, including Word, Notepad, PowerPoint, Outlook, etc. Apart from that, you can use the same on browsers, any website, or anywhere else.