
Is Storage Sense not working on your Windows 11/10 PC? This is not a standalone issue, as many users have similar complaints regarding this built-in cleanup tool. Users find that this automated feature suddenly stops running, disappears, or refuses to delete files from the Downloads folder or Recycle Bin. In this article, we will break down why this happens and how to fix it.
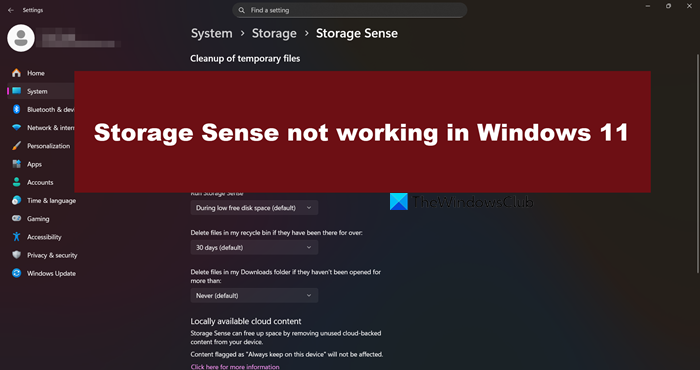
Storage Sense not working on Windows 11
If Storage Sense is not working on Windows 11, execute the solutions given below.
- Verify and repair the Storage Sense Scheduled Task
- Check Group Policy and Registry Configuration
- Install a specific critical update
- Repair system files
- Use a custom PowerShell script for granular cleanup
Let’s get started with the troubleshooting guide.
1] Verify and repair the Storage Sense Scheduled Task
Storage Sense needs Windows Task Scheduler to trigger its automatic cleanup. If it gets corrupted, unregistered, or misconfigured, the automated feature will fail. To fix this, we need to locate the specific Storage Sense and manually run it.
- Click Win + R to open the Run dialogue box, type taskschd.msc, and hit Enter to open Task Scheduler.
- Navigate to Task Scheduler Library > Microsoft > Windows > StorageSense.
- Select StorageSense, and from the Actions pane, click Run, and check the Last Run Result field. Once the task is complete, a 0x0 or The operation completed successfully result will be visible on the screen.
- Next, right-click on StorageSense, select Properties, and go to the Triggers tab. There, ensure that either On Schedule or On log on is enabled and active.
- Now, navigate to the Conditions tab, and ensure that settings like Start the task only if the computer is on AC power are not preventing it from running.
Check if Storage Sense is not working. Move to the next solution if the issue remains.
2] Check Group Policy and Registry Configuration
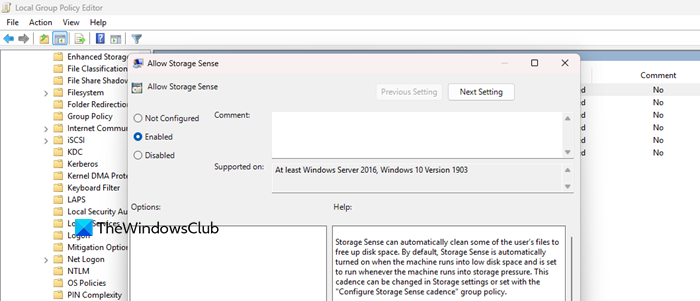
Group Policy or Registry settings can forcibly disable Storage Sense, grey out options, or override personal settings. To remove the administrative block and re-enable user control, we will edit the Local Group Policy.
For Pro/ Enterprise/ Education
- Click Win + R to open the Run dialogue box, type gpedit.msc, and hit Enter to open the Local Group Policy editor.
- Navigate to Computer Configuration > Administrative Templates > System > Storage Sense.
- Double-click on the Allow Storage Sense policy, and set it to Enabled or Not Configured. Click Apply and OK to save the changes.
- Once done, launch Command Prompt with administrative rights, and execute the following command:
gpupdate /force
For all Windows versions
- Press Win + R to open the Run dialogue box, type regedit, and click Enter to open Windows Registry Editor.
- Navigate to the location given below.
HKEY_LOCAL_MACHINE\SOFTWARE\Policies\Microsoft\Windows\StorageSense
- There, look for a DWORD (32-bit) value named AllowStorageSenseGlobal, double-click on it, and change the value to 1.
If it doesn’t exist, the policy is not enforced via Registry. Reboot the PC after the procedure is completed, and check if the issue is resolved. If not, see the next solution.
3] Install a specific critical update
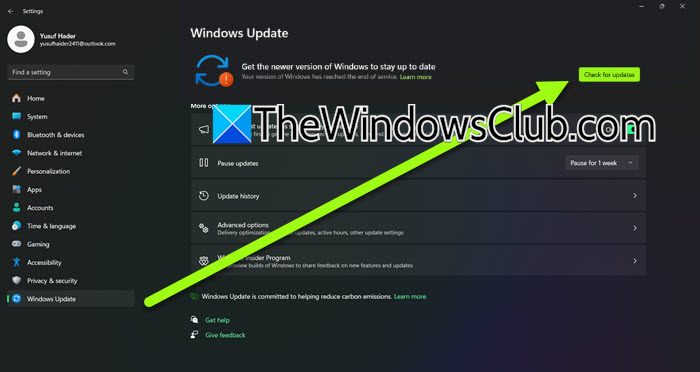
Click Win + I to open Settings, select Windows Update, and click the Check for updates button.
If there are any updates available, install all available features and quality updates.
After updating, to verify which patch was applied, go to Settings, click Windows Update, and select Update History. There, look for relevant Knowledge Base numbers, such as KB5050092 or KB5051989, as they are known to resolve Storage Sense functionality issues.
If it is Windows 11 Enterprise Multi-session edition, then coordinate with the IT administrator to confirm that the device is running the latest organisation-approved cumulative update. If it is up to date, proceed to the next solution.
4] Repair system files
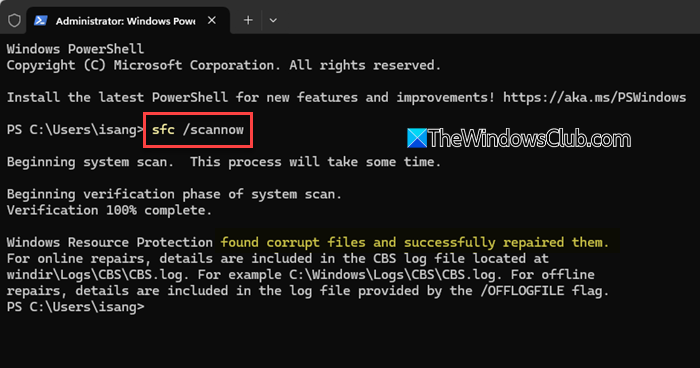
Corrupted or missing core Windows system files can break integrated features like Storage Sense. To repair these files, we need to run the System File Checker and DISM to scan and replace corrupted system files and the Windows image that serves as the source for these files.
- Click Win + R to open the Run dialogue box, type cmd, and hit Ctrl + Shift + Enter to open it with admin rights.
- Run the following command to use Deployment Image Servicing and Management to repair the Windows image.
DISM /Online /Cleanup-Image /RestoreHealth
- Wait for the process to complete, and then run the System File Checker by executing the command given below.
sfc /scannow
The scan will report if it found and repaired corrupt files. After both commands are completed, restart the device, and test Storage Sense again. If the issue persists, see the next solution.
5] Use a custom PowerShell script for granular cleanup
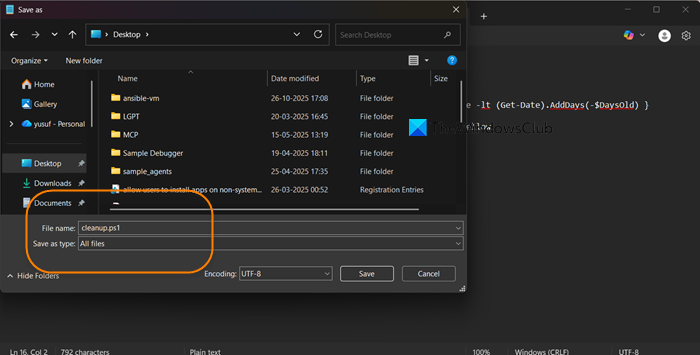
Storage Sense has design limitations that prevent it from cleaning subfolders deeply on non-system drives or offering fine-grained control. One workaround is to create a custom PowerShell script to bypass the Storage Sense limitation.
- Launch Notepad, and copy and paste the following script.
# Define the target folder and age threshold
$TargetFolder = "C:\Users\$env:USERNAME\Downloads"
$DaysOld = 30
# Get all files recursively that are older than the specified days
$OldFiles = Get-ChildItem -Path $TargetFolder -Recurse -File | Where-Object { $_.LastWriteTime -lt (Get-Date).AddDays(-$DaysOld) }
# Display what will be deleted (SAFETY CHECK)
Write-Host "The following files older than $DaysOld days will be deleted:" -ForegroundColor Yellow
$OldFiles | ForEach-Object { Write-Host $_.FullName }
# Ask for confirmation before proceeding
$Confirmation = Read-Host "Proceed with deletion? (Y/N)"
if ($Confirmation -eq 'Y') {
$OldFiles | Remove-Item -Force -Verbose
Write-Host "Cleanup completed." -ForegroundColor Green
} else {
Write-Host "Cleanup cancelled." -ForegroundColor Red
}
- Save the file with .ps1 extension, and then right-click the file and select Run with PowerShell.
- Review the list, edit the script, and change $DaysOld, or modify the $TargetFolder path. When it is ready, run it again, and hit Y when prompted.
- The next step is to schedule the PowerShell script for automatic runs. Open Task Scheduler, click Action, and select the Create Basic Task option.
- Provide it with a name, select the trigger option, and select Start a program in the Action section.
- Enter powershell.exe in the Program/script section, and in the Add Arguments section, enter the following path, but ensure to replace it with the actual path to the script file.
-ExecutionPolicy Bypass -File "C:\Path\To\Your\CustomCleanup.ps1"
Complete the wizard, then right-click the new task and select Run to test it immediately.
Read: Disk Cleanup not working properly or does not remove files
How to activate Storage Sense in Windows 11?
Activating Stprage Sense is a quick and easy step. To do the same, go to Settings, click on System, and then select Storage. In the Storage Sense section, switch the toggle key to On to activate it. Users can customise their schedules and rules.
Read: Stop or Make Storage Sense delete files from Downloads folder
How do I troubleshoot Storage Sense problems?
To troubleshoot any issues related to Storage Sense, start with a basic solution, such as ensuring that the user’s Windows version supports it, and then verify that the feature is turned on in Settings > System > Storage. If the issue is that the tool is not working or missing, see the article mentioned above.
Also Read: Disk is either Full or Read only error on Windows 11.
