By default, Windows 11 shows most used apps in the Start Menu. If you like to display such an app list, you can show Most Used apps in the Start Menu on Windows 11/10 using this tutorial. It is possible to change this setting using Windows Settings, Local Group Policy Editor, and Registry Editor.

Most Used is an app list visible in the Start Menu, which lets you find out the apps you have frequently opened in recent times. It helps you open those apps quickly when you do not want to search for them or pin them to the Taskbar.
Windows 11/10 Start offers you several customization options. It has features to enrich your Windows experience. It even displays a list of your Most used files, folders, and applications for convenience, knowing that you might want to use these again and again. For privacy purposes, some of you may not want to display these items. Let us see how you can remove the Most Used apps from the Windows Start Menu – totally or select items only. We will also see how you can add your favorite places here.
How to show or hide Most Used apps in Start Menu using Windows Settings
To show or hide Most Used apps in Start Menu using Windows Settings, follow these steps:
- Press Win+I to open Windows Settings.
- Go to the Personalization setting.
- Click on the Start menu.
- Toggle the Show most used apps button.
To learn more about these steps, continue reading.
At first, you have to open the Windows Settings on your computer. For that, you need to press Win+I together. Then, go to the Personalization setting and click on the Start menu.
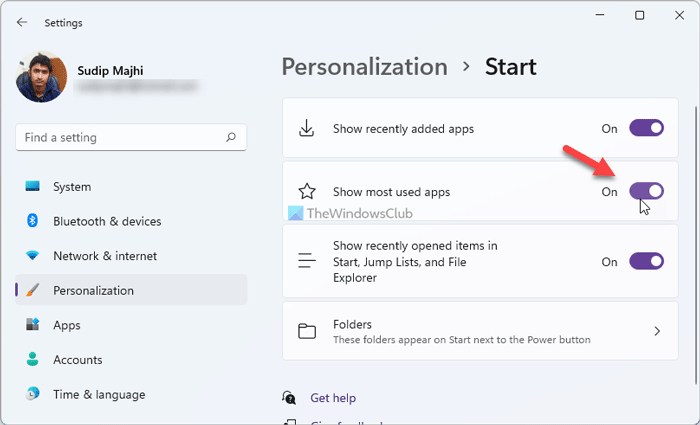
Here you can find an option called Show most used apps. You need to toggle this button to show or hide the most-used app list in the Start Menu.
How to turn on or off Most Used apps in Start Menu using Group Policy
To turn on or off Most Used apps in Start Menu using Group Policy, follow these steps:
- Press Win+R to open the Run prompt.
- Type gpedit.msc and press the Enter button.
- Go to Start Menu and Taskbar in the Computer Configuration.
- Double-click on the Show or hide “Most used” list from Start Menu setting.
- Select the Enabled option.
- Select Show to show the Most used app list.
- Select Hide to hide the Most used app list.
- Click the OK button.
Let’s check out these steps in detail.
To get started, you need to open the Local Group Policy Editor on your computer. For that, press Win+R to display the Run prompt, type gpedit.msc, and press the Enter button. After opening it on your computer, navigate to this path:
Computer Configuration > Administrative Templates > Start Menu and Taskbar
Here you can find a setting called Show or hide “Most used” list from Start Menu. You need to double-click on it and select the Enabled option.
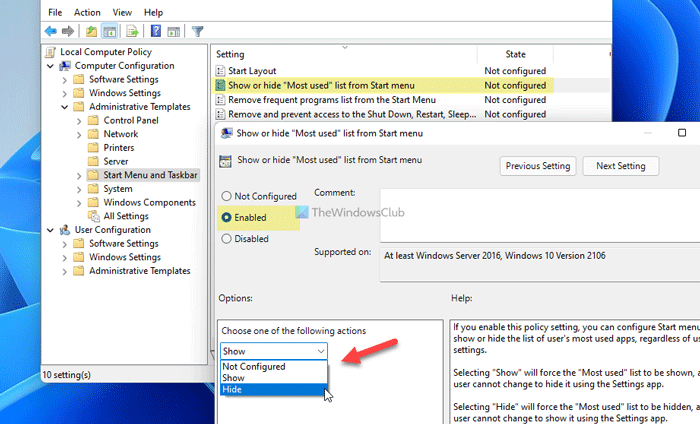
Then, expand the drop-down list and select the Show option to show the list or the Hide option to hide the Most used app list in the Start Menu.
Click the OK button to save the change. After that, you can open the Start Menu and click on the All apps button to find out the list.
How to add or more Most used apps in Start Menu using Registry
To add or more Most used apps in Start Menu using Registry, follow these steps:
- Search for notepad in the Taskbar search box.
- Click on the search result.
- Paste the REG code in Notepad.
- Click on File > Save As.
- Select a path where you want to save the file.
- Enter a name with .reg extension.
- Select All Files from the Save as type drop-down list.
- Click the Save button.
- Double-click on the .reg file.
- Click the Yes option.
- Restart your computer.
You need to keep reading to know more about these steps.
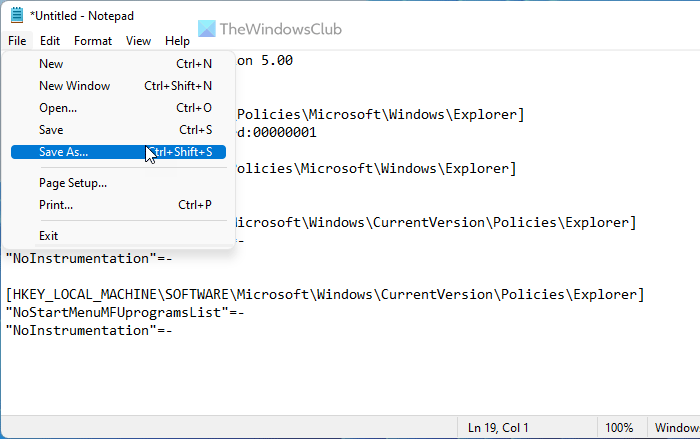
To get started, you need to open Notepad on your computer. You can search for it in the Taskbar search box and click on the individual search result. After that, paste the following code in Notepad:
Windows Registry Editor Version 5.00

[HKEY_LOCAL_MACHINE\SOFTWARE\Policies\Microsoft\Windows\Explorer]
"ShowOrHideMostUsedApps"=dword:00000001

[HKEY_CURRENT_USER\SOFTWARE\Policies\Microsoft\Windows\Explorer]
"ShowOrHideMostUsedApps"=-

[HKEY_CURRENT_USER\Software\Microsoft\Windows\CurrentVersion\Policies\Explorer]
"NoStartMenuMFUprogramsList"=-
"NoInstrumentation"=-

[HKEY_LOCAL_MACHINE\SOFTWARE\Microsoft\Windows\CurrentVersion\Policies\Explorer]
"NoStartMenuMFUprogramsList"=-
"NoInstrumentation"=-
Click on File > Save As option.
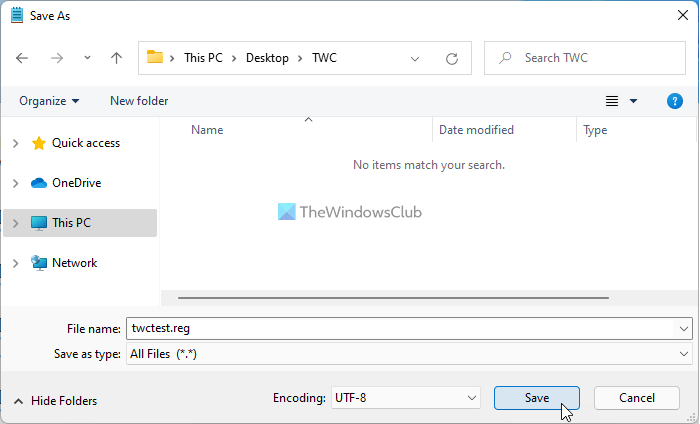
After that, select a path where you want to save the file, enter a name with .reg extension (example, twctest.reg), choose All Files from the Save as type drop-down list, and click on the Save button.
Next, double-click on the .reg file, and click on the Yes button to confirm the change.
After that, you need to restart your computer to get the change.
It is also possible to show or hide a particular app from the Most used app list in Start Menu. For that, you need to right-click on the app, select the More option, and select the Don’t show on this list option.
Add folders and items to Windows 11 Start
If you wish, you can add or remove some of the folders and places you frequently visit. To do so, simply choose the Folders tile under Personalization > Start.
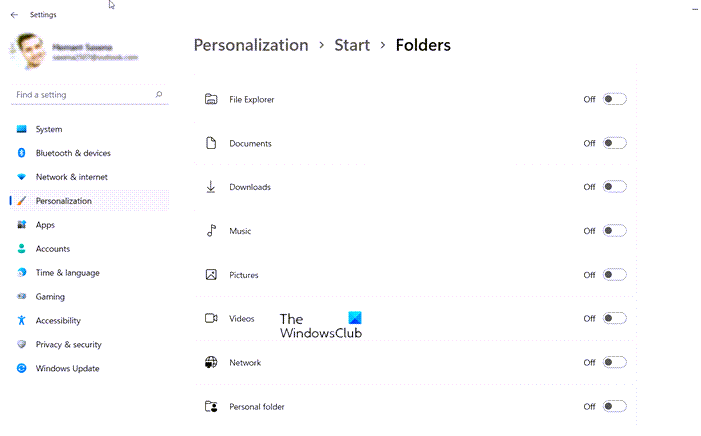
Start adding important items like Settings, Documents, Download folder, etc by toggling the switch to the On position.
Show or Remove Most Used apps from Windows 10 Start Menu
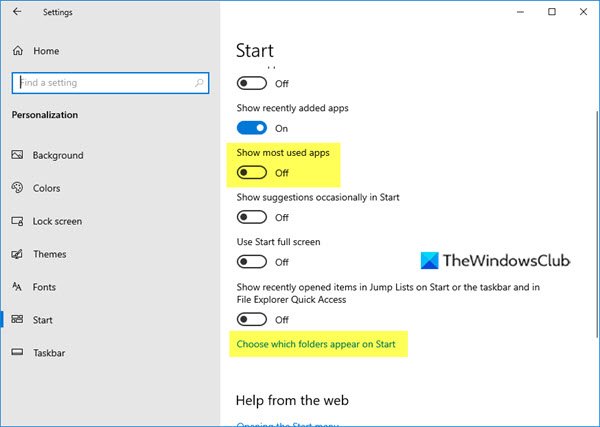
- Open the Settings app
- Click on Personalization
- Then click on Start
- Under Customize list, you will see Show most used apps.
- Toggle the switch to the Off position.
Now open the Start Menu and you will an empty space.
Read: How to clear Recent Files and Folders in Windows.
Add folders and items to Windows 10 Start
If you wish, you can add or remove some of the folders and places you frequently visit here, to fill up this empty space.
To do so you will have to click on the blue Choose which folders appear on Start link as shown above in the image.
The following panel will open.
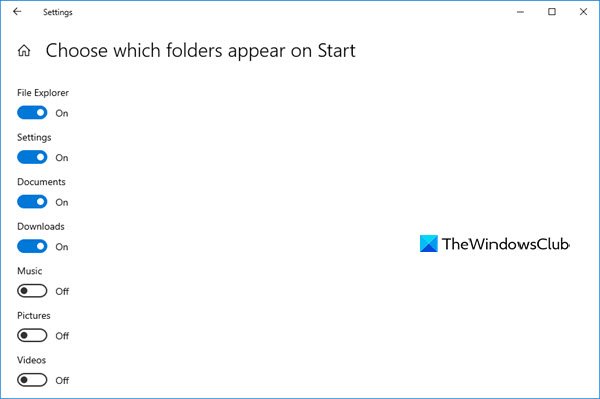
This lets you customize which places to link to, in your Windows 10 Start quick links section.
Here you can add important items like Settings, Documents, Download folder, etc, to fill in the created gap. Select the ones you want by toggling the switch and you will see them appear in your Start.
Hide particular program from Most used list in Windows 10
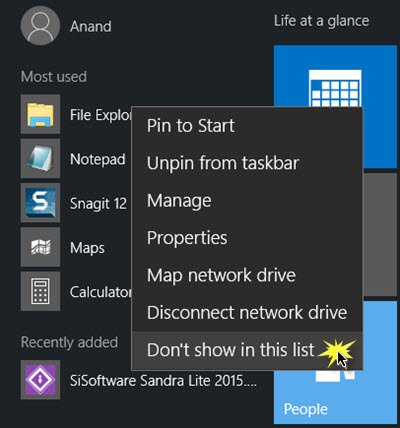
If you want to hide only select or particular programs in the Most Used list, then you can simply open the Start Menu and then right-click on that item and click on Don’t show in this list.
How do I see Most used apps on Start menu?
It is possible to see the most used apps on Start Menu using Windows Settings, Registry Editor, and the Local Group Policy Editor. In Windows Settings, you need to go to Personalization > Start and toggle the Show most used apps button.
How do I hide Most used apps?
If you have enabled it using Windows Settings, you need to go to Personalization > Start and toggle the Show most used apps option. Alternatively, you need to disable the Show or hide “Most used” list from Start Menu setting in the GPEDIT. If you used Registry, you need to delete all the added Registry keys and REG_DWORD values.
Does Windows 11 have a Start menu?
You can find the Start menu at the center of the screen over the Taskbar. In the earlier iteration, it was more towards the left of the screen over the Taskbar. To left-align the taskbar, go to Settings > Personalization > Taskbar > Taskbar behaviors. Under it, use the Task alignment section to adjust the position.
What is Recently used programs?
The recently used programs list in Windows shows the apps you’ve run most recently. It should not be confused with programs “pinned” to the Start menu. By default, Windows 11 displays 6 of them, but you can easily increase or decrease that number via Settings.
Go here if you want to hide Recently added apps group in Windows Start Menu.