Recovering email data in Microsoft Exchange Server is important to deal with issues like database corruption, accidental deletions, or server problems. In this article, we will see the steps to recover email data in Microsoft Exchange Server, whether restoring individual mailboxes, or entire databases, ensuring data integrity and smooth operation.
Can you retrieve emails from Microsoft Exchange Server?
Exchange Server offers tools such as recovery database and the eseutil utility to help recover data efficiently and reduce downtime. In the upcoming section, we are going to see how to use them to recover email data.
How to recover Email Data in Microsoft Exchange Server?
To recover email data in Microsoft Exchange Server, execute the methods mentioned below:
- Using Windows Server Backup
- Using Command Prompt
- Using a recovery database
Let’s get started with the guide.
1] Using Windows Server Backup

Windows Server backup is a native feature for backing up server data, including Exchange Server. This feature must be enabled and configured before an Exchange failure occurs. In this solution, we will explore the complete process, from start to finish, of recovering email data using Windows Server backup.
- Click Win + X, hit the A key, and select the Yes button when prompted to open PowerShell with admin rights. Then, execute the command mentioned below to enable Windows Server backup.
Install-WindowsFeature Windows-Server-Backup
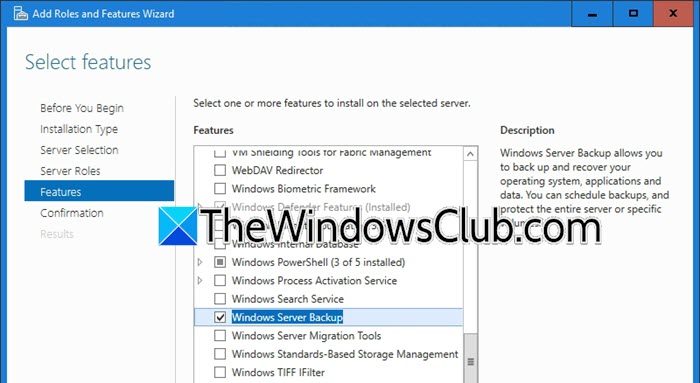
- Alternatively, navigate to the Server Manager, and select Manage. Click on Add Roles and Features, follow the wizard, and then select Windows Server Backup from the Features tab. Once enabled, go to the Server Manager, click Tools, and open it.
- Now, go to the left pane, right-click on Local Backup, and select Backup Schedule. Hit the Next button, and then select Custom > Next. In the next step, select the volumes containing the Exchange database (.edb files) and log files. Avoid selecting individual files or folders.
- Click on Advanced Settings > Next, and choose either one of the options according to your need. Choose how often the backup should run, the disk to store the backup, and hit the Yes button when warned that existing data will be deleted.
- Review the settings and click Finish to finalize the backup schedule.
Once the backup is ready, we will recover it.

Follow the steps mentioned below to recover the data.
- Launch Windows Server backup, right-click on Local Backup from the left pane, and select Recover.
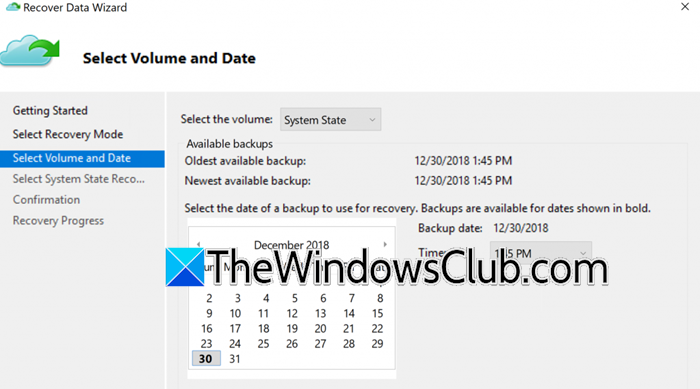
- In the window that opens up, choose where the backup is stored > Next, and then select the backup date, followed by hitting the Next button.
- On the Select Recovery Type window, click on Applications, and if it is greyed out, it means that files or folders were backed up instead of volumes. In this case, click on File and Folders, recover .edb, and log files to a custom location for further processing.
- In the Application drop-down menu, select Exchange> Next, and then for simplicity, we are going with Recover to Original Location in specifying Recovery destination.
- Verify the recovery settings, and start the process. Wait for it to complete, and then mount the database either through the Exchange Admin Centre or executing the following command on PowerShell:
Mount-Database DB01
(Replace DBO1 with the database name)
- To verify the database status, execute the following command:
Get-MailboxDatabase -Server -Status | fl Name,*FullBackup
If any error appears during the mounting, it may indicate disk corruption or logical issues. Use the eseutil utility to repair the database.
2] Using Command Prompt
Users can also recover an Exchange database using Command Prompt. This includes preparing the necessary database and log files to verify their health and performing recovery operations using the eseutil tool. Here’s how to do the same:
- To prepare the exchange database, copy the exchange database (.edb) and log files to a custom directory. If files were restored using Windows Server Backup, place them in this custom location for easy access during recovery.
- The next step is to determine whether the data is in a Clean Shutdown or Dirty Shutdown, therefore execute the following command to verify using the eseutil tool.
eseutil.exe /MH D:\DBRecovery\DB01\DB01.edb
- If the database is in Dirty shutdown, we are going to check the integrity of the transactions log:
eseutil.exe /ml E00
If the status indicates OK, logs are healthy and can be used for recovery.
- Now, we are going to recover the database using the eseutil tool, so run the following command:
eseutil /r E00 /l D:\DBrecovery\DB01 /d D:\DBrecovery\DB01
- Once done, run the command to verify the database state after recovery to confirm that the recovery process successfully fixe the database:
eseutil.exe /MH D:\DBRecovery\DB01\DB01.edb
Alternatively, users can also run the following command to verify it:
eseutil /R E00 /l D:\DBrecovery\DB01 /d D:\DBrecovery\DB01
Once in the Clean Shutdown state, the database can now be mounted or used to recover mailbox data.
Read: Stellar Data Recovery software review: How it recovered my data
3] Using a recovery database

We will use the Recovery database to recover the Exchange mailbox for specific users. Here’s how.
- To create a recovery database using the existing .edb file, execute the following command:
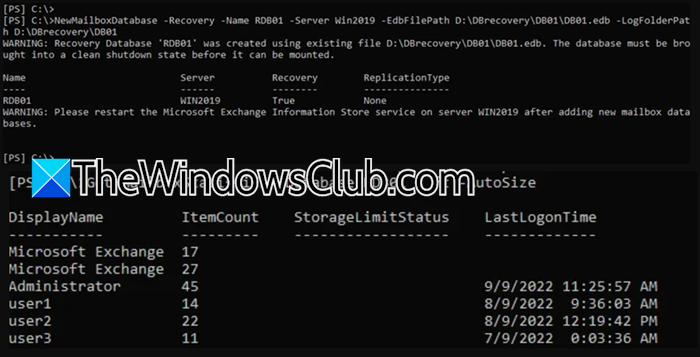
New-MailboxDatabase -Recovery -Name <RDBName> -Server <ServerName> -EdbFilePath <RDBPathandFileName> -LogFolderPath <LogFilePath>
(Make sure to replace <RDBName> with a unique name for the recovery database, <ServerName>, <RDBPathandFileName>, and <LogFilePath> with appropriate paths.)
- Once done, launch PowerShell, and execute the command line to restart the Exchange Information Store service to apply the new recovery database:
Restart-Service MSExchangeIS
Alternatively, users can also launch the Service Console, find and right-click on Microsoft Exchange Information Store, and select Restart.
- The next step is to mount the recovered database to access the mailbox data using the following command:
Mount-thedatabase RDB01
- After we have access to the mailbox data, we need to verify that it contains the desired mailboxes:
Get-MailboxStatistics -Database RDB01 | Format-Table DisplayName,MailboxGUID -AutoSize
- Now, to restore the desired mailbox from the recovery database to the target mailbox, execute the command mentioned below:
New-MailboxRestoreRequest -SourceDatabase RDB01 -SourceStoreMailbox 8aa77cb3-dc38-1f37-72e5-55702e737f52 -TargetMailbox DB01
(If executing the command leads to the legacy Exchange DN mismatch error: Source Mailbox legaceuxchangedn doesn’t match, then add the following command at the end:
-AllowLegacyDNMismatch)
- This marks the end of the recovering request; however, execute the following command as we still need to remove the completed request not to clutter the recovery environment:
Get-MailboxRestoreRequest | where status -eq completed | Remove-MailboxRestoreRequest
- Dismount the recovery database to finalize the recovery process, as it close access to the database:
Dismount-Database RDB01
Lastly, log in to the recovered mailbox via Outlook or Outlook Web Access to ensure that the user’s mailbox is functional and all required data has been stored before handing over access to the user.
Read: How to recover data from Unformatted Drive in Windows
How do I get an Email back?
Users accessing Outlook or the Outlook web app can use the Recover Deleted Items feature to recover an email. However, for mailbox recovery, users can restore from a backup or use a recovery database in Exchange.
Also Read: Free Data Recovery Software: Recover deleted files & folders.