Kubunto is a user-friendly Linux distribution that combines the power of Ubuntu with the sleek KDE desktop environment. If you’re curious about trying out Kubuntu without installing it directly on your device, installing it in VirtualBox is the easiest and safest way to experience it. In this guide, we will walk through the step-by-step process of installing Kubuntu on VirtualBox, from installing VirtualBox to configuring Kubuntu on the newly created VirtualBox.

How to install Kubuntu on VirtualBox?
If you want to install Kubunto on VirtualBox on a Windows computer, execute the steps below.
- Verify prerequisites
- Download and install VirtualBox
- Download the Kubunto ISO File
- Create a new Virtual Machine
- Configure Kubuntu on the new Virtual Machine.
1] Verify prerequisites
First and foremost, it’s necessary to verify the prerequisites to ensure a smooth installation of any Operating System, either on VirtualBox or the device itself. For Kubuntu, ensure that the system has a 1 GHz x86-compatible processor. It must have a minimum of 1 GB RAM, although 2 GB is recommended for a smoother experience. Moreover, 10 GB of free hard disk space, including space for the swap partition, must be available. Once verified, the next step is to download and install VirtualBox.
2] Download and install VirtualBox

If you don’t have VirtualBox downloaded and installed, we will do so first. For that, navigate to virtualbox.org, install it, and go to the downloaded file. Run the installer, and then follow the on-screen instructions to complete the process. Launch the app, and then move to the next step to download the Kubunto ISO file.
3] Download the Kubunto ISO file
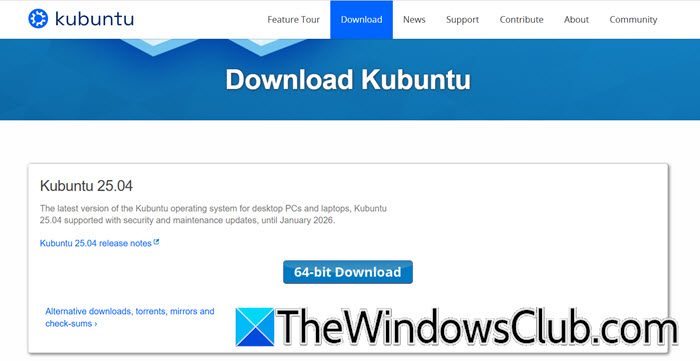
After installing VirtualBox, we need to download the Kubunto ISO file. To do the same, visit the official Kubuntu website and click the Download button for the latest version. On the mirror download page, select the version; the 64-bit Desktop image is recommended, then choose the .iso file, and the download will begin immediately. The next step after downloading the ISO file is to set up a new Virtual Machine.
4] Create a new Virtual Machine

Once the Kubuntu ISO file is downloaded, open VirtualBox and set up a new Virtual Machine to begin the installation process. To do so, follow the steps outlined below.
- Launch VirtualBox, and click on the New icon.
- In the Create virtual machine wizard, provide a name for the Virtual Machine, specify the location where it will be stored, and then set Type as Linux, and then Version as Ubuntu (64-bit).
- Click on Hardware, keep in mind your computer’s physical resources, and set the parameters. However, it is always recommended to allocate at least 2 GB of memory and 2 or 3 CPUs to avoid any lag.
- Hit on Hard Disk, then select the Create a Virtual Hard Disk Now option, set the parameters, and untick Pre-allocate Full Size.
- Finally, click on Finish.
The next step after creating a new Virtual Machine is to mount the Kubuntu ISO file.
5] Configure Kubunto on the new Virtual Machine
The Virtual Machine has been created. The next task for us is to configure Kubuntu by mounting the ISO file and adjusting some essential settings. This involves attaching the Kubutu ISO file to the Virtual Machine so it can boot from it, and then configuring storage and display options. Here’s how to do the same.
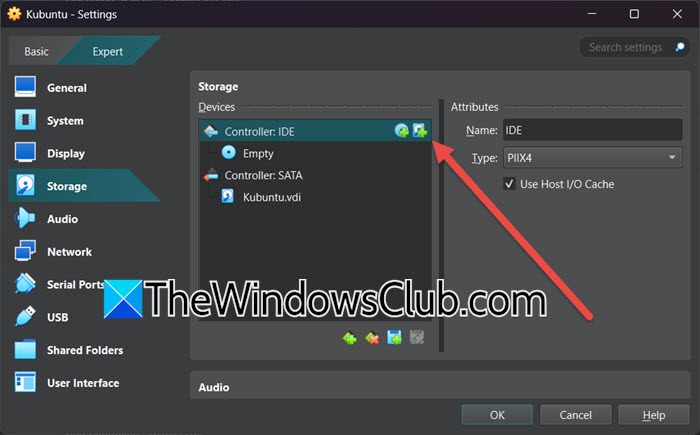
- Select the newly created Virtual machine, click on Settings, and then click on the Storage tab.
- Click on the + icon right next to Controller: IDE, and select the Add icon.
- Now, navigate to the location where the ISO file is stored, select it, and then click OK to save the settings.
This step makes sure that the Virtual Machine can boot from the Kubuntu ISO file. Now that the ISO is mounted, we are ready to boot into the Kubuntu installer. For that, select Kubuntu VM from the left panel, hit Start to launch it, and if prompted, select Kubuntu ISO and press Enter. Once Kubuntu loads, the next step is to configure it.
- Click on Install Kubuntu to begin the installation process, and then select your preferred keyboard layout, and select Continue.
- Next, select the download preferences from the options, click Continue, and then tick the Guided: Use entire disk option on the next screen.
- Hit the Install Now option, and then continue to apply the changes.
- Select the region, time zone, and click Continue to move forward. Once done, set up a User account by filling in the usual information, deciding whether to log in automatically or require a password to log in, and then hit the Continue button when done.
With all the settings in place, Kubuntu will now install on the Virtual Machine. Wait for Kubuntu to copy its files and complete the setup. Once installation is complete, click on the Restart Now button when prompted. After rebooting, log in using the credentials, and you are all set to explore the Kubuntu environment. The user can customize the desktop, install software, or get comfortable with this Linux OS within the Virtual Machine.
Read: How to install Arch Linux in VirtualBox
Should I install Ubuntu or Kubuntu?
Deciding between Ubuntu and Kubuntu depends on users’ needs and computer specs. Both options are equally powerful, so users can go for Ubuntu if they are looking for a clean, modern interface with strong community support. Alternatively, they can opt for Kubuntu if they prefer a more customizable, Windows-like desktop experience through the KDE environment. Choose wisely, and make a sound decision that suits your requirements.
Read: How to install Oracle Linux on Oracle VirtualBox
How to install Ubuntu on VirtualBox?
To install Ubuntu on VirtualBox, users need to download the Ubuntu ISO file from its official website and create a new virtual machine. Once they are done, the next step is to mount the ISO file, start the VM, and follow the on-screen instructions.
Read: Rocky Linux on VirtualBox in Windows 11.