Databases such as Oracle, PostgreSQL, MySQL, and Cassandra can be installed on Windows 11. Even though we don’t see DBs running on a client operating system, we can install them to get some practice done before moving to a production environment or switching to a Server/Infrastructure Operating Systems. In this guide, we will see how you can install Cassandra DB on Windows 11.
How to install Cassandra DB on Windows 11
If you want to install Cassandra DB on your computer, follow the steps mentioned below.
- Install Java
- Install and Configure Python
- Download and Set Up Apache Cassandra
- Start Cassandra Server from Command Prompt
Follow the steps mentioned below.
1] Install Java
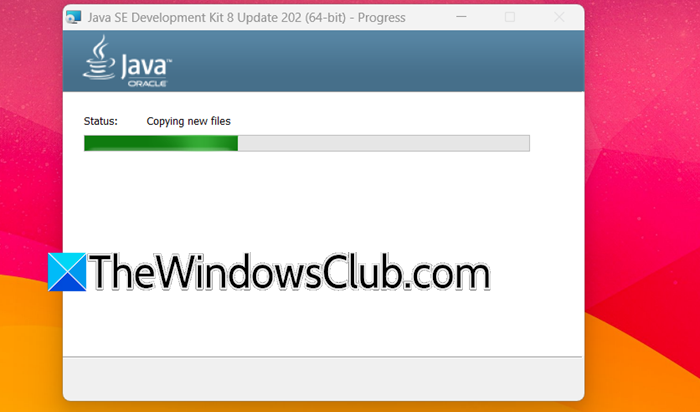
Java 8 is the crucial first piece of our puzzle, as Cassandra relies on it fundamentally to function. Although newer versions of Java exist, you must stick precisely to Java 8 (Update 202 or later) (the latest version at the time of writing this article) to avoid a labyrinth of compatibility issues that can arise with Cassandra 3.11 on Windows. An Oracle account is required to download the installer, but the sign-up is free and takes just a moment. Follow the steps below to install Java 8.
- Navigate to the Oracle Java SE 8 Archive Downloads page (oracle.com). You’re looking specifically for the Java SE Development Kit 8u202 (or later update) for Windows x64.
- After signing in and downloading the .exe file, run the installer as an administrator.
- The wizard will guide you through the setup; stick with the default installation path on your system drive, but be sure to note the full directory path. You’ll need it shortly.
- Once the installation completes, it’s time to set the environment variables. Press the Windows key, type environment variables, and open the Edit the system environment variables control panel entry. Click the Environment Variables… button.
- Under System variables, click New. For Variable name, enter JAVA_HOME, and for Variable value, paste the full path to your Java installation folder (for example, C:\Program Files\Java\jdk1.8.0_202). Click OK.
- Next, find the Path variable in the same System variables section, select it, and click Edit….
- Click New and add the path to the bin subfolder inside your Java directory (e.g., C:\Program Files\Java\jdk1.8.0_202\bin). Confirm the changes by clicking OK on all open dialogs.
After downloading and setting up Java, let’s move to the next step.
2] Install and Configure Python
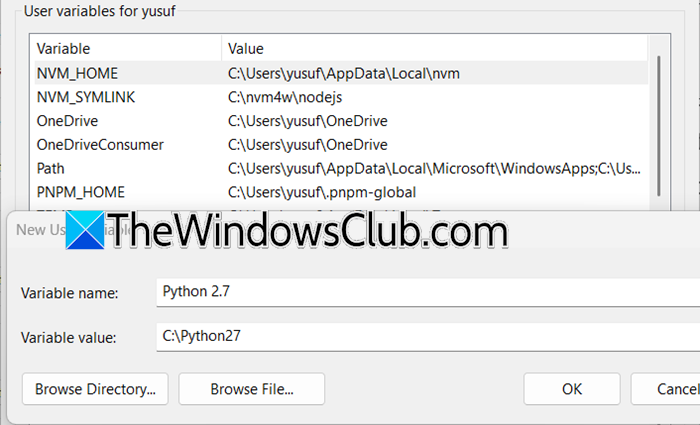
Cassandra’s interactive terminal, cqlsh, is a Python application that handles your commands and queries. As with Java, it’s picky about versions; Python 2.7 is the mandatory, tested partner for Cassandra 3.11, even though it is now a deprecated Python release. You can even check this by trying to launch cqlsh later without Python installed, you’ll promptly be met with a friendly error reminding you of the dependency.
- Head over to the Python 2.7.18 (the latest version at the time of writing this article) download page and grab the Windows x86-64 MSI installer.
- Run the downloaded MSI file. Choose to install for all users if you prefer, and on the feature customization screen, ensure the option to add python.exe to the Path is selected. If it’s a simple checkbox, enable it; if not, you’ll add it manually next.
- After the installer finishes, return to the Environment Variables dialog as you did before. Edit the Path system variable and add a new entry pointing directly to your Python 2.7 installation folder (commonly C:\Python27).
To verify, open a new Command Prompt and type python --version.
Seeing Python 3.14.3 confirms the setup is sound. If you get an error, double-check the path you entered. A single typo will prevent the system from finding Python, so precision is key.
3] Download and Set Up Apache Cassandra
With Java and Python firmly in place, it’s time to bring in the main component. Cassandra dropped native Windows support after version 4.0, so the final release that runs directly on your Windows 11 machine without any compatibility layer is 3.11.9. We’ll be sticking to this older but perfectly stable build for our local practice environment.
- Download the binary tarball apache-cassandra-3.11.9-bin.tar.gz directly from the official Apache archives (archive.apache.org). You need a tool like 7-Zip or WinRAR to unpack it because the .tar.gz format isn’t natively handled by Windows File Explorer.
- Extract the archive to a short, root‑level folder, for example, C:\Cassandra. This keeps paths clean and avoids the “path too long” issues that can sometimes plague Windows tools.
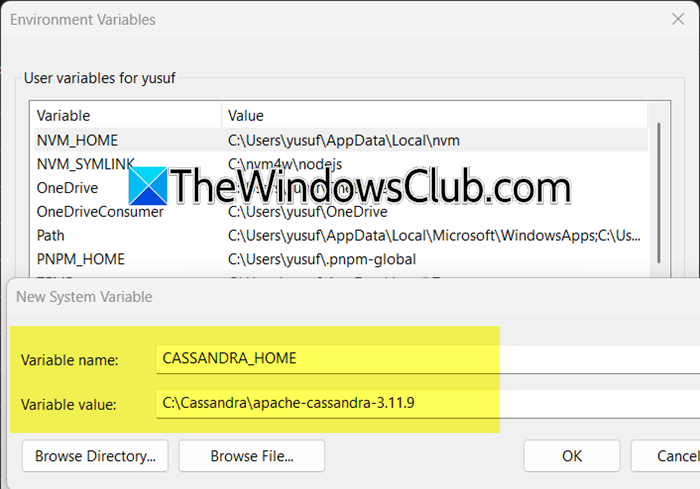
- Open System Properties again and create a new System variable:
- Variable name: CASSANDRA_HOME
- Variable value: the full path to your extracted folder (like C:\Cassandra\apache-cassandra-3.11.9).
Find the Path variable in the same list, edit it, and add a new entry for the bin directory inside Cassandra’s home (e.g., C:\Cassandra\apache-cassandra-3.11.9\bin). Click OK to save all changes.
4] Start Cassandra Server from Command Prompt

Now we can fire up the server. In a real production setup you would normally run Cassandra as a service, but on Windows 11 a foreground process is the simplest way to get a test cluster rolling. This window will stay open for as long as you want the database to run.
Open File Explorer, go to the Cassandra bin folder (from the previous step).
Click into the address bar, type cmd, and press Enter. This opens a Command Prompt already pointed at the bin folder.
Inside that terminal, type cassandra and press Enter. A stream of log messages will start scrolling by as the server boots up. Do not close this window as it stops the database immediately.
Wait until you see a line that says something like Starting listening for CQL clients on localhost/127.0.0.1:9042. That tells you the server is ready to accept connections.
Now, you can start typing your queries and creating databases.
Read: How to create a Database in Access: Steb-by-step guide
How to start Cassandra on Windows?
To start Cassandra, open your Cassandra bin folder (e.g., C:\Cassandra\apache-cassandra-3.11.9\bin), click the address bar, type cmd, and press Enter. Inside the Command Prompt, run the command cassandra. The server will begin spitting out log messages; wait until you see the line Starting listening for CQL clients… on port 9042. Do not close that terminal window, it represents your live Cassandra node. To stop the server later, simply press Ctrl+C in that same window.
Is Cassandra faster than MySQL?
It depends entirely on the workload. Cassandra, as a distributed NoSQL database, is engineered for extreme write throughput and scales horizontally across many nodes, making it blazingly fast for time‑series data, logging, or massive key‑value operations. MySQL, a relational database, excels at complex joins, transactions, and ACID‑guaranteed consistency on a single machine. In large‑scale, write‑heavy scenarios with simple read patterns, Cassandra often outperforms MySQL. However, for intricate, relational queries on smaller datasets, MySQL is usually faster. They aren’t interchangeable; the faster label always depends on what you’re measuring.
Also Read: Difference between SQL and NoSQL: A Comparison.