
Windows 11 offers a number of features that allow users to customize their system, and Desktop Stickers is one of them. In this feature, you can add stickers to your desktop, which will remain there after changing the wallpaper. Once you have added stickers, you can move and resize the stickers as needed. Here’s a quick tutorial on how to enable and use Desktop Stickers on a Windows 11 computer.
How to Add and Use Desktop Stickers on Windows 11
After you have activated Desktop Stickers on your Windows 11 computer, you now have to learn how to add and use Desktop Stickers. Let’s go through it in detail:
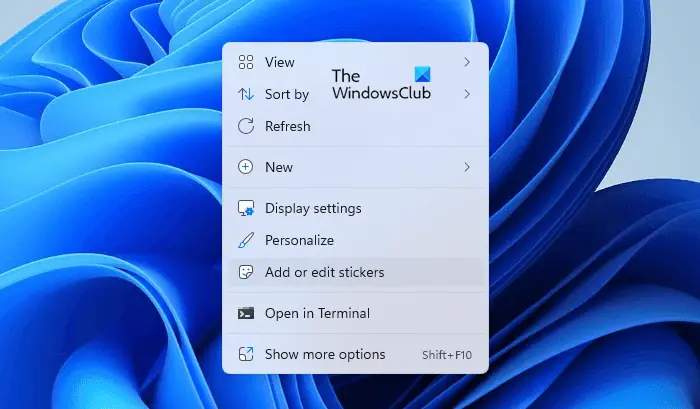
To use them, right-click your desktop and select Add or edit stickers from the context menu. This will take you to the background settings page in Windows 11. On the next screen, make sure the feature is enabled. Another way to access the stickers interface is through the Settings menu. From there, open Personalization > Background, then click Add stickers to choose stickers for your wallpaper.
When you select the Add or edit stickers item in the context menu, you will see a Stickers tool that lets you choose or edit the stickers. The sticker search engine also allows you to search for the stickers you want to use for your Desktop screen.
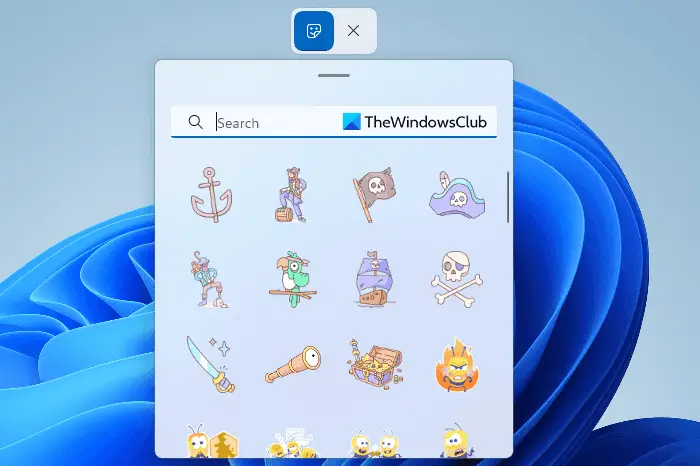
Here you will find an interface for choosing stickers. You can scroll through the list or search for stickers that you want to use for your desktop screen. As of now, custom images cannot be turned into stickers.
The first thing you will notice when you select a sticker is that it will appear in the upper left corner of the screen. Now you can drag or resize the sticker by clicking on it. You can delete a sticker by clicking on the trash icon below it, or selecting the sticker and then pressing the Delete key on your keyboard. In order to exit the sticker editor, click “X” at the top.

To move the sticker, click on it, and a square will appear. Hold it near the edge and move it to the place you want.
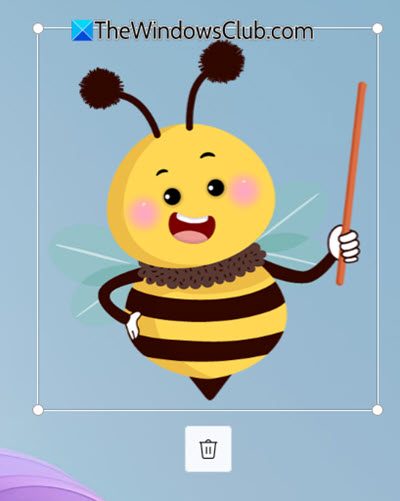
To delete the sticker, click on the Bin icon that you see.
What I like about desktop stickers is that there is no need to add back stickers when you change the desktop background. So, when you switch wallpapers, the stickers will stay on the desktop.
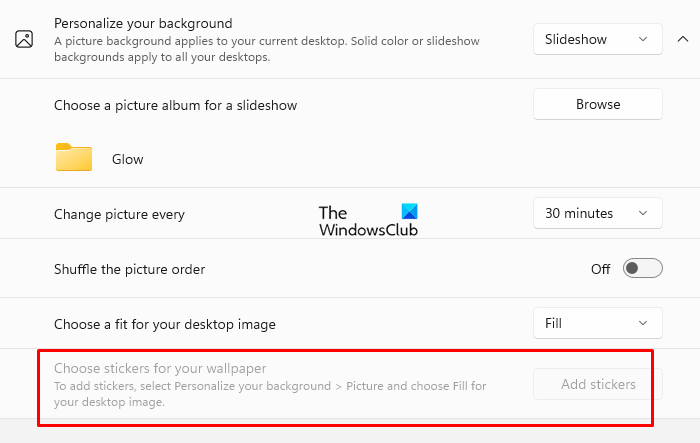
Another thing you should note is that they won’t work with the Solid color and slideshow background. As you can see from the above screenshot, when I apply slideshow background, the option to choose stickers for wallpaper becomes greyed out and disabled.
You can add, resize, or delete stickers as many times as you wish. While adding stickers, you’ll notice that the Taskbar and applications are hidden on the desktop.
That’s how you enable and use desktop stickers on your Windows 11 PC.
TIP: You can also Overlay or display another image or photo on your Windows desktop wallpaper
How to disable Desktop Stickers in Windows 11
Some users like the stickers feature, but many others find it unnecessary and a waste of time. If you agree and consider it time-wasting and useless, you can disable it by applying a simple registry hack. Just follow the instructions below.
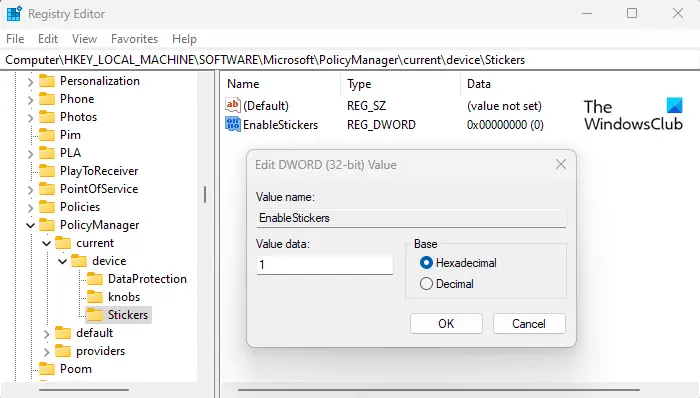
- Open the Registry Editor.
- Browse to the following location –
HKLM\SOFTWARE\Microsoft\PolicyManager\current\device - You can now either delete the Stickers key or set the EnableStickers Value to 0 in the right pane.
- Click OK, and then exit Registry Editor.
- Restart the computer after you have finished this procedure.
The stickers may not disappear even after disabling the feature, so you may need to remove them manually or change the desktop wallpaper.
Read: AwesomeWallpaper lets you display images & video on your desktop wallpaper
Does WhatsApp desktop support sending stickers?
There is no automatic support for animated stickers in the desktop version of WhatsApp. So, you’ll need to use the mobile version of WhatsApp to access these stickers. In the desktop version, you’ll be able to use the stickers automatically after downloading.
Related Post: How to create a personal Sticker on WhatsApp Web or WhatsApp Desktop.
