There could be times when you might want to add a transparent gradient to an image to make it more professional. If so, you can follow the guide mentioned in this article to apply a transparent gradient to an image. Here we have mentioned two options – Canva and Photoshop. You can use either method as per your requirements.

What is the transparent gradient effect?
In photo editing, a gradient effect means two colors merge or blend gradually from one to the other. However, a transparent gradient denotes the same thing, except there is only one color. Instead of having two primary colors, the transparent gradient contains one primary color opposite to a transparent phase.
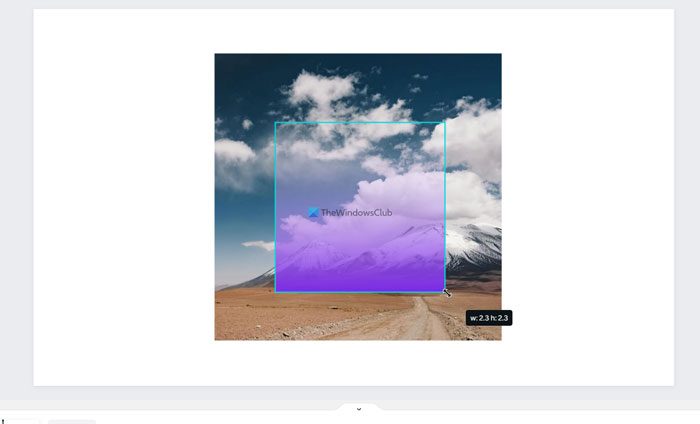
For a better understanding, it is recommended to refer to the aforementioned image. Here you can see the transparent gradient on a landscape. The primary color is yellow, visible in the bottom section, and it gradually merges with the image or with no other color.
How to create and add Transparent Gradient to Image using Canva
To add a transparent gradient to an image using Canva, follow these steps:
- Open Canva website and log in to your account.
- Switch to the Uploads tab and upload the image.
- Go to the Elements tab.
- Search for transparent gradient.
- Select an effect.
- Adjust the position and choose the color.
- Download the image from Canva.
To learn more about these steps, continue reading.
To get started, open Canva’s official website and log in to your account. Then, create a blank file and switch to the Uploads tab. Next, you need to upload your image and select it.
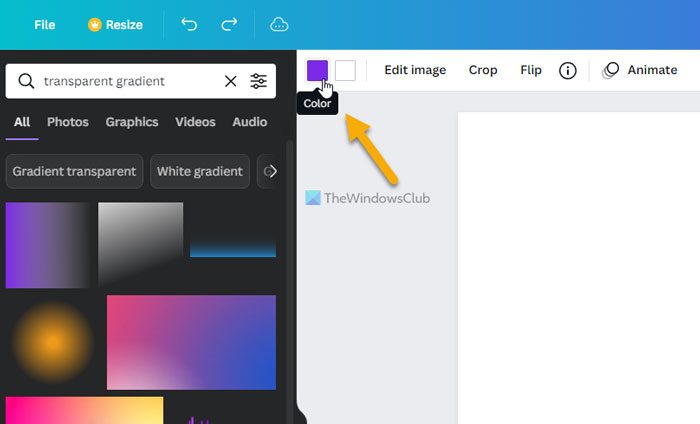
Once the image is selected, go to the Elements tab and search for transparent gradient.

Then choose a transparent gradient and adjust its position as shown in the image.
Once done, you can choose the color you want. As said earlier, you can select only one color for the transparent gradient effect.
Following that, you can download the image from Canva.
How to add a transparent gradient to an image using Photoshop
To add a transparent gradient to an image using Photoshop, do the following:
- Open the image in Photoshop.
- Select the Gradient tool or press G.
- Click on the Gradient Editor.
- Expand the Basics section and choose the transparent gradient option.
- Choose the color you want and click the OK button.
- Apply the effect using your mouse.
Let’s check out more about these steps.
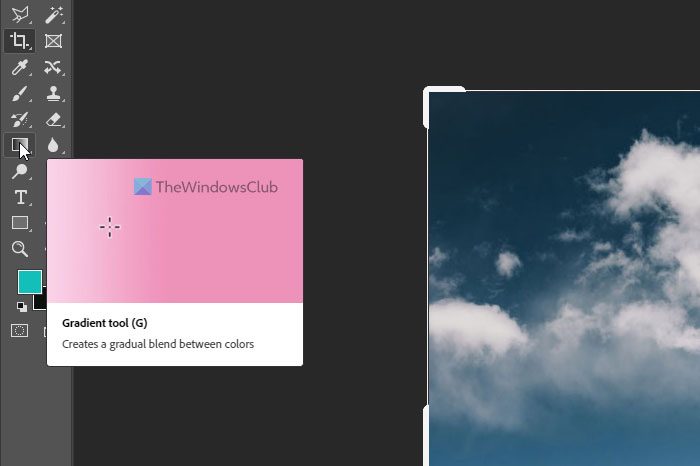
First, you need to open the image in Photoshop and select the Gradient tool or press the G button on your keyboard.
Next, click on the Gradient Editor panel and expand the Basics section. It contains the Transparent Gradient option that you need to select and choose a color as per your requirements.
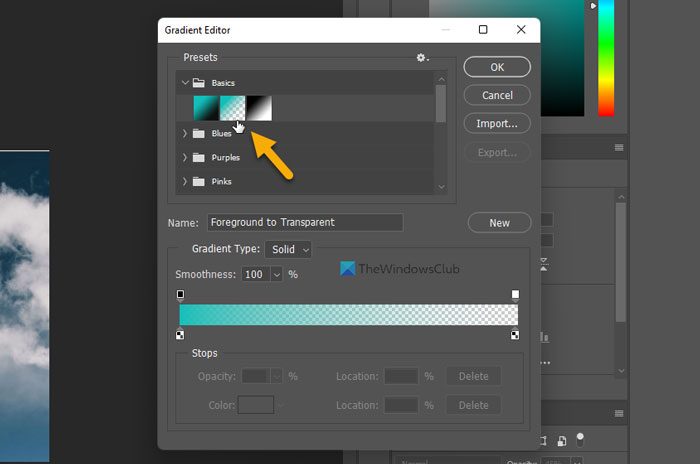
Once done, click the OK button and apply the gradient effect using your mouse.
Once done, you can save the image as you do with other images.
That’s all!
How do you make a gradient transparent in Photoshop?
To make a gradient transparent in Photoshop, follow the steps above. The good news is that Photoshop comes with a preset transparent gradient that you can use to get things done. Whether you have a square or a rectangular image, you can apply the same effect to any image with the help of Photoshop.
Read: How to remove background from image using Canva Background Remover
How do you add opacity to a gradient?
To add or change the opacity to a gradient in Photoshop, you need to apply the effect first. However, you must apply the effect on a separate layer from the original image. Once done, you can expand the Layers section, select the gradient layer, expand the Opacity section, and adjust it as needed.
Read: How to create Instagram Carousels in Photoshop.