
Creating a mosaic with images is not particularly difficult, especially if the right tools are in use. The problem, then, is finding the right tools, and that can be a task within itself. If you’re struggling to locate the perfect Windows 10 program for your mosaic needs, then you’re in luck. Today, we’re going to talk about a tool known as AndreaMosaic. The sole purpose of this program is to create mosaics from digital images, and it’s all about making the task as easy as possible. Here’s the thing: from what we’ve gathered, users can choose the mosaic’s resolution, but that’s not all.
Users can also choose the number of tiles and the file size, among other settings designed to make AndreaMosaic work best for them. It’s quite capable, but at first glance the design makes it seem hard to use. We can say for certain that it’s not easy at first, but once you’ve gotten the hang of things, you’ll be just fine.
Make a mosaic picture with AndreaMosaic for PC
Using the AndreaMosaic tool to create mosaics is pretty simple, but things might not turn out as expected if you lack experience.
- Add the main image
- Size and Tile parameters
- Tile variants
- Add other images for the mosaic
- Create the mosaic
1] Add the main image
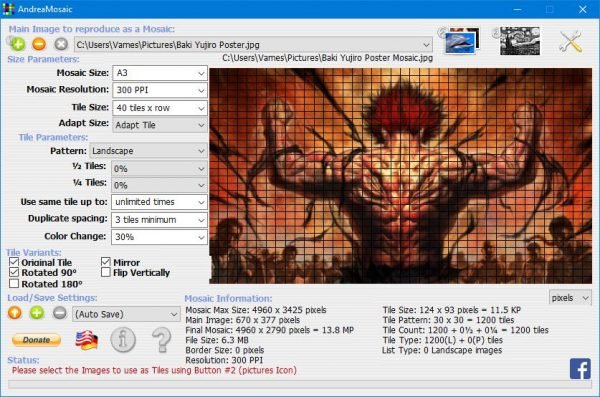
The first step to take in creating your mosaic is to add the main image. This is done by clicking the green button, then finding your picture and adding it. You’ll see the image in the box to know if you’ve made a perfect choice.
2] Size and Tile parameters
OK, before we move forward, it’s time to edit the size parameters to your liking. Users can edit the mosaic size, mosaic resolution, and tile size. It’s straightforward if you ask us, so amateurs shouldn’t have a hard time getting what they want.
When it comes to tile parameters, this is where the user changes the patterns, half-tiles, and quarter-tiles. Additionally, the other options make it possible to decide whether or not to use the same title, duplicate the spacing, or alter the color of images by a certain percentage amount.
3] Tile variants
With the Tile variants feature, users can do quite a few things simply by ticking boxes. Users can rotate the tile by 90 to 180 degrees. Want to flip vertically? No problem, Bob; this is very much a possibility here.
Once everything is done, simply click the save button to ensure your settings won’t be lost if something unexpected goes down.
4] Add the other images for the mosaic
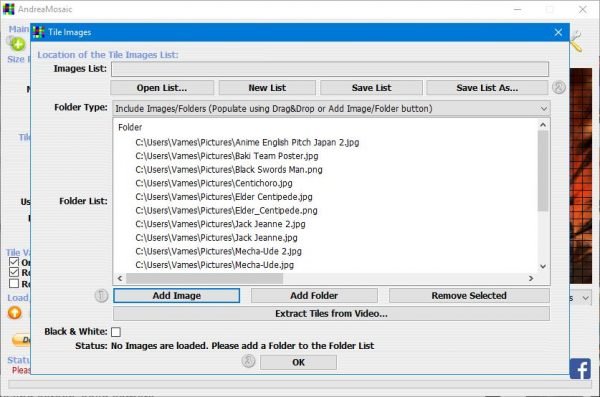
To add the other images to the mosaic, users must click the picture next to the green plus button at the top to begin the process. Once the button is clicked, you’ll see options to add the pictures needed for the mosaic.
Select the one you want, add the images, then hit OK. Before doing that, you can choose to convert the images to black & white during the mosaic creation process.
5] Create the mosaic
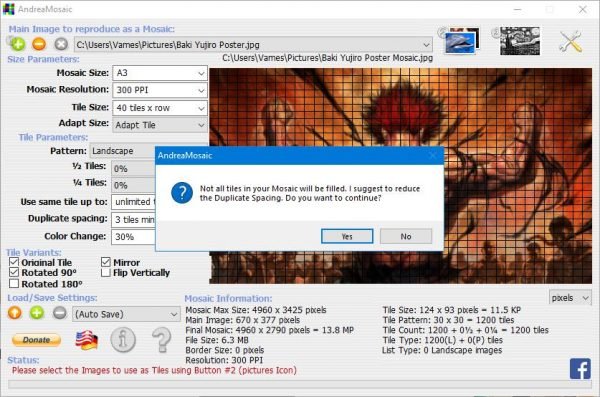
Finally, it’s time to create the mosaic to get everything aligned to how you want it to be. Simply click on the button with the #3 attached, then sit back and wait for the mosaic to be created. Bear in mind that you might see an error suggesting you reduce the duplicate spacing.
If this is not done, then you’ll come across several dark spaces in your mosaic. Download the AndreaMosaic tool directly from the official website.
