Some Game Pass users reported that their game is explicitly using the integrated graphics driver instead of the dedicated GPU. When a user attempts to assign the high-performance GPU, they find that the game’s .exe file is inaccessible. In the Windows Graphics settings page, the game may not appear in the list, or the user may be blocked from selecting it due to permission errors. In this post, we will address this issue and see what you can do if the Game Pass PC won’t let you assign a GPU to a game.
Game Pass PC won’t let me assign GPU to a game
The reason you are unable to allocate a dedicated GPU to your Game Pass title is because of the packaging model, UWP/MSIX, used for Microsoft Store and Xbox Game Pass titles. Unlike traditional Win32 programs (like those from Steam), these games are installed in a protected, encrypted directory. This design enhances security but also locks down the game files, preventing users and even other applications from directly accessing or modifying the executables. This is a structural limitation of the platform itself, not a fault of the game or the user’s system. While Microsoft has shifted some games back to Win32, some protective folder behaviors seem to persist.
If Game Pass won’t let you assign a GPU to your game, follow the solutions mentioned below.
- Select your game from the Microsoft Store Apps
- Modify the Game’s configuration file
- Set a System-Wide GPU Preference
- Disable the Integrated GPU Temporarily
Let us talk about them in detail.
1] Select your game from the Microsoft Store Apps

Microsoft has added the ability to pick a Microsoft Store app in the recent version of Windows. If you are unable to find the game under “Add Desktop app”, try looking for it under Microsoft Store apps. Follow the steps mentioned below to do the same.
- Open Settings by Win + I.
- Go to System > Display > Graphics.
- Now, click on Add Microsoft Store app.
- Search for the app and add it.
Finally, check whether you can run your game on the dedicated GPU.
2] Modify the Game’s Configuration File
In this solution, we will bypass the locked Xbox platform. When the game starts, it reads the engine_config.txt file. By setting the graphics_adapter value in this file, you tell the game which GPU to use, replacing the default choice made by the system.
Follow the solutions mentioned below to do the same.
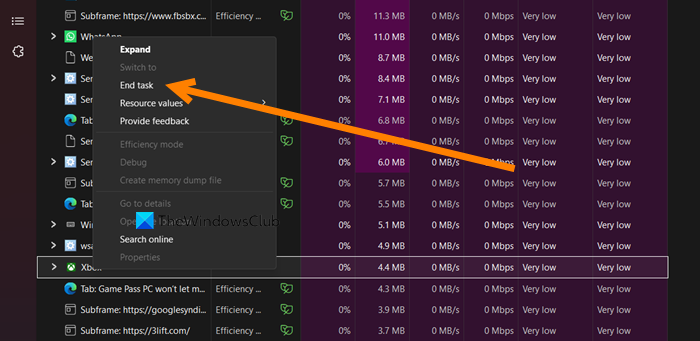
- Open Task Manager by Ctrl + Shift + Esc.
- Look for the Xbox app, right-click on it, and select End Task. Then, end your game’s instance as well.
- Navigate to the game’s documents folder. For example, for Mount & Blade II: Bannerlord, it’s located at: C:\Users\[YourUsername]\Documents\Mount and Blade II Bannerlord\Configs. (If the folder doesn’t exist, launch the game once to generate it.)
- Open the engine_config.txt file with a text editor like Notepad.
- Look for the line graphics_adapter = 0 (where 0 typically represents the integrated GPU).
- Change the value to 1 (for your dedicated NVIDIA GPU) or 2 if 1 doesn’t work, save the file, and relaunch the game.
Finally, check if you can see improvement in the game.
3] Set a System-Wide GPU Preference
When you establish a global setting, you create a system-level directive that takes precedence over individual application preferences. By setting the default graphics preference to High performance, you instruct Windows to prioritize the more powerful dedicated GPU for all processes. This includes protected Game Pass applications, which cannot be configured manually. As a result, the system bypasses its default power-saving logic and utilizes the appropriate GPU for the game.
Follow the steps mentioned below to do the same.
- Open Settings.
- Go to System > Display.
- Look for Graphics and click on it.
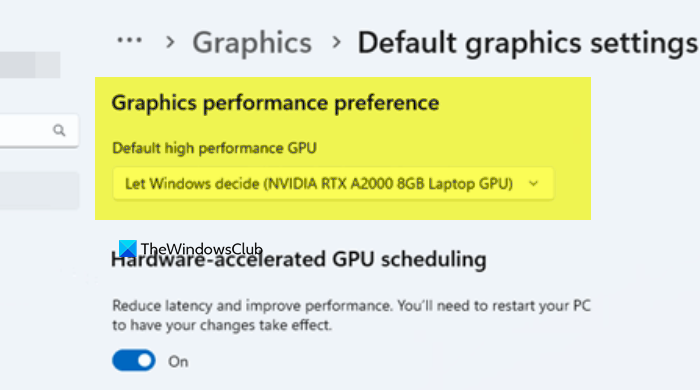
- Now, go to Default graphics settings.
- Then, set the Graphics performance preference to the dedicated GPU option.
This is a workaround, and not a solution, as using a dedicated GPU all the time will increase load on your system.
4] Disable the Integrated GPU Temporarily
Let’s try a different approach. We’ll disable the integrated GPU (iGPU) in Device Manager, which will prevent Windows from recognizing it. After restarting, all graphics processing, including for the Game Pass app, will be routed through your dedicated GPU (dGPU).
You can follow the steps mentioned below to do the same.
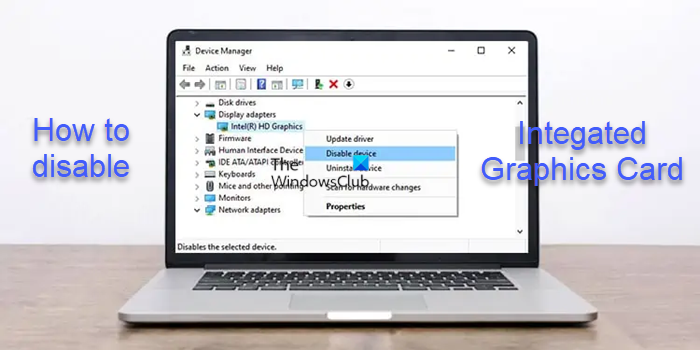
- Launch the Device Manager.
- Now, expand Display adapters.
- Right-click on your Integrated Graphics device and click on Disable device.
- Click on Yes when prompted.
Hopefully, this will do the job for you.
We hope that with the help of these solutions and workarounds, your issue will be resolved.
Read: Video card not detected but the fan is spinning.
Why is my game using CPU instead of GPU?
Your game may be using the CPU instead of the GPU due to a misconfiguration that incorrectly defaults to the weaker integrated graphics. This can happen if your graphics control panel does not properly recognize the game or if the high-performance GPU is not selected in Windows’ Graphics Settings for that specific application, forcing the CPU to handle more graphical workload than intended.
Read: Force a Game to use a Graphics Card or GPU in Windows 11
How do I force games to use 100% GPU?
You can’t directly force your GPU to run at 100% usage because this depends on how demanding the game is. However, you can make sure your GPU is used fully. Set it as the default high-performance processor in your NVIDIA or AMD control panel. Also, choose the ‘High Performance’ power plan in Windows. This helps remove software limitations, allowing the game to access the GPU’s full power when needed, rather than being held back by power-saving settings.
Read: Game not using GPU in Windows 11.