If you are using the Windows 10 Mail app, then you can enable, disable, change, and use the Swipe actions. If you are using a touch-enabled Windows 10 device, you can use the swipe actions with your finger;if not, you can find some buttons when you hover your mouse over an email in your Mail app.
The Outlook app in Windows is one of the best free email clients that allows users to add an email from almost any provider. As Windows is highly compatible and fluent with touch-screen monitors, the Mail app offers this functionality to enhance the user experience. Like most of the email clients for mobile platforms, you can have some swipe actions so that you can quickly choose something to perform (example: Archive, Delete, Move, etc.).
Enable & use Swipe actions in the Outlook app for Windows
To enable and use Swipe actions in the Windows Outlook app, follow these steps:
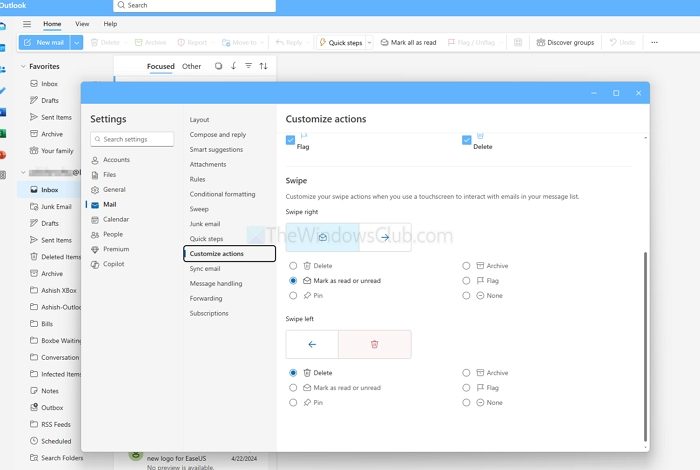
- Open the Outlook App and then click on the settings icon on the top-right
- Navigate to Mail > Customize actions
- Here you can change Quick actions and Swipe
While the default swipe right is to set it as Mark as read, and swipe left to delete the email, you can configure it to Flag, pin etc.
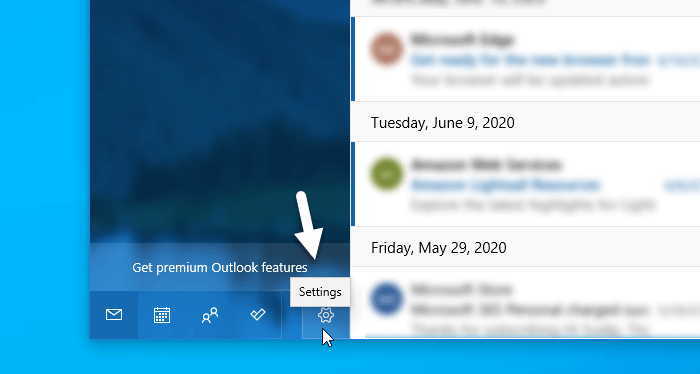
To enable and use Swipe actions in the Windows 10 Mail app, follow these steps-
- Open the Mail app on your Windows 10 computer.
- Click the settings gear icon.
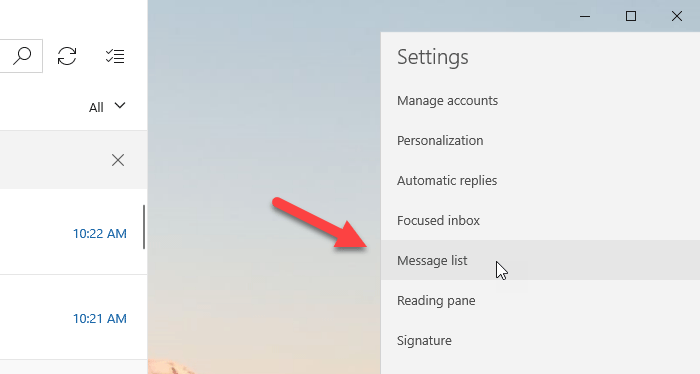
- Click on the Message list option.
- Toggle Enable swipe actions button.
- Choose the account to apply swipe actions.
- Choose Swipe right, and Swipe left actions.
Open the Mail app on your Windows 10 PC. If it is already pinned to Taskbar, you can open it from there. Otherwise, you can use the Taskbar search box to get the job done. After opening, you should find a settings gear icon in the bottom-left side of the Mail app window.
You need to click on this icon. Following that, a panel should appear from the right side of your screen. Here you can find an option called Message list. You need to click on this option.
By default, the Swipe actions are turned on. If it is not, you need to toggle the Enable swipe actions button. After that, you can choose the account on which you want to apply the actions. If you have multiple accounts and you want to use on all of them, it is better to make a tick in the Apply to all accounts checkbox.

Then, you can choose the swipe actions. For that, expand the Swipe right / hover and Swipe left / hover drop-down list and select action as per your requirement. For your information, you can have Set/Clear flag, Mark as read/unread, Archive, Delete, Move, and Move to Junk options.
That’s all! From now on, you can swipe to perform the selection action efficiently.
I hope it helps!