If Dropbox is not syncing or working on Windows 11 or Windows 10 computers, these solutions will help you fix the issue. There could be several reasons why Dropbox is not working correctly on your PC. This article explains almost all the possible reasons along with the solutions.
Dropbox not syncing or working on Windows 11/10
If Dropbox is not syncing or working on Windows 11/10, follow these steps:
- Check internet connection
- Verify account password
- Check storage
- Check Camera Upload setting
- Don’t limit bandwidth
- Check file names
- Disable VPN and proxy
- Check Selective Sync
- Clear cache
- Turn off Firewall software
To learn more about these steps, continue reading.
1] Check internet connection
It is probably the first thing you need to check if you are getting synchronization issues with Dropbox. For obvious reasons, Dropbox requires a valid internet connection to synchronize files. Otherwise, you cannot have it uploaded on Dropbox storage.
To check if you have an internet connection, simply open a website in your browser. On the other hand, you can also open Command Prompt and enter
ping 8.8.8.8 -t
If you have problems with them, you need to change the internet source.
2] Verify account password

If you recently changed your account password, synchronization will stop automatically until you log in again. You might change the password for security reasons. In those cases, you need to enter the new credentials in the Dropbox app. If Dropbox doesn’t display a pop-up, you can go to the Account tab in the Dropbox Preferences panel and click the Sign out option.
Then, enter your email ID and password to log in.
3] Check storage
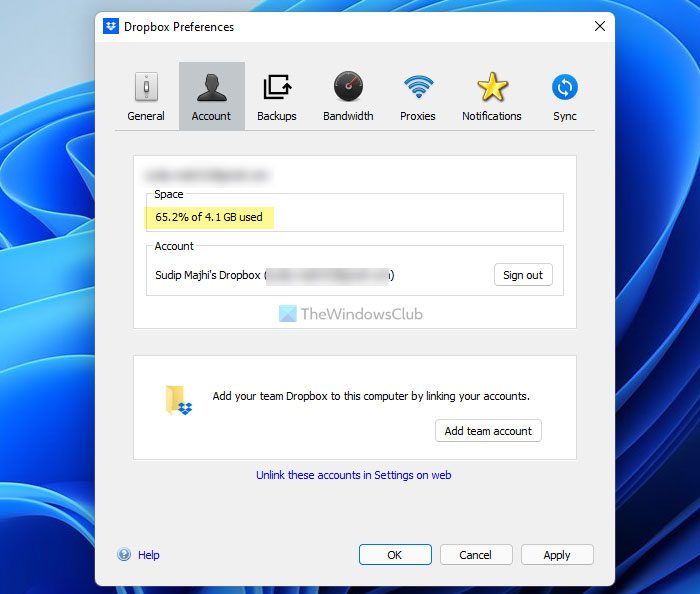
Dropbox provides 5GB of free storage to free account holders, and it increases as you upgrade your account. No matter which account you use, you can always run out of free space. That is why you need to keep a watch on the available space.
If your account has no free space left, you cannot synchronize files. Let’s assume you have 100MB left and are trying to upload a 150 MB file. In such a situation, you cannot do that for obvious reasons.
4] Check Camera Upload setting
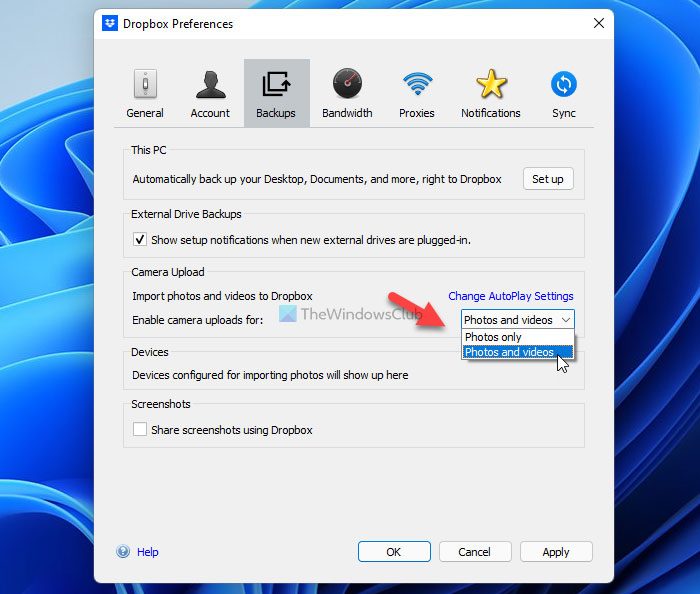
Like OneDrive, you can automatically upload photos and videos to Dropbox storage from your PC. Let’s assume you mistakenly selected to upload only photos to Dropbox and are now trying to find videos as well. In such situations, you cannot find them because of an incorrect setting. That is why it is recommended that you verify the setting of the Camera Upload. For that, do the following:
- Open the Dropbox Preferences panel on your computer.
- Switch to the Backups tab.
- Find out the Camera Upload section.
- Select the Photos and videos option from the drop-down list.
- Click the OK button.
After that, your images and videos will be uploaded to Dropbox automatically.
5] Don’t limit bandwidth
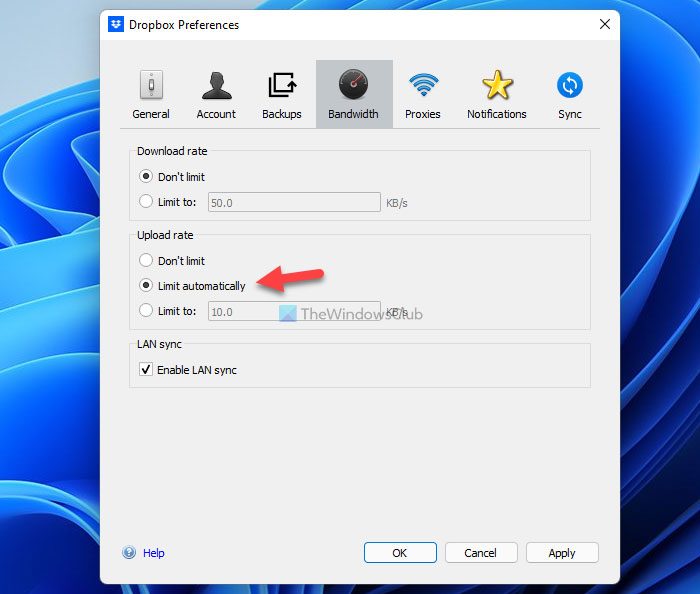
Dropbox allows users to limit bandwidth so they do not run out if they have a limited data connection. However, if you set things up incorrectly, you might have problems with the uploads. In other words, Dropbox will take forever to upload large files.
To verify the upload rate, follow these steps:
- Open the Preferences.
- Go to the Bandwidth tab.
- Find out the Upload rate section.
- Select the Don’t limit option.
- Click the OK button.
After that, restart the Dropbox app to check if the problem is resolved or not.
6] Check file names
Dropbox can upload files only if they have a valid name. For example, myimage.png is a valid name but, *myimage is not a valid one. In such cases, Dropbox skips the file and uploads the rest of them. Like the asterisk, there are many other things you need to avoid when naming a file to upload to Dropbox. For example, here is a list:
- Colon (:)
- Double quotes (“)
- Vertical line (|)
- Question mark (?)
- Period (.)
If you have a file with such things in its name, it is recommended to rename it to check whether it gets uploaded.
7] Disable VPN and proxy
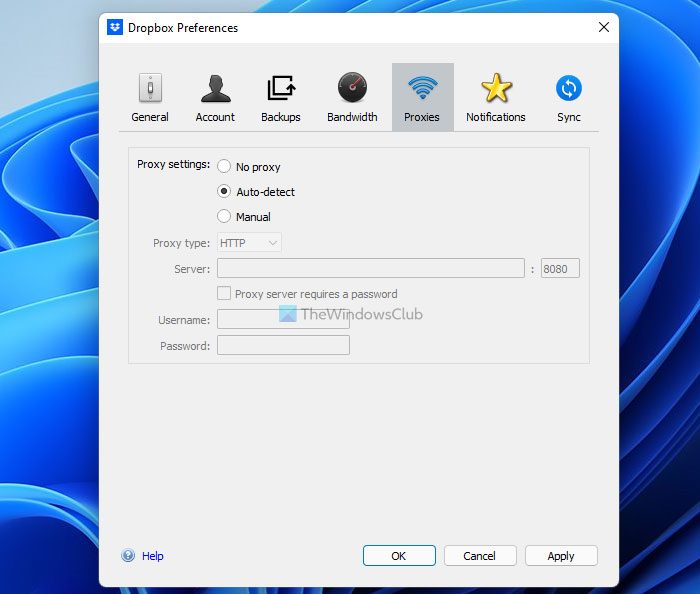
At times, your VPN or proxy apps could also cause the same error on your computer. Whether you use a paid or free VPN, every app can have server issues. As a result, you won’t have a valid internet connection on your computer. That said, you can’t upload files to Dropbox. The same thing can happen with proxy as well. Therefore, it is recommended to disable the VPN connection if you have any. On the other hand, follow these steps to reset the proxy setting:
- Open the Dropbox Preferences on your PC.
- Go to the Proxies tab.
- Select the Auto-detect option.
By default, Dropbox uses the aforementioned option. However, you can also select the No proxy option.
8] Check Selective Sync
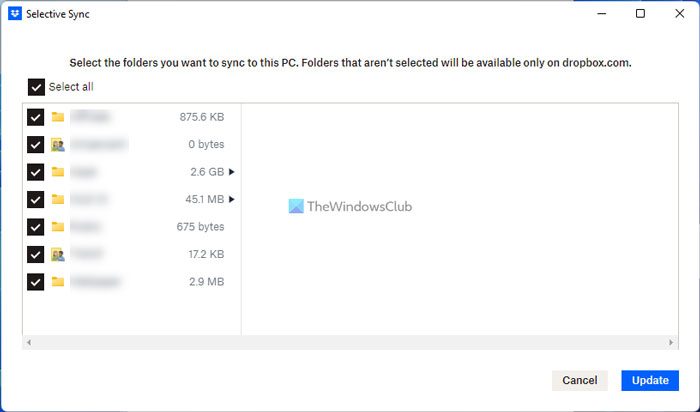
Like other cloud storage services, Dropbox allows users to include or exclude specific folders from backup. If users do not want to upload or synchronize all the folders, they can skip it. It is also known as Selective Sync. If you set things up incorrectly, you may run into problems with synchronization. That is why follow these steps to verify the setting:
- Go to the Sync tab in Dropbox Preferences.
- Find the folder you want to synchronize.
- Tick the corresponding checkbox.
- Click the Update button.
After that, the selected folder will be uploaded and synchronized.
9] Clear cache
At times, the cache can cause this issue on your computer. That is why you can remove them and check if it resolves your problem or not. To do that, do the following:
- Press Win+R to open the Run prompt.
- Enter this:
%HOMEPATH%\Dropbox\.Dropbox.cache - Select and delete all of them visible in this folder.
- Remove them from the Recycle Bin.
- Restart the Dropbox app.
After that, you should not find the same problem again.
10] Turn off Firewall software
A third-party firewall can often block incoming and outgoing traffic on your computer. If you recently installed firewall software on your computer and the problem started afterward, it is recommended to disable the firewall. No matter which firewall software you use, almost all of them offer an option to temporarily pause security settings. You need to find the option in your firewall app and turn the option on.
How do I sync Dropbox in Windows 11?
Dropbox doesn’t require any additional settings to turn on or off synchronization in Windows 11. However, if you set the Selective Sync setting incorrectly, you might get problems afterward. Although Dropbox displays such an option when you install the app, you can find the same in the Dropbox Preferences panel. Go to the Sync tab and click on the Selective Sync button. Here you can find all the folders you want to include or exclude.
Why is Dropbox not syncing on my computer?
There could be various reasons why Dropbox is not syncing on your computer. Some reasons and solutions are discussed in this article. It is recommended to follow all of them according to the situation. However, it is recommended to check the internet connection first – no matter why you are getting this issue.
Why is my Dropbox Smart Sync not working?
Dropbox Smart Sync lets you view and access all your files and folders stored in the cloud without syncing them to your local device. To enable Smart Sync, open the Dropbox folder, right-click the file or folder that you want to make Online-only, and select Smart Sync. If your Dropbox Smart Sync is not working, check the available storage space, update your Dropbox app, check your firewall, security, and antivirus settings, and check your network connection.
Read: How to remove Dropbox from File Explorer Navigation Pane.