
WifiDiagnosticsView is a free and portable application that helps you diagnose wireless connectivity problems on Windows 11/10 computers. Here is how to set it up to troubleshoot any wireless network issue on your Windows 11 or Windows 10 computer.
No matter whether you use Ethernet, a mobile hotspot, or a dedicated Wi-Fi network to get an internet connection on your computer, you can find various problems at times. Although Windows 11/10 comes with in-built troubleshooters, you might not be able to fix all the issues using those tools. That is when you can opt for WifiDiagnosticsView.
As mentioned earlier, WifiDiagnosticsView is freeware and compatible with Windows 11, Windows 10, and some other older versions of Windows. In terms of features, the main function of this tool is to log any event that happened or is happening on your Wi-Fi network. Whether you use a Wi-Fi router or mobile hotspot, it displays the same log for any Wi-Fi network.
Generally, it displays a gray icon alongside the date and time. However, if there is an issue with the network, you can find a red icon so that you know when and what caused the issue.
WifiDiagnosticsView features and options
WifiDiagnosticsView is intended for troubleshooting only the wireless network issues. However, if you want to learn more about the options, the following list may be helpful.
- Find network name and description.
- It shows the date and time for logging the data.
- Copy any error message in one-click.
- Export reports in HTML format.
- Show or hide specific columns.
- Change font for the user interface.
There are more other options here and there. To learn more about them, use this app.
Diagnose wireless connectivity problems in Windows with WifiDiagnosticsView
To diagnose wireless connectivity problems with WifiDiagnosticsView, follow these steps:
- Download the app from the official website.
- Extract and double-click on the WifiDiagnosticsView.exe file.
- Let it start the scanning.
- Find the log on the screen.
To learn more about these steps, continue reading.
First, you need to download the WifiDiagnosticsView app from the official website. Once the ZIP file is downloaded, extract it and double-click on the WifiDiagnosticsView.exe file.
It opens the main interface, which looks like this:
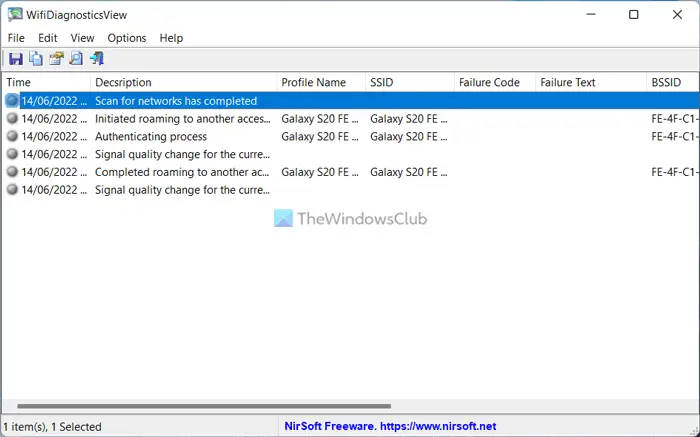
Then wait a few moments for it to start scanning. Once it starts scanning, you can find all the network information.
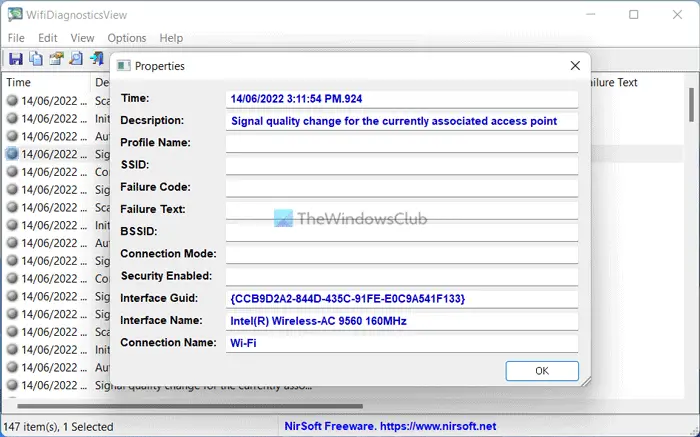
To find more details, double-click any log. It displays the data like this:
That’s all! If you like, you can download WifiDiagnosticsView from nirsoft.net.
How do I diagnose wireless network problems?
There are multiple ways to diagnose wireless network problems on your computer. For example, you can use the built-in troubleshooters in Windows 11/10. You can also download and use the WifiDiagnosticsView app.
How do I run a Wi-Fi diagnostic test?
To run a Wi-Fi diagnostic test on Windows 11 or Windows 10 computers, you can use the WifiDiagnosticsView app. It is one of the best options you have. Whether you use Windows 11 or Windows 10, or any other version, you can make use of this app.
Reads that may help you:
