Coordinating meetings with external clients while including internal team members can be a logistical challenge. The traditional method of juggling Outlook calendars and lengthy emails often leads to a frustrating back-and-forth process. Microsoft 365 offers a streamlined solution – the Shared Bookings Page. By sharing a simple link, external participants can see available time slots for all required attendees and book instantly, eliminating guesswork and creating a seamless, professional experience. In this post, we are going to see how to create a Shared Booking Page in MS Bookings.
Create Shared Booking Page in MS Bookings
Standard users cannot delete a Bookings page; only Microsoft 365 administrators can do so, making planning essential to avoid cluttered back-end situations. You need to review the requirements below.
- Only Microsoft 365 administrators can delete a Bookings page.
- Standard users are restricted from deleting pages.
- Planning is crucial to avoid creating unnecessary pages.
- Consider adding new “Services” to existing pages instead of creating new ones.
- Map out use cases in advance to maintain a clean back-end.
If you meet the requirements listed here, follow the steps below.
- Create the foundation
- Configure the Default Service and Access
- Customize Services for Specific Teams
- Scale your bookings
Let us talk about them in detail.
1] Create the foundation

To begin, navigate to the Microsoft Bookings homepage (login.microsoft.com). Select Create a Booking Page. You will be presented with the option to either build one from scratch or clone an existing template. For a new initiative, starting fresh is usually the simplest path.
Here, you will name your page and set the default business hours. While you can adjust availability per service later, this establishes the baseline schedule for the entire page. After this, you will add your staff members. You can only add users who are already in your Microsoft 365 tenant. At this stage, it is wise to add all relevant team members, even if they won’t be used in every service. You can later assign specific staff to specific meeting types.
2] Configure the Default Service and Access
Next, you will set up the default service. Essentially, the template for your first meeting type. You’ll define the standard duration (e.g., 30 minutes) and set the default availability.
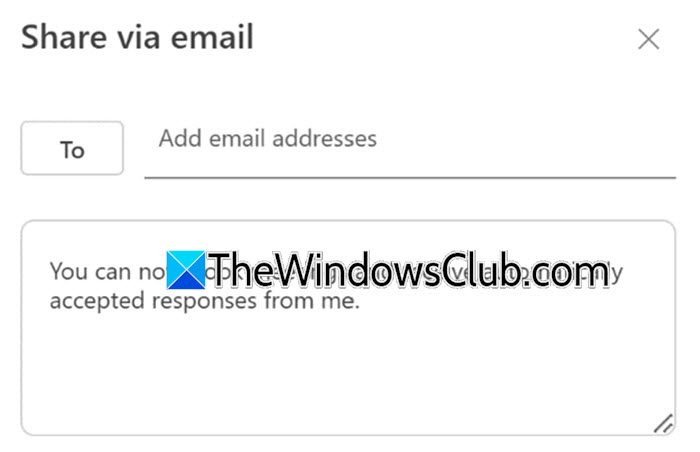
A crucial setting is deciding who can book. To create a link that can be shared externally with clients or vendors, you must select the Anyone option. This generates a public-facing link. Once these settings are confirmed, click Create. Your base page is now live. You can share your booking page via email by entering the email addresses of the recipients you want to reach. You also have the option to include a custom message. This focused approach ensures that your booking page is shared with individuals who are most likely to engage with your services.
3] Customize Services for Specific Teams
The real power of a Shared Bookings Page lies in creating specific services within it. If you need separate links for meetings with different team members (e.g., Meeting with Engineer A vs. Meeting with Engineer B), navigate to the Services tab on your new page.

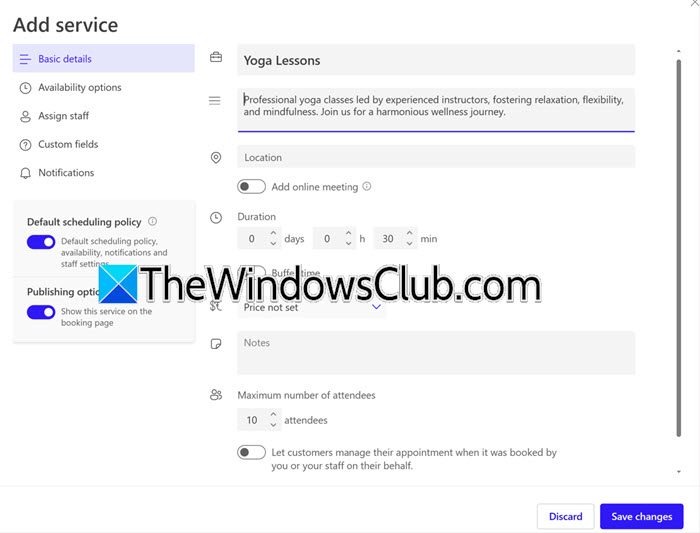
When editing a service, you can fine-tune the details:
- Basic Details: Name the meeting and toggle on the Add online meeting option to ensure a Microsoft Teams link is automatically generated.
- Availability: Set the minimum lead time (e.g., 9 hours to prevent same-day bookings) and maximum lead time (e.g., 30 days out) to control how far in advance people can schedule.
- Assign Staff: This is the most critical step for shared booking. Select the Assign all of your selected staff option. By checking multiple names (e.g., yourself and a colleague), you ensure the link only displays availability where both individuals are free simultaneously.
- Custom Fields: You can add required fields to the booking form, such as Company Name, to qualify leads before the meeting occurs.
- Notifications: Configure automated email confirmations and reminders to reduce no-shows.
Make sure to populate those fields with proper details.
4] Scale your bookings
If you want to create different options for the same service, like three separate links that connect you with three different engineers, you don’t have to start from the beginning each time.
Hover over the existing service and select Copy Service. This duplicates all the settings. Simply rename the meeting, update the Assign Staff section to reflect the new team members, and save. This method allows you to generate a suite of custom booking links in minutes.
Finally, go ahead and share your meeting with organization members.
Read: How to customize and publish a Microsoft Bookings page?
How to Delete a Shared Booking Page in MS Bookings?
Deleting a shared booking page isn’t as simple as clicking a delete button in the Bookings app. That’s because when you create a shared booking page, Microsoft automatically creates a corresponding mailbox in Exchange Online to manage the calendar and staff assignments.
Only a Microsoft 365 administrator can permanently delete a shared booking page. Standard users won’t see a delete option anywhere in the Bookings interface.
Delete via Microsoft 365 Admin Center
- Go to the Microsoft 365 Admin Center at admin.microsoft.com.
- Navigate to Users > Active Users.
- Locate the booking calendar entry (it will have the same name as your shared booking page).
- Select it and click Delete user
Delete via Exchange Online PowerShell
If you’re comfortable with PowerShell, you can also remove the booking mailbox directly.
Connect to Exchange Online PowerShell
Run Get-EXOMailbox -RecipientTypeDetails SchedulingMailbox to list all booking mailboxes

Run Remove-Mailbox -Identity <YourBookingCalendar> to delete the specific one
After deletion, allow about 30 minutes for the changes to fully process and for the page to become inaccessible
Read: Can’t add new members to MS Bookings
Unable to Create a Shared Booking Page in MS Bookings
If you are unable to create a Shared Booking Page in MS Bookings. Make sure you have the following privileges.
- License verification: You need a qualifying license like Microsoft 365 Business Standard, Business Premium, or certain Enterprise plans (E1, E3, E5) to create shared booking pages.
- Bookings enabled at the tenant level: Even with the right license, an administrator may have disabled Bookings for the organization. Run this PowerShell command to check: Get-OrganizationConfig | Select BookingsEnabled. If it returns $false, use Set-OrganizationConfig -BookingsEnabled $true to enable it
But if you have the privileges, clear your browser (Edge and Chrome) cache, try an Incognito window, or test with a different browser.
Also Read: Microsoft Bookings not working.