At times, you might need to open an app with specific settings on Windows 11/10. If so, you can use AutoActions on your computer to change settings for apps automatically. It is a portable app compatible with Windows 11 and Windows 10.
Let’s assume that you want to open a game with HDR, but you do not want to use the same for other apps. Or let’s say that you want to use a certain resolution for a particular game. In such situations, you have two options. First, you can change those settings manually. Second, you can use AutoActions, which will change those settings automatically. If the second option sounds better, you can follow this guide to get the job done.
AutoActions features
This app comes with some essential options and features. Here is a comprehensive list you can find handy:
- Profiles: You can create a profile and assign apps to it to enable specific settings in bulk whenever needed. You do not need to launch one app at a time since you can apply multiple settings for multiple apps in one click. For your information, you can create multiple profiles in this app.
- Applications: It is possible to include apps to the list from this section. The best thing is that you can include third-party apps as well as UWP apps.
- Display-wise settings: There is an option to choose the display and the respective settings. As per the monitor, you can change HDR settings, resolution, refresh rate, color depth, etc.
There are more other useful options included in the app. However, you need to start using it to be more familiar.
Use AutoActions to change settings to apps automatically
To use AutoActions to change settings to apps automatically, follow these steps:
- Download and open AutoActions on your computer.
- Switch to the Profiles tab and click the + icon.
- Enter the profile name and click the + icon in Application started actions.
- Select the type of action and choose the app.
- Go to the Applications tab and click the + icon.
- Choose an app and change settings.
- Click the Launch application button.
To learn more about these steps, continue reading.
To get started, you need to download the app, extract the ZIP file, and double-click on the AutoActions.exe file to open it. Next, go to the Profiles tab and click the + icon.
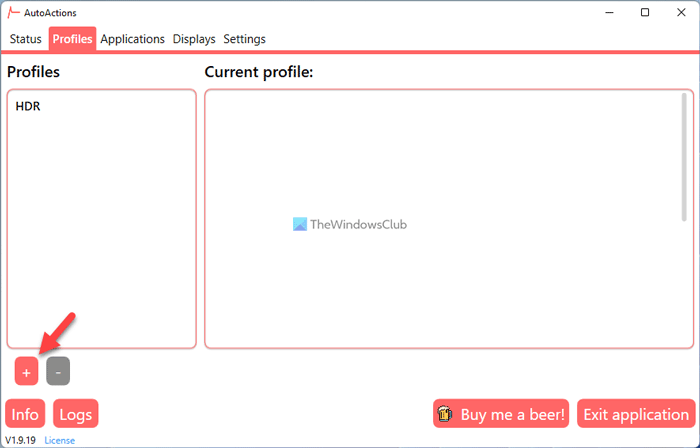
It will create a profile when you enter the name. Once done, click the + icon in the Application started actions section.
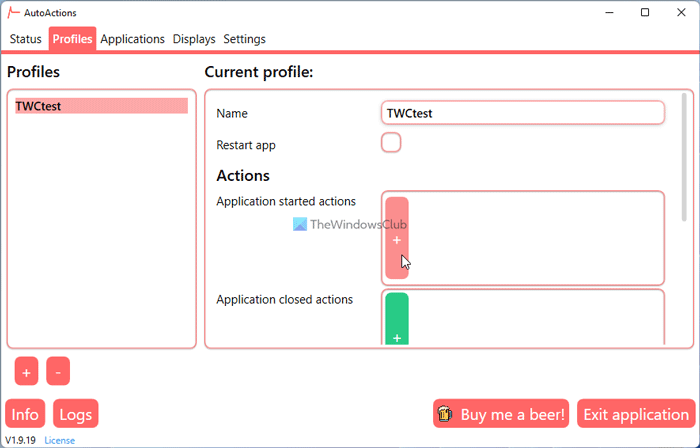
Next, choose the type of action. For your information, you have five options:
- Display action
- Run program
- Close program
- Reference profile
- Audio
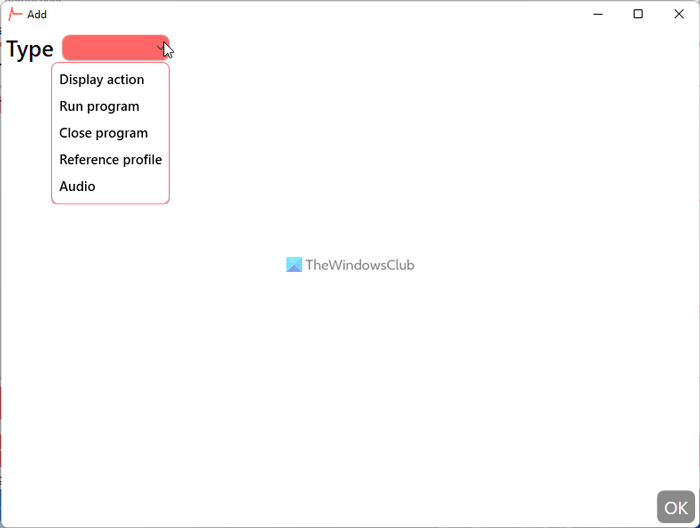
You can choose an action according to the desired option. For example, if you choose the Display action option, you can select the HDR setting, refresh rate, etc. On the other hand, if you select the Run program option, you will be able to open an app automatically.
Once done, click the OK button. You can repeat the same steps to add multiple apps.
Next, switch to the Applications tab. From here, you can add various apps and select specific settings. To do that, click the + icon and select either Choose application or Choose UWP app option.
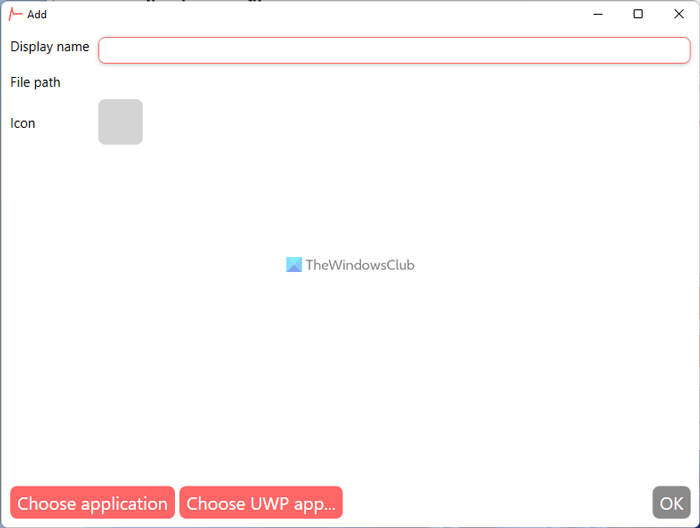
Based on the setting, you can select an app in the app. Once done, you can set different options and settings.
Once done, click on the app and select the Launch application button to test.
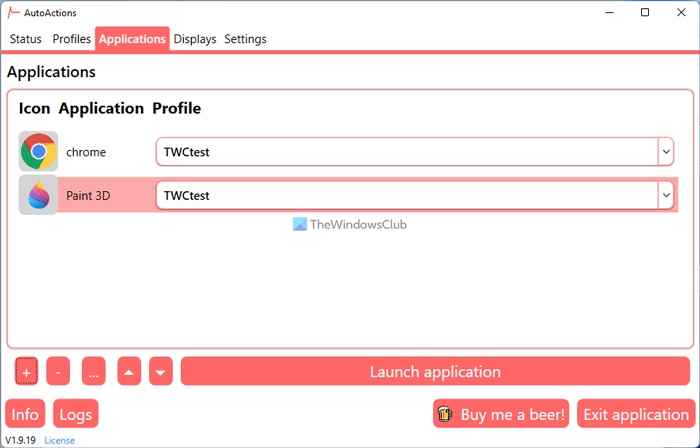
Alternatively, you can switch to the Status tab and click the corresponding play icon to open the app with predefined settings.
The last but not the least tab is the Settings tab. It includes all the settings and options you can change for this app. Here is a list of options you have:
- Auto-Start
- Start to tray
- Close to tray
- Create log file
- Check for new version on startup
- Update automatically
- Hide splash screen on startup
- Hide splash screen on update
- Use automated HDR Mode for all monitors
- Default profile
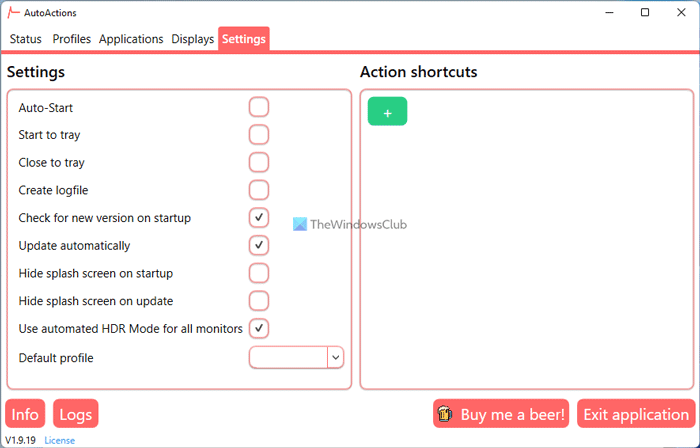
The next option is Action shortcuts. It is similar to the Applications section since you can find identical options here.
That’s all! If you like AutoActions, you can download it from github.com.
Pro tip: If you want this app to work automatically, you must enable the Auto-Start option in the Settings panel.
How do I change default program settings?
To change default program settings on Windows 11/10, you can use the AutoActions app. It helps you predefine various settings for specific apps so that you can change them automatically. It is a free and portable application you can download on Windows 11 and Windows 10 PC.
How do I set Windows to automatically open apps?
To set Windows to automatically open apps, you can add apps to the startup. It is possible to assign an app to the startup without using any software. You can simply open the Windows Startup folder and place the app’s executable file there. On the opposite side, if you want to remove an app from startup, you need to use the Task Manager.