Many users are reporting the Access Denied error with code 0x80090010 (NTE-PERM) when setting up or using Windows Hello. If this issue is stopping you from creating or using a PIN, fingerprint, or facial recognition to sign in, you are not alone. In this article, we will explore the reasons behind the error and how to fix it.

What does the error code 0x80090010 (NTE-PERM) mean?
This error is a Windows system code indicating a Permission denied failure (NTE-PERM) during a cryptographic operation. It specifically means that Windows or your user account lacks the required access rights to read or write the security keys used by Windows Hello, which are stored in the system’s NGC folder or the Trusted Platform Module (TPM). This block prevents the setup or use of PIN, fingerprint, or facial recognition.
Fix Access denied, 0x80090010, NTE-PERM Windows Hello error [Fix]
If you encounter error code 0x80090010 (NTE-PERM) with the “Access denied” message, apply the solutions below.
- Modify the UsePassportForWork Registry key
- Apply the Multi-Scope registry fix
- Enable PIN sign-in via Group Policy
- Verify and repair the NGC Folder permission
- Reset the TPM
- Uninstall problematic updates and pause updates
Let’s get started with the troubleshooting guide.
1] Modify the UsePasssportForWork Registry key
The systemwide Windows Hello policy may be disabled, which can prevent PIN setup or trigger the error. To enable Hello sign-in at the device level, you must enable it.
- Click Win + R to open the Run dialogue box, type regedit, and press Enter to open Registry Editor.
- Navigate to the following location:
HKEY_LOCAL_MACHINE\SOFTWARE\Microsoft\Policies\
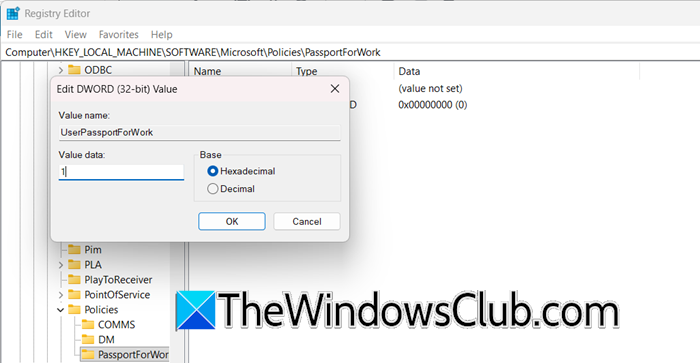
- Look for PassportForWork and open it. If it is not there, right-click on Policies, select New > Key, and name it PassportForWork
- Inside this key, create a New > DWORD (32-bit) Value named UserPassportForWork, and set its value to 1.
Save the changes, close Registry Editor, and restart the device. Verify the situation, and go to the next solution if it remains the same.
2] Apply the Multi-scope registry fix
If the first registry fix didn’t work, the issue may be caused by Windows enforcing conflicting per-user Hello policies via hidden SID-based registry keys. In this solution, we will correct how Windows applies Windows Hello policies across user scopes.
- Follow the steps mentioned in the first solution.
- Restart the PC, log in, and open regedit again. Now, navigate to the PassportForWork key where the new subkeys with long names should be visible.
- Delete the UserPassportForWork DWORD (if you didn’t create it in the first solution), and navigate to each new SID subkey.
- Inside each SID subkey, look for or create a Policies folder, and inside that, look for or create a PassportForWork key.
- In each PassportForWork key, create a new DWORD (32-bit) Value named UsePassportForWork and set its value to 1.
- Once done for all visible SID subkeys, reboot the device.
Once done, reboot the device. and see if the issue is resolved. If not, see the next solution.
3] Enable PIN sign-in via Group Policy
Local Group Policy settings can silently block the option to use PIN or sign in. Enabling convenience PIN sign-in is necessary as it is a required component for Help PIN setup to even appear in some environments.

- Open the Run dialogue box, type gpedit.msc, and hit Enter to open the Local Group Policy Editor.
- Navigate to Computer Configuration > Administrative Templates > System > Logon.
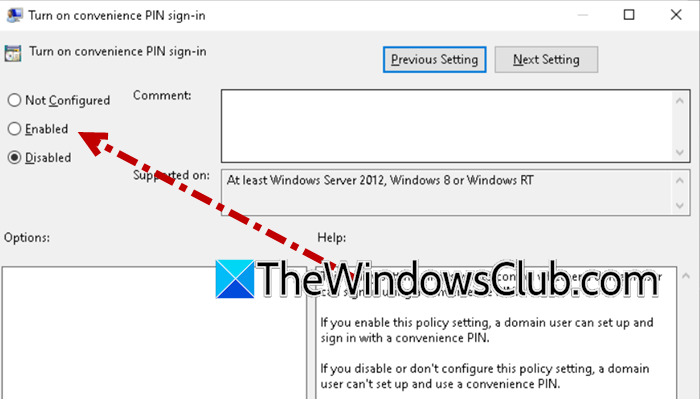
- Find and double-click on the Turn on convenience PIN sign-in policy, and select the Enabled button.
- Click Apply, Ok, and then reboot the device.
After rebooting, sign in and try setting up a PIN again. If the error persists, continue with the next solution.
4] Verify and repair the NGC Folder permission
Windows Hello stores its cryptographic keys in the Ngc folder. If Windows or updates conflict with the folder’s security settings, the system account may lose access, causing the error. We will reset the folder permissions to ensure the System and Administrator accounts have full access.
- Press Win+E to open File Explorer, then navigate to the following location.
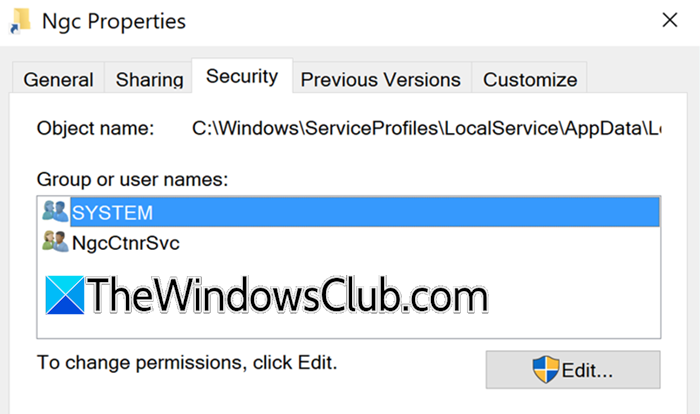
C:\Windows\ServiceProfiles\LocalService\AppData\Local\Microsoft\ - Right-click on the Ngc folder, select Properties, and go to the Security tab.
- Click on the Advanced option, select Disable inheritance, and then choose Convert inherited permissions into explicit permission on this object in the dialogue box that appears.
- Now, click on Edit, and ensure that the following accounts have Full Control and that all checkboxes are ticked.
System
Administrators - Click OK and reboot the device.
Once the changes are saved, and the device restarts, test Hello sign-in again.
5] Reset the TPM
Windows Hello depends on TPM to store and protect sign-in keys. If the TPM has leftover or corrupted data, users might get blocked with access errors.
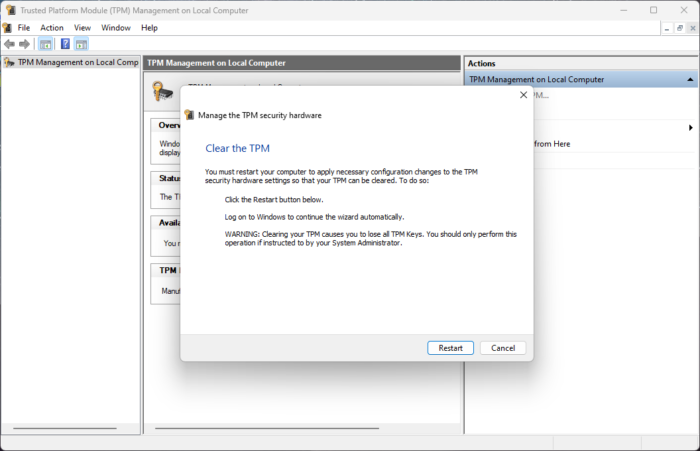
To fix this, we are going to reset the TPM. For that, press Win + R to open the Run dialogue box, type tpm.msc, and press Enter to open the TPM Management console. Click Clear TPM from the right-hand action pane, and choose the method that requires a restart. The device will reboot, and may show a BIOS/TPM configuration screen. Follow the on-screen instructions to approve the clearing. After Windows loads, log in and try setting up Windows Hello again. See the next solution if you still encounter the error.
Read: Fix Hello PIN Error 0x80090011 on Windows 11
6] Uninstall problematic updates and pause updates
Some users started encountering the error after specific updates. If your setup broke right after an update, rolling it back can undo the damage.
- Open Settings, click on Windows Update, and select Update History.
- Click on the Uninstall updates button, and in the list of installed updates, look for and select the most recent update.
- Click Uninstall, confirm, and once done, reboot the device when prompted.
To prevent reinstalling, go back to Settings, click Windows Update, select Advanced options, and click the Pause updates button. If the issue persists, see the next solution.
Hopefully, with the solutions outlined in this post, your issue will be resolved.
Read: Fix 0x801c0451 Windows Hello error on Windows 11
How to fix access is denied in Windows 10?
If you see Access is Denied in Windows 10, it’s usually a problem with your user account’s permissions for a specific file, folder, or program. The most effective way to fix this is to first try running the program or file operation as an administrator. If that doesn’t work, check and adjust the security permissions for the affected file or folder by right-clicking it, going to Properties, then the Security tab, and ensuring your user account has the Allow box checked for the actions you need, such as Full Control.
Also Read: Windows Hello Errors 0x801c004d or 0x80070490.