
Nowadays, Multimedia is predominant as everything that we watch or listen to is Multimedia. The media player is essential for playing multimedia files, such as movies and videos. While you can choose a media player from the many options on the market, VLC media player is the most significant.
VLC’s extremely impressive features include support for most multimedia files, streaming protocols and all platforms. The best thing about VLC media player is that it is available for free download. The free, open-source media player is extremely powerful, trouble-free to use, and can be effortlessly customized according to user needs.
VLC Media Player skipping and lagging
Apparently, some VLC media player users have reported a few issues on Windows 11/10. The video opened in VLC media player, which seemed to sputter, skip and lag during playback. This issue is mainly observed in high-definition video, 1080p (GoPro) videos, and MKV video files.
In this article, we discuss some solutions to fix this problem. Before you begin, make sure that your video & graphics drivers are up-to-date.
To fix VLC Media player skipping and lagging issue in Windows 11/10, follow these tips:
- Adjust the video cache’s value in VLC
- Disable Hardware-accelerated decoding
- Change the Video Output module
- Alter the Power settings
- Alter the FFmpeg audio/video decoder
To learn more about these tips and tricks, continue reading.
1] Adjust the video cache’s value in VLC
The following steps will guide you through changing VLC’s cache settings to fix lagging video playback.
Open VLC media player and click on Tools.
From the Tools drop-down menu, go to Preferences.
In the Preference window, locate the Show settings at the bottom of the page and under that click on the radio button with option All.
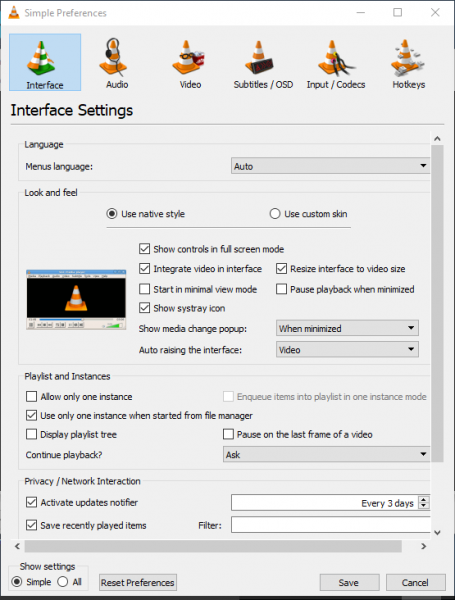
Click on Input/Codecs at the Advanced Preference window.
Search for an option with File caching (ms).
Revise the cache values from 300 to 600 or 1000.
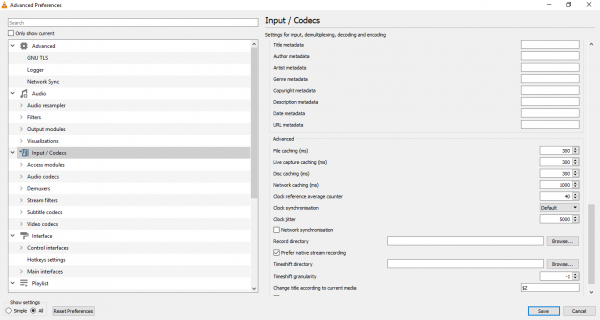
Click on Save to use the changes.
2] Disable Hardware-accelerated decoding
Hardware-accelerated decoding is extremely useful for post-processing on a graphics card and for rendering decoded video. But the process seems to clash with the drivers which may cause lags on video playback. Toggling the Hardware acceleration to disable may fix the issue in a few computers.
Open VLC media player and click on Tools.
From the Tools drop-down menu, go to Preferences.
Click on Input/ Codecs.
In the Input and Codecs settings, search for Hardware-accelerated decoding option and toggle it to Disable.
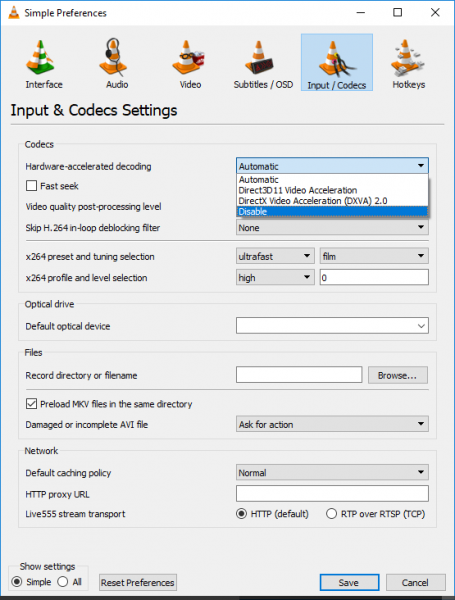
Click on Save to apply changes.
Fix: VLC Errors, Problems, and Issues on Windows PC.
3] Change the Video Output module
Open VLC media player and click on Tools.
From the Tools drop-down menu, go to Preferences.
In the Preference window, locate the Show settings at the bottom of the page and under that click on the radio button with option All.
Expand Video and click on Output modules from the drop-down menu.
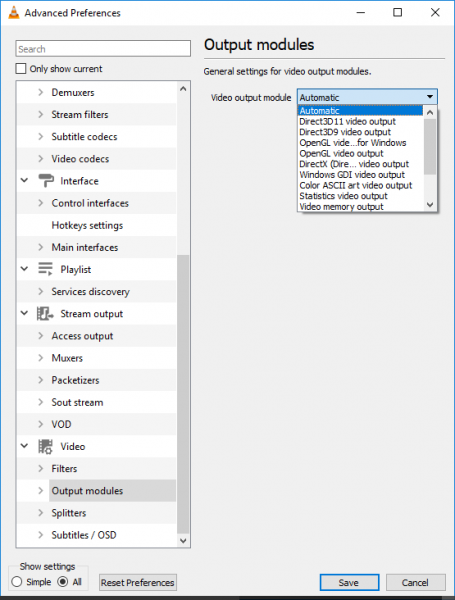
Experiment with a different option for the video output module. Try and check which of the menu can fix the problem.
4] Alter the Power settings
If your system is in Battery Saver mode to reduce power consumption, your hardware usage is reduced. But unfortunately, HD video requires more hardware power for smooth playback. It is worth noting that high-performance power profiles consume more power and eventually drain the battery even faster. You may want to change the power settings to fix the problem.
Go to Control Panel and click on Power Options.
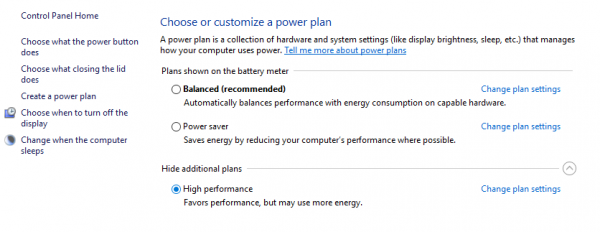
Click the radio button with High performance.
5] Alter the FFmpeg audio/video decoder
If you are having a lagging issue with MKV file, then you may want to change the number of FFmpeg threads that are used for transcoding multimedia files to the value 2.
Open VLC media player and click on Tools.
From the Tools drop-down menu, go to Preferences.
In the Preference window, locate the Show settings at the bottom of the page and under that click on the radio button with option All.
Click on Input Codecs section and expand.
Go to Video codecs from the drop-down.
Expand Video codecs and click on FFmpeg.
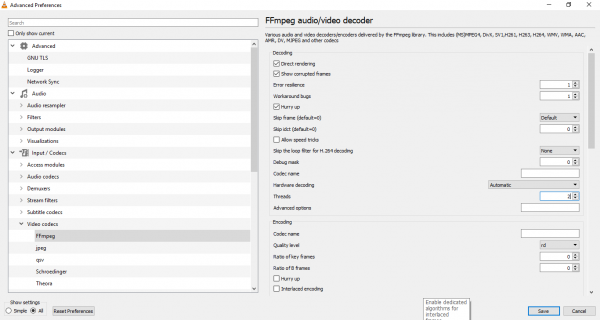
Search for the option Threads and change the value to 2.
Click Save to apply the changes.
If the problem persists, make sure you use a full version of the graphics card drivers as VLC uses the GPU for video processing, and using the full version aids in solving the buffering problems. You may also consider lowering the video quality as a last resort and see.
Why does my VLC player keep skipping?
There could be several reasons why VLC Media Player keeps skipping while playing a video on your computer. This problem may occur on Windows 11, Windows 10, or any other version. It may occur due to the video cache, graphics card issues, hardware acceleration, incorrect video output module, etc. However, you can use the aforementioned solutions to resolve this problem.
How do I fix the lag on VLC media player?
To fix the lag in VLC, follow the solutions mentioned above. For instance, you can alter the FFmpeg decoder, adjust your graphics card settings, find the issue with the graphics card, disable hardware acceleration, etc. However, if none of these solutions worked for you, you need to uninstall and reinstall the app on your computer.
Related read: VLC washed out colors & color distortion problem.
