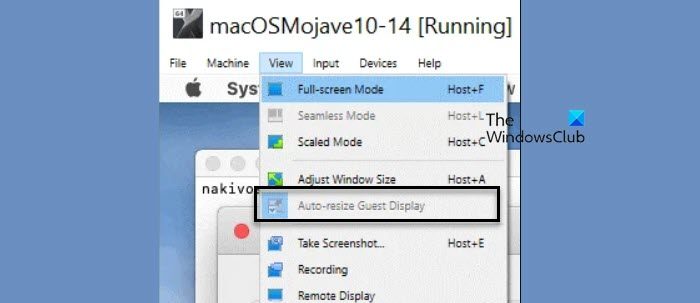
If you have noticed that the resize screen option in VirtualBox is greyed out, due to which, you are unable to change your screen size, then this post will help you resolve the issue. This is frustrating, especially for users for whom autoscale is not working as per the requirement. In this post, we will see what to do if the VirtualBox resize screen is greyed out.

Fix VirtualBox resize screen greyed out
If the VirtualBox resize screen is greyed out, follow the solutions mentioned below to resolve the issue.
- Reboot your virtual machine
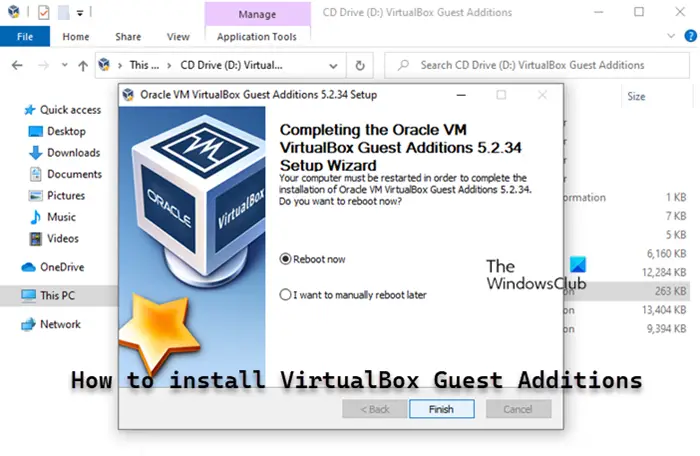
- Install Guest Additions Package
- Remove and re-attach the Guest Addition
- Change the Graphics Controller of the problematic VM
Let us talk about them in detail.
1] Reboot your virtual machine
If the “Auto-resize Guest Display” is greyed out for you, go ahead and reboot your virtual machine and check if the issue is resolved. In case that doesn’t work, go ahead and restart your VirtualBox. If the issue is a result of a glitch, rebooting will do the trick.
2] Install Guest Additions Package

VirtualBox Guest Additions package installs virtual video drivers to improve system performance and provide advanced graphics capabilities. Without these drivers, the virtual machine may experience a performance hit, and many advanced features such as screen resizing will not be available and, hence, will not work. So, go ahead and install the guest additions package and check if the issue is resolved.
3] Remove and re-attach the Guest Addition

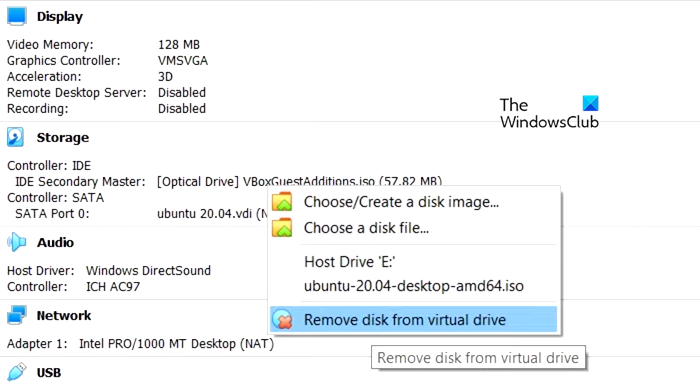
If the Guest addition was already installed on your computer, the VirtualBox is likely unable to register it due to which the “Auto-resize Guest Display” option is disabled. To get things right, we are going to remove and then re-attach the guest addition ISO file. In order to do the same, you need to right-click on your virtual machine, go to Settings > Storage > Controller: IDE, right-click on the guest addition ISO file, and select Remove Attachment.
Or, shut down your Virtual Machine. Then, select it and navigate to the Storage section on the right. Right-click on the ‘VBoxGuestAdditions.iso’ file (the name may vary) and choose ‘Remove disk from virtual drive.'”
Once done, power on your machine, go to the Devices tab, and click on Insert Guest Addition CD image. Follow the on-screen instructions to install the image completely. After reinstalling the Guest Addition, check if the issue is resolved.
4] Change the Graphics Controller of the problematic VM

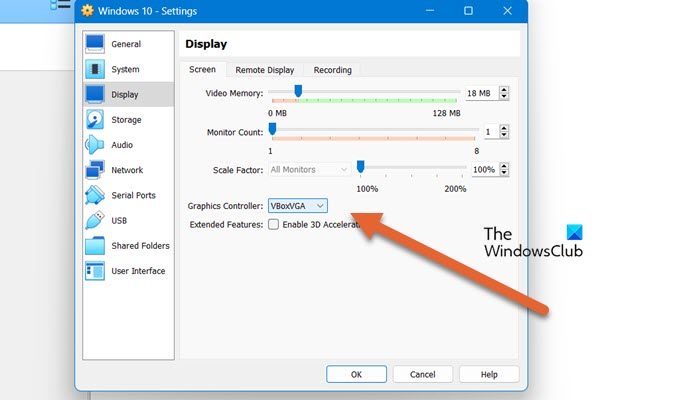
The graphics controller is responsible for specifying the type of adapter used by the guest machine. If yours is set to VMSVGA, the guest addition is not being used. Hence, we need to change it to VBoxVGA. To do the same, follow the steps mentioned below.
- Open VirtualBox.
- Right-click on your VM and select Settings.
- Go to the Display tab, change the Graphics Controller option to VBoxVGA, and untick Enable 3D Acceleration.
- Click Ok.
Now, restart the machine and check if the issue is resolved.
Hopefully, you will be able to resolve the issue using these solutions.
Read: Unable to install Guest Additions in VirtualBox
How do I enable auto-resize guest display?
To resize the user interface of guest Windows 10 in your VM Window, follow these steps:
- Go to the VM Window menu and click on View.
- Make sure that the Auto-resize Guest Display option is enabled.
- Move your mouse pointer over the corner of the VM window.
- Push the left mouse button and drag the corner to change the size of the VM window.
The resolution of the user interface of guest Windows 10 will automatically adjust to fit the new size of the VM window.
Read: Install VMware Tools greyed out [Fixed]
How do I turn off auto-resize in VirtualBox?
To turn off auto-resize, just go to View and then disable the “Auto-resize Guest Display” option. This will disable and stop your virtual machine from getting resized automatically and without your consent.
Also Read: VirtualBox displays Black screen and not Booting guest OS.